Milling massive beech tree trunk

Pics and updates on milling a large beech tree trunk.

This is the trunk section of this massive tree that blew over in a storm back in 2019:


I posted progress on other things made from this tree here too:
https://www.donaldsimpson.co.uk/2020/07/27/slabs-sleepers-and-stumps/

These giant chunks of wood have sat patiently outside my shed for the last 2+ years, like a massive looming todo list…

Now this (and a lot of sawdust) is all that’s left in the spot they occupied for so long:

It took me years to get around to it, but only a couple of Saturday afternoons to mill it all.

I used my Husqvarna 365 X-Torq chainsaw, along with a 42″ low-profile bar fitted with a 3/8 Lo Pro .050 ripping chain with 137 drive links… 137… I am not looking forward to sharpening that!

This, for me, is a whole load of bar and chain to run. It more than maxed out the cutting width of my Alaskan Mill setup, which was just a little too short to cope with the widest parts of this trunk, so I had to take a couple of edge sections off.

The Husqvarna 365 did a great job getting through this much solid beech wood – I expected more of a struggle, but as long as I took it slowly and used wedges to keep the weight from pinching the bar & chain, it chugged through it no problem. Having the trunks at a slight angle meant that gravity lent a hand too.

Great chain and bar from https://www.chainsawbars.co.uk/ along with their usual great service and helpful advice too, thank you again guys, this worked perfectly.

Here are some of the slabs that were produced – I don’t think the pics properly show how big these are, and they definately don’t convey the weight of them! I had to ‘walk’ the thicker ones over to the shed, one corner at a time.

These slabs are now stacked, spaced and weighted in my wood shed with a dehumidifier and fan on them (running off my small solar setup!). Hopefully in a year or so I can try giving the thinner slabs a final flattening with the router sled then turn them in to tables.

I’m hoping that void and inclusion on two of the slabs could work out quite nicely too – I’m not normally a fan of epoxy resin but this could be a good place for it? Maybe? Or just go with the ‘feature’ perhaps?

There are three 4″ thick slabs that will take even longer to properly dry, but if they don’t warp or split they should become very characterful – and heavy – tables.

To fit these in to my shed I had to take out a load of planks I milled a couple of years ago, many of which have come out nice and straight – so making something useful from those is now next on the todo list. My wife has already placed an order for some waney-edged bookcases for the Yurt… possibly curved to match the walls… ?!

Storm Arwen- windfall beech tree 2022

Cleaning up a beech tree that fell over in late 2021 during storm “Arwen”, squishing some stock fencing. There were ditches on both sides so getting the tractor close enough to be much help was awkward, but I used it to drag out the thickest trunk sections and bring things home. I plan to mill the trunks in to slabs, and will add pics of that (and whatever becomes of them) to this post.

Pics of the fallen tree and damaged fence

Progress pics – a fun day or two of chainsawing and throwing logs around…

Bringing things home – mostly firewood but a few big sections…

All cleaned up like new – the fence needed some new posts & staples but it’s now stock proof again. The stump and a section of trunk are left to keep bugs & critters happy:

Will add posts on progress when milling the trunk sections….

Hey Siri, manage my server…

Intro

I use Siri and Apple Homekit to automate some basic things – switching lights and heaters on/off, etc – and was wondering if there was some way I could use Siri to run tasks on my computers and servers at home.

Some googling showed me this was possible and also reasonably easy to set up – these are my notes on the process and some examples of what I’ve done with it so far.

Setup on iPhone

There’s a free Apple “Shortcuts” app for iPhones:

https://apps.apple.com/us/app/shortcuts/id915249334

which can perform a wide range of tasks, including – as of reasonably recently – the abiltiy to run scripts over SSH.

Open the Shortcuts App, click + and then Add action. These pics show the process from that point on:

Click on Add Action….

From here you fill out the details – the IP address of the remote computer, the user and password, and the path to the script you want to run.

Requirements

You need to have SSH setup and a working script you can run over SSH first.

On Ubuntu that means installing and configuring SSH as described here:

https://linuxize.com/post/how-to-enable-ssh-on-ubuntu-20-04/

On MacOS you need to enable Remote Login under Sharing here:

You also need a script that is executable as the user you are connecting with.

Obviously, be aware of the security risk of enabling tasks to be run remotely, etc.

Examples

Here are some I made earlier.

This one connects to my old Mac Pro (it runs Ubuntu) and runs a ‘shutdown’ script.

My /home/don/shutdown script simply contains “sudo init 0” and the ‘don‘ user is enabled for passwordless sudo.

and this one connects to the same host and powers on the attached monitor, that runs Firefox showing my CCTV/Zoneminder conosole:

The “/home/don/screenon” script contains this:

xset -display :0.0 dpms force on

and there’s a ‘screenoff’ that switches the display off when I don’t want it too.

For my iMac runnning MacOS I’ve added a shutdown script – useful when I don’t want to go and power it off manually.

I’ve ended up with a selection of shortcuts to power things on & off, and can now say “Hey Siri, CCTV on please“, or “Hey Siri, shutdown iMac please“, and Siri makes it so….

This setup enables me to run pretty much anything on a Linux or Mac host simply by asking Siri – it could trigger deployment pipelines, perform updates, start/stop/restart services…. anything you can put in a shell script.

If you have any interesting ideas or suggestions please let me know below.

Kodi on Apple TV 4k 2nd Gen

Intro

Notes on installing Kodi on a new Apple TV 4K (2nd generation). This didn’t go smoothly and it needs redone/updated anually when the certificate expires. If the solution I came up with also works for you, please let me know.

The Kodi Wiki HOW-TO here explains the steps in detail

I followed the steps as closely as I could, but it didn’t work for me. Here’s a note of the diagnostic steps I took, and the changes I made to get it installed and working successfully…

Problems & error messages

The process appeared to go well up until the point of installing the newly built and freshly signed ipa on the target device, but after a minute or two the XCode deploy step ended with a generic “Unable to install” followed by the name of the package was I was trying to deploy (and I tried quite a few!).

Example error messages:
Unable to install "kodi-20210422-3a7c0f50-master-tvos"
Unable to install "org.xbmc.kodi-tvos_19.1-0-tvos"

After clicking OK the process ended with no further info, so I went to look for some logs in XCode -> Windows -> Devices & Simulators -> “Open Console“:

then in the Console selected Devices (on the left), then my AppleTV from the list on the left, and narrowed things down by filtering for “Errors & Faults“.

I could then see that each attempted deploy had resulted in an error log entry like this:

Failed to install application at <~~~> : Error Domain=MIInstallerErrorDomain Code=37 "<~~~>" UserInfo={LegacyErrorString=<~~~>, FunctionName=<~~~>, SourceFileLine=652, NSLocalizedDescription=<~~~>}

This is the full original message – I haven’t taken out my details and replaced them with <—> or anything, there was just exactly the above: interesting elements being an installer error, code=37 and reference to line 652 in some source file… not a lot to go on.

There were no good hits from a search on this message at the time, and the few roughly related suggestions were where there was a mismatch between the deployment target version and the built application – e.g. when the app was built for a specific iPad version, but deployed to a later version. No good match and nothing obviously helpful.

What worked for me

I think it took a combination of two things to get this working for me.

The first thing was using an older version of the iOS App Signer application (details and link below) to sign my newly generated ipa file, while I was trying to replicate the steps from other guides as closely as possible.

The other thing I did just before that which seems to have contributed was to deploy the sample example “Hello World” XCode project to my device from XCode first, then was able to deploy the Kodi ipa (signed with the older App Signer), and it then “just worked”, after many failures.

Verification
I have recently deleted Kodi from  my device and tried to add the same singed Kodi ipa again - resulting in "Unable to install". 

After deploying the example app first, I was then able to replace it with the same signed Kodi ipa without issues.
iOS App Signer

Following the guide, I had originally downloaded and used the latest available version – 1.13.1 at the time – with no joy, but getting the older Version 1.7 (r17) worked for me with these settings:

These are the same settings I used when (unsucessfully) trying to sign with the latest version of the app.

Deploy XCode project to Apple TV

While trying to verify connectivity and permissions and rule some things out, I tried to deploy the sample project from XCode to my Apple TV. This was done by selecting my physical device (as opposed to the default emulator) as the deployment target, then building & deploying the “Hello world” project.

This worked and I could see a new application appear on my Apple TV home screen – when clicked in the Apple TV Menu page, it said Hello World, as you’d expect…

I could now see this application on the Installed Apps page for my device in XCode. When I then attempted to deploy the signed Kodi IPA I’d built, signed with the older iOS App Signer, this was replaced with Kodi and it now works as expected.

It would be great to know if both of these steps are required, or if just one of them was all that was needed. If you are hitting the same issue please let me know what works for you – deploying an initial test app then using the latest iOS App Signer, or not deploying the test app and using the older iOS App Signer version, perhaps?

Links

The older version of app signer I used was:

https://github.com/DanTheMan827/ios-app-signer/releases/download/r17/iOS.App.Signer.app.zip

and the deb file I used was org.xbmc.kodi-tvos_19.1-0-tvos.deb from:

https://mirrors.kodi.tv/releases/darwin/tvos/org.xbmc.kodi-tvos_19.1-0-tvos.deb

the end result is a happy Kodi install on my new Applt TV 4k 2nd Gen:

AWS CodeCommit – prep for AWS CDK & CodePipelines

This is the next step in a series on using the AWS CDK and AWS CodePipeline.

In the previous post I set up a new local AWS CDK environment and a remote AWS Cloud account, user etc, and connected the two. That got as far as deploying a simple local AWS CDK application to my AWS account and then cleaning it up. This post looks at the next step which is setting up CodeCommit – AWS’s managed and git-based version control system, much like github or gitlab – in preparation for some AWS CodePipeline and AWS CodeBuild posts that will follow on.

The first step is to add permissions to AWS CodeCommit for your IAM user – I’m using the “cdk-user” that was created previously – as detailed here:

https://docs.aws.amazon.com/codecommit/latest/userguide/setting-up-gc.html

In the AWS UI, go to IAM > User > Security Credentials:
Select the “HTTPS Git credentials for AWS CodeCommit (Generate)” option then download the newly generated credentials:

In CodeCommit, create a new Repo if you don’t already have one, click Clone and select/copy the HTTPS link

In your local cli, do a “git clone” of the HTTPS repo

when prompted, supply the credentials from above.

You should now be able to interact with the AWS CodeCommit repo in your AWS account using your local git cli in the same way you would for github, bitbucket or gitlab – an example clone, add, merge and push to master (!) as a quick test:

In the next post, this setup will be used to manage and host the source code for new AWS CDK applications, and to manage and trigger the AWS CodePipelines (also written in CDK!) that will build and deploy them.

AWS CDK setup and test

These are my notes on setting up a new development environment to use the AWS CDK.

Most of this is very well documented already but I’m planning on using this setup for a few upcoming posts, so thought I’d start at the very beginning.

I’m using a Mac but the steps are much the same regardless of OS.

Local tooling install & config

AWS CLI install from here:
https://docs.aws.amazon.com/cli/latest/userguide/install-cliv2-mac.html

Install node.js from: https://nodejs.org/ if you don’t have it already

Then use node to install the aws-cdk

npm install -g aws-cdk

Check the cdk is working with:

cdk --version

Optionally, you may also want to install python or java

Remote account creation

An AWS Cloud is needed, so you must have or create an AWS account.

Once that’s done, we need to setup an AWS User & give it sufficient access:
https://cdkworkshop.com/15-prerequisites/200-account.html

Go to the IAM console in your AWS account and select Users > Create User

I called mine “cdk-user“. Select to enable Programattic Access and add an Admin policy. At the end of the process, select to download the new users credentials.

In your local command line, run:

aws configure

this will prompt you to supply the newly created credentials.
Once that is done, you can test connectivity from your local shell to your AWS account with some simple aws commands like:

aws s3 ls

which should simply list the S3 buckets in your account to prove connectivity is working; it may return nothing if there are no buckerts, or an error if it can’t connect.

Verify with a simple example

Now is a good time to decide on an IDE like vscode or atom.

They both have extensions and plugins that make CDK development easier, no matter which language you choose to develop your CDK apps in.

To create a new simple project, run

cdk init sample-app --language typescript

as described here:
https://cdkworkshop.com/20-typescript/20-create-project.html
this is a very simple project but ideal for testing the setup and end to end process.

Before you can deploy you need to initialise CDK in the account:
https://cdkworkshop.com/20-typescript/20-create-project/100-cdk-init.html

cdk bootstrap

This creates an S3 bucket in our AWS account with the supporting files needed by CDK. This only needs done once.

take a look around the example app’s code, there are a few files of interest:
lib/cdk-workshop-stack.ts contains the tiny amount of code used to create an SQS queue and an SNS topic
package.json details the project dependencies and node shortcuts for building, watching, testing etc
README.md details some useful commands and describes the overall project

After boot-strapping, if you run another

aws s3 ls 

you should now see the bootstrap S3 bucket.

and when ready, you can deploy the simple example app with

cdk deploy

CDK will let you know in advance what is is planning on doing – which resources will be created, deleted or altered, giving you a chance to backout

After confirming you want to go ahead with these changes, you should soon see the new stack within your CloudFormation console, along with the CDK toolkit stack we bootstrapped


to delete the example stack and clean up, simply do

cdk destroy

That’s it – the local environment is set up and can connect to the AWS account, a very simple app has been built, tested, deployed and deleted, and the one-off CDK bootstrapping has been done.

Next: on to something more interesting!

Installing APKs on Amazon Fire HD with ADB

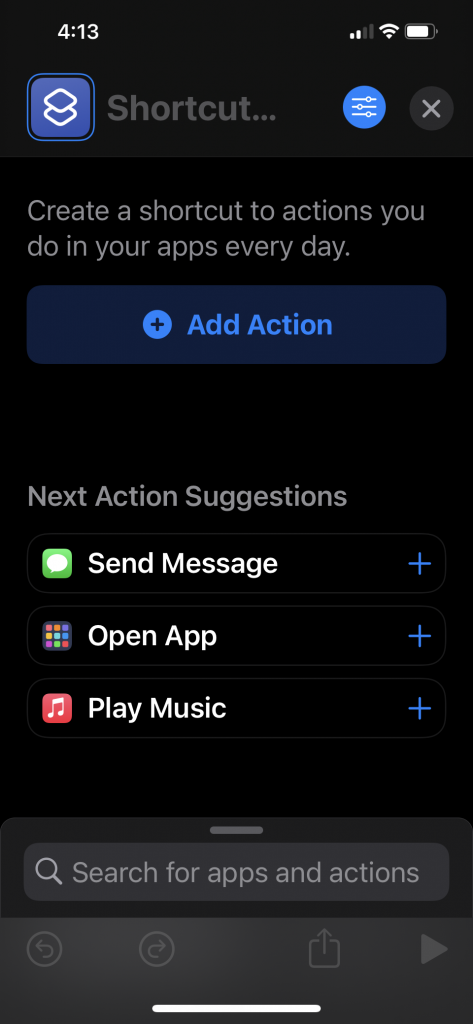
My notes on “sideloading” APK files to an Amazon Fire TV HD using ADB.

I don’t do this often and had forgotten how, so this may help me out next time.

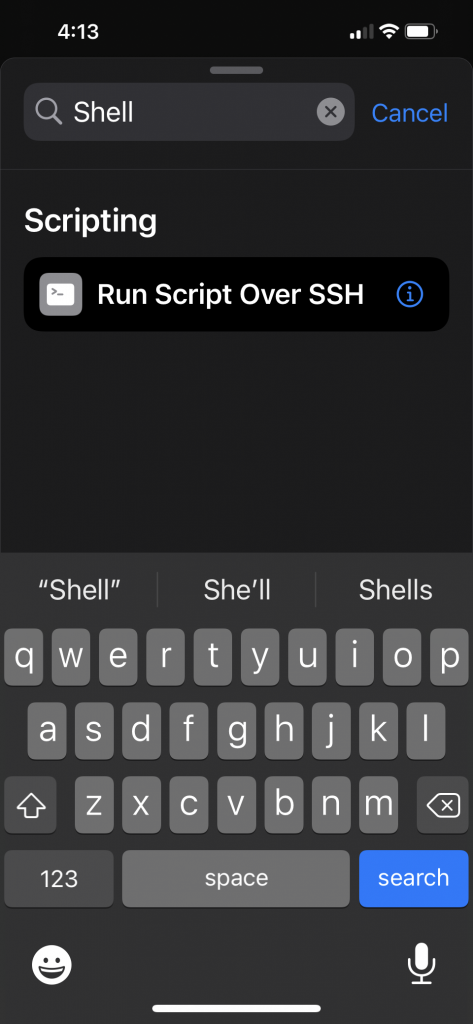
Getting and using Android Debug Bridge (adb)

Useful info here:

https://developer.android.com/studio/command-line/adb

download the stable binaries for Mac, linux or Windows from here:

https://developer.android.com/studio/releases/platform-tools

you can either add the location of the binaries to your PATH, or cd to them and run them directly like I did, e.g.

./adb help

Download the APK files you want to install

For example

https://smartyoutubetv.github.io/en/

or Kodi

https://mirrors.kodi.tv/releases/android/arm/

I put the downloaded APK files in the same dir as the adb tools to keep things very simple.

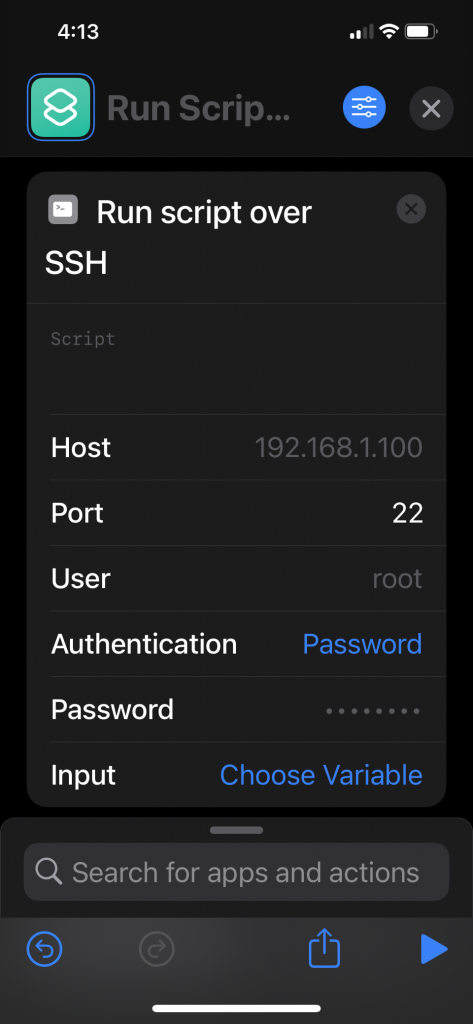
Connect to your Amazon Fire TV

Find the IP address of your Amazon Fire device from Network Settings (From Settings, go to Device (or My Fire TV) > About > Network), for example mine was 192.168.0.176.

Enable ADB debugging in your Amazon Fire device via Settings.

connect from client laptop/pc to Fire TV, for example:

./adb connect 192.168.0.176:5555

you can also list local devices:

donaldsimpson@Donalds-iMac adb-tools % ./adb devices
List of devices attached
192.168.0.176:5555 unauthorized
192.168.0.59:5555 unauthorized

Install APK to connected device

Once connected, installing a new app should be as simple as

./adb install yourapp.apk

Note that if you have multiple devices you may get this message:

➜ adb-tools ./adb install smartyoutubetv_latest.apk
Performing Push Install
adb: error: failed to get feature set: more than one device/emulator

check the list of attached devices:

➜ adb-tools ./adb devices
List of devices attached
G070VM1904950F5U device
192.168.0.18:5555 device

then specify the device you are aiming for with “-s <address:port>” like this:

➜ adb-tools ./adb -s 192.168.0.18:5555 install smartyoutubetv_latest.apk
Performing Streamed InstallSuccess

I also had this response at one point:

./adb install smartyoutubetv_latest.apk
Performing Push Install
adb: error: failed to get feature set: device unauthorized.
This adb server's $ADB_VENDOR_KEYS is not set
Try 'adb kill-server' if that seems wrong.
Otherwise check for a confirmation dialog on your device.

… the last line promoted me to look at the Fire TV screen and notice it was asking me to approve the connection request from my laptop.
Doh.
Once approved the app installed no problem:

./adb install smartyoutubetv_latest.apk
Performing Push Install
smartyoutubetv_latest.apk: 1 file pushed, 0 skipped. 3.3 MB/s (7901934 bytes in 2.261s)
pkg: /data/local/tmp/smartyoutubetv_latest.apk
Success

Also, when doing this:

./adb -s 192.168.0.88:5555 install FlixVision_v2.9.2r.apk
adb: device '192.168.0.88:5555' not found

despite adb appearing to connect, the device was listed as offline:

error: device offline

this again turned out to be the FireTV having prompted me for approval on-screen, which I didn’t see when connecting from my laptop.

Note to self – check for a dialog on-screen when having issues!

Updating an existing app

I’ve had an outdated Kodi install for ages and wanted to update that while I was here. The process is simple, just add an -r for “replace existing application”:

./adb install -r kodi-18.8-Leia-armeabi-v7a.apk
Performing Push Install
kodi-18.8-Leia-armeabi-v7a.apk: 1 file pushed, 0 skipped. 3.5 MB/s (63508040 bytes in 17.391s)
pkg: /data/local/tmp/kodi-18.8-Leia-armeabi-v7a.apk
Success

This went very smoothly, all my settings, connections and shares etc were still there after the upgrade, and it looks a lot nicer for it too.

That’s it – there’s a ton of useful info on other commands and options from

./adb help

I found some more useful info on connecting from ADB to Fire TV here:

https://developer.amazon.com/docs/fire-app-builder/connecting-adb-to-fire-tv.html

Starting up Kodi on Amazon FireTV remotely

After getting the above sorted out, I wanted to find a way to start Kodi on my FireTV without having to switch my projector on & off to do so.

I use Kodi as an AirPlay target for music during the day, and it switches itself off overnight. I could probably change that.

Using ADB tools, I connect to the device remotely, as before, with:

./adb connect 192.168.0.176:5555

though normally that comes back with “already connected to…

then start up Kodi using the “Android activity manager”, “am“:

./adb shell am start -n org.xbmc.kodi/.Splash

this takes a little while to start, but after about 30 seconds I can connect to the Kodi web interface on port 8080 of my FireTV, and the AirPlay target becomes available.

It looks like there are many other interesting things you can do with “am”.

Uninstalling packages with adb

List installed packages

./adb shell pm list packages

and filter for whatever you’re looking for (e.g. “guard“)

./adb shell pm list packages | grep -i guard

then unsinstall that package name:

./adb uninstall com.adguard.vpn

Update on smartyoutube to fix ads

Quick update specifically on Smart Youtube TV on Android. This was brought on by my initial install of Smart Youtube TV starting to show adverts (a lot).

I had installed Smart Youtube TV, version 6.17.739 (at time of writing this is still the latest stable release available) on my Android Fire – details above. This worked very well for months, but has started to not filter out youtube advertisements.

Having not found an update and while looking for another solution, I found “SmartTubeNext Beta”, which looks to be pretty stable and widely used, for a beta version:

https://www.apklinker.com/apk/liskovsoft/

From that site, it looks like around 4 months since SmartYouTube was updated, but SmartTubeNext is actively being developed, so could be worth a try – here’s how:

Get the latest smarttube beta APK (via wget, or download via browser from here: https://smartyoutubetv.github.io/)

wget https://github.com/yuliskov/SmartTubeNext/releases/download/latest/smarttube_beta.apk

connect to your Android device (update the IP to match yours):

./adb connect 192.168.0.176:5555

install the APK:

./adb -s 192.168.0.18:5555 install -r smarttube_beta.apk

All done.

I wasn’t sure if this would replace the existing SmartYouTube (which is why I added the -r switch that wasn’t necessary), but it’s ok: it’s installed as a different app so the stable version is kept and available should there be any issues with the beta version.

This version of SmartYoutube looks a lot better than the previoous/stable one.

List of improvements from their site:

  • 4K support
  • runs without Google Services
  • designed for TV screens
  • stock controller support
  • external keyboard support

Personally I really like the better controller support, and the overall look is much more suitable for a large screen. It’s also a lot more customisable. And, most importantly, it removes all the adverts.

Slabs, Sleepers and Stumps

Some pics on a range of wood-related things I’ve been working on recently.

Bringing home the last of the Beech tree 2019, finally! Dealing with the massive trunk & stump sections – they’re to be sealed, slabbed and stored away for milling next year…

Some nice Oak Sleepers brought over by a friend, which I’m experimenting with – hopefully going to be some chunky tables, benches and maybe other things too.

Slabs from old Beech wood that’s gone a bit soft with white rot, and some slabs from decent beech that’s been drying for about a year – more tables coming soon hopefully.

Kubernetes Operators for Monitoring with Prometheus and Grafana Dashboards

Introduction

This post takes a look at setting up monitoring and alerting in Kubernetes, using Helm and Kubernetes Operators to deploy and configure Prometheus and Grafana.

This platform is quickly and easily deployed to the cluster using a Helm Chart, which in turn uses a Kubernetes Operator, to setup all of the required resources in an existing Kubernetes Cluster.

I’m re-using the Minikube Kubernetes cluster with Helm that was built and described in previous posts here and here, but the same steps should work for any working Kubernetes & Helm setup.

An example Grafana Dashboard for Kubernetes monitoring is then imported and we take a quick look at monitoring of Cluster components with other dashboards

Kubernetes Operators & Helm combo

K8s Operators are described ‘in plain English’ here:
https://enterprisersproject.com/article/2019/2/kubernetes-operators-plain-english

and defined by CoreOS as “a method of packaging, deploying and managing a Kubernetes application

The Operator used in this post can be seen here:

https://github.com/coreos/prometheus-operator

and this is deployed to the Cluster using this Helm Chart:

https://github.com/helm/charts/tree/master/stable/prometheus-operator

It may sound like Helm and Operators do much the same thing, but they are different and complimentary

Helm and Operators are complementary technologies. Helm is geared towards performing day-1 operations of templatization and deployment of Kubernetes YAMLs — in this case Operator deployment. Operator is geared towards handling day-2 operations of managing application workloads on Kubernetes.

from https://medium.com/@cloudark/kubernetes-operators-and-helm-it-takes-two-to-tango-3ff6dcf65619

Let’s get (re)started

I’m reusing the Minikube cluster from previous posts, so start it back up with:

minikube start

which outputs the following in the console

🎉  minikube 1.10.1 is available! Download it: https://github.com/kubernetes/minikube/releases/tag/v1.10.1
💡  To disable this notice, run: ‘minikube config set WantUpdateNotification false’

🙄  minikube v1.9.2 on Darwin 10.13.6
✨  Using the virtualbox driver based on existing profile
👍  Starting control plane node m01 in cluster minikube
🔄  Restarting existing virtualbox VM for “minikube” …
🐳  Preparing Kubernetes v1.18.0 on Docker 19.03.8 …
🌟  Enabling addons: dashboard, default-storageclass, helm-tiller, metrics-server, storage-provisioner
🏄  Done! kubectl is now configured to use “minikube”

this all looks ok, and includes the minikube addons I’d selected previously.
Now a quick check to make sure my local helm repo is up to date:

helm repo update

I then used this command to find the latest version of the stable prometheus-operator via a helm search:
helm search stable/prometheus-operator --versions | head -2

there’s no doubt a neater/builtin way to find out the latest version, but this did the job – I’m going to install 8.13.8:

install the prometheus operator using Helm, in to a new dedicated “monitoring” namespace just takes this one command:
helm install stable/prometheus-operator --version=8.13.8 --name=monitoring --namespace=monitoring

Ooops

that should normally be it, but for me, this resulted in some issues along these lines:

Error: Get http://localhost:8080/version?timeout=32s: dial tcp 127.0.0.1:8080: connect: connection refused

– looks like Helm can’t communicate with Tiller any more; I confirmed this with a simple helm ls which also failed with the same message. This shouldn’t be a problem when v3 of Helm goes “tillerless”, but to fix this quickly I simply re-enabled Tiller in my cluster via Minikube Addons:


➞  minikube addons disable helm-tiller
➞  minikube addons enable helm-tiller

verified things worked again with helm ls, then the helm install... command worked and started to do its thing…

New Operator and Namespace

Keeping an eye on progress in my k8s dashboard, I can see the new “monitoring” namespace has been created, and the various Operator components are being downloaded, started up and configured:

you can also keep an eye on progress with:
watch -d kubectl get po --namespace=monitoring

this takes a while on my machine, but eventually completes with this console output:

NOTES:
The Prometheus Operator has been installed. Check its status by running:
  kubectl –namespace monitoring get pods -l “release=monitoring”

Visit https://github.com/coreos/prometheus-operator for instructions on how
to create & configure Alertmanager and Prometheus instances using the Operator.

kubectl get po --namespace=monitoring shows the pods now running in the cluster, and for this quick example the easiest way to get access to the new Grafana instance is to forward the pods port 3000 to localhost like this:

➞  kubectl --namespace monitoring port-forward monitoring-grafana-64d4f6fcf7-t5zkv 3000:3000

(check and adjust the above to use the full/correct name of your monitoring-grafana-* pod)

Connecting to Grafana

now I can hit http://localhost:3000 and have that connect to port 3000 in the Grafana pod:


from the documentation on the Helm Chart and Operator here:

https://github.com/helm/charts/tree/master/stable/prometheus-operator

the default user for this Grafana is “admin” and the password for that user is “prom-operator“, so log in with those credentials…

Grafana Dashboards for Kubernetes

We can now use the ready-made Grafana dashboards, or add/import ones from the extensive online collection, like this one here for example: https://grafana.com/grafana/dashboards/6417 – simply save the JSON file

then go to Grafana and import it with these settings:

and you should now have a dashboard showing some pretty helpful stats on your kubernetes cluster, it’s health and resource usage:

Finally a very quick look at some of the other inbuilt dashboards – you can use and adjust these to monitor all of the components that comprise your cluster and set up alerting when limits or triggers are reached:

All done & next steps

There’s a whole lot more that can be done here, and many other ways to get to this point, but I found this pretty quick and easy.

I’ve only been looking at monitoring of k8s resources here, but you can obviously set up grafana dashboards for many other things, like monitoring your deployed applications. Many applications (and charts and operators) come with prom endpoints built in, and can easily and automatically be added to your monitoring and alerting dashboards along with other datasources.

Cheers,

Don