This is the next step in a series on using the AWS CDK and AWS CodePipeline.
In the previous post I set up a new local AWS CDK environment and a remote AWS Cloud account, user etc, and connected the two. That got as far as deploying a simple local AWS CDK application to my AWS account and then cleaning it up. This post looks at the next step which is setting up CodeCommit – AWS’s managed and git-based version control system, much like github or gitlab – in preparation for some AWS CodePipeline and AWS CodeBuild posts that will follow on.
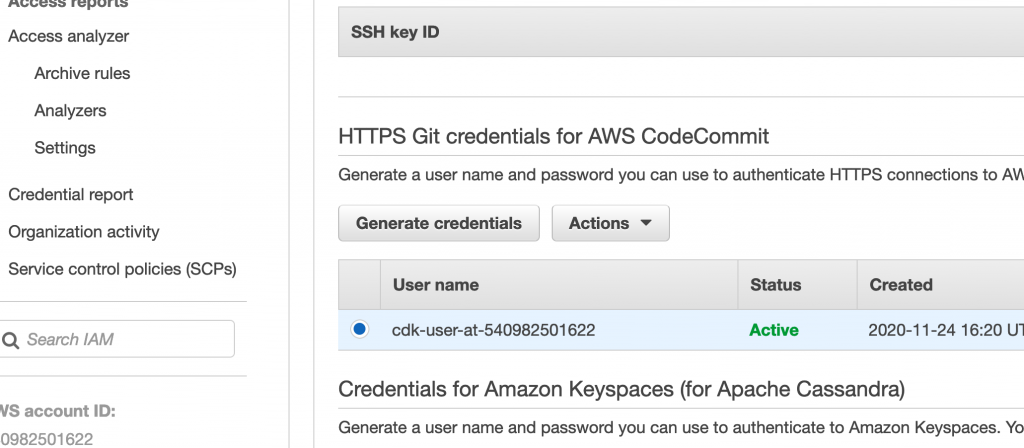
The first step is to add permissions to AWS CodeCommit for your IAM user – I’m using the “cdk-user” that was created previously – as detailed here:
In the AWS UI, go to IAM > User > Security Credentials: Select the “HTTPS Git credentials for AWS CodeCommit (Generate)” option then download the newly generated credentials:
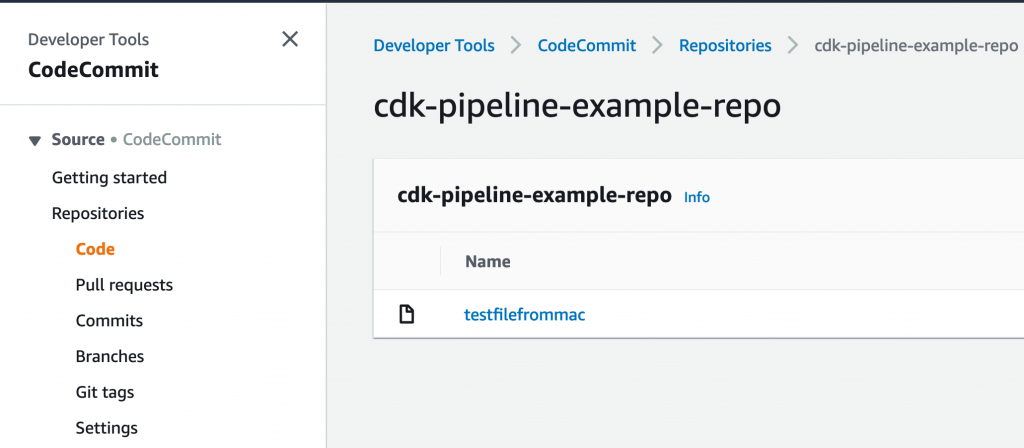
In CodeCommit, create a new Repo if you don’t already have one, click Clone and select/copy the HTTPS link
In your local cli, do a “git clone” of the HTTPS repo
when prompted, supply the credentials from above.
You should now be able to interact with the AWS CodeCommit repo in your AWS account using your local git cli in the same way you would for github, bitbucket or gitlab – an example clone, add, merge and push to master (!) as a quick test:
In the next post, this setup will be used to manage and host the source code for new AWS CDK applications, and to manage and trigger the AWS CodePipelines (also written in CDK!) that will build and deploy them.
These are my notes on setting up a new development environment to use the AWS CDK.
Most of this is very well documented already but I’m planning on using this setup for a few upcoming posts, so thought I’d start at the very beginning.
I’m using a Mac but the steps are much the same regardless of OS.
Go to the IAM console in your AWS account and select Users> Create User
I called mine “cdk-user“. Select to enable Programattic Access and add an Admin policy. At the end of the process, select to download the new users credentials.
In your local command line, run:
aws configure
this will prompt you to supply the newly created credentials. Once that is done, you can test connectivity from your local shell to your AWS account with some simple aws commands like:
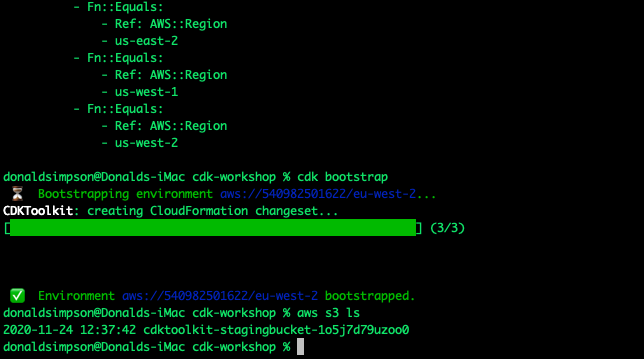
aws s3 ls
which should simply list the S3 buckets in your account to prove connectivity is working; it may return nothing if there are no buckerts, or an error if it can’t connect.
Verify with a simple example
Now is a good time to decide on an IDE like vscode or atom.
They both have extensions and plugins that make CDK development easier, no matter which language you choose to develop your CDK apps in.
This creates an S3 bucket in our AWS account with the supporting files needed by CDK. This only needs done once.
take a look around the example app’s code, there are a few files of interest: lib/cdk-workshop-stack.ts contains the tiny amount of code used to create an SQS queue and an SNS topic package.json details the project dependencies and node shortcuts for building, watching, testing etc README.md details some useful commands and describes the overall project
After boot-strapping, if you run another
aws s3 ls
you should now see the bootstrap S3 bucket.
and when ready, you can deploy the simple example app with
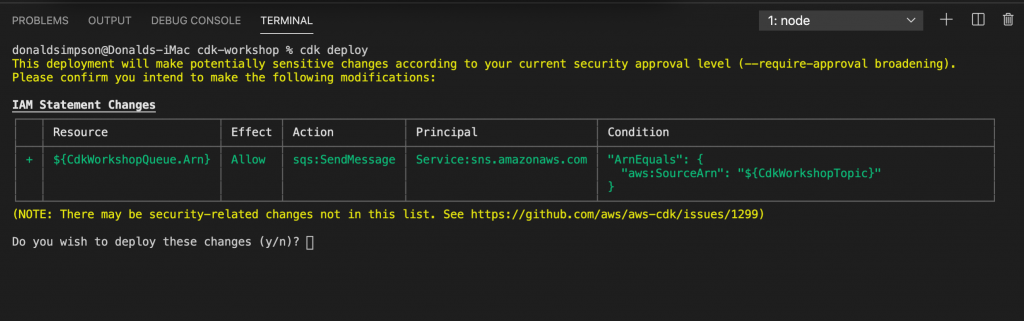
cdk deploy
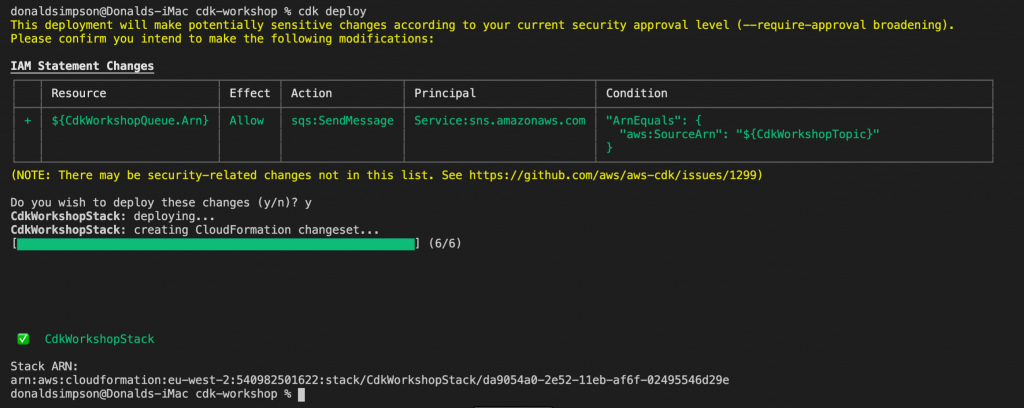
CDK will let you know in advance what is is planning on doing – which resources will be created, deleted or altered, giving you a chance to backout
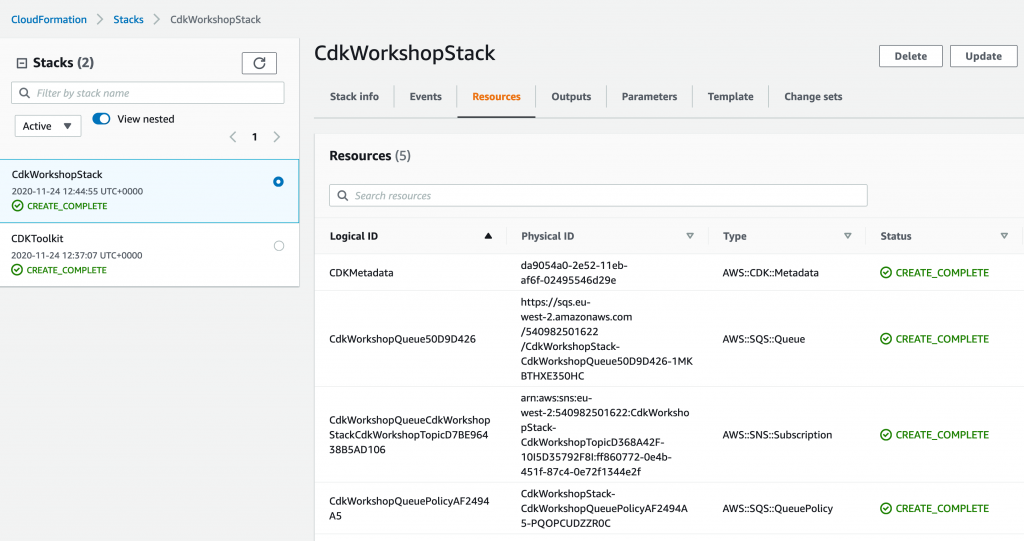
After confirming you want to go ahead with these changes, you should soon see the new stack within your CloudFormation console, along with the CDK toolkit stack we bootstrapped
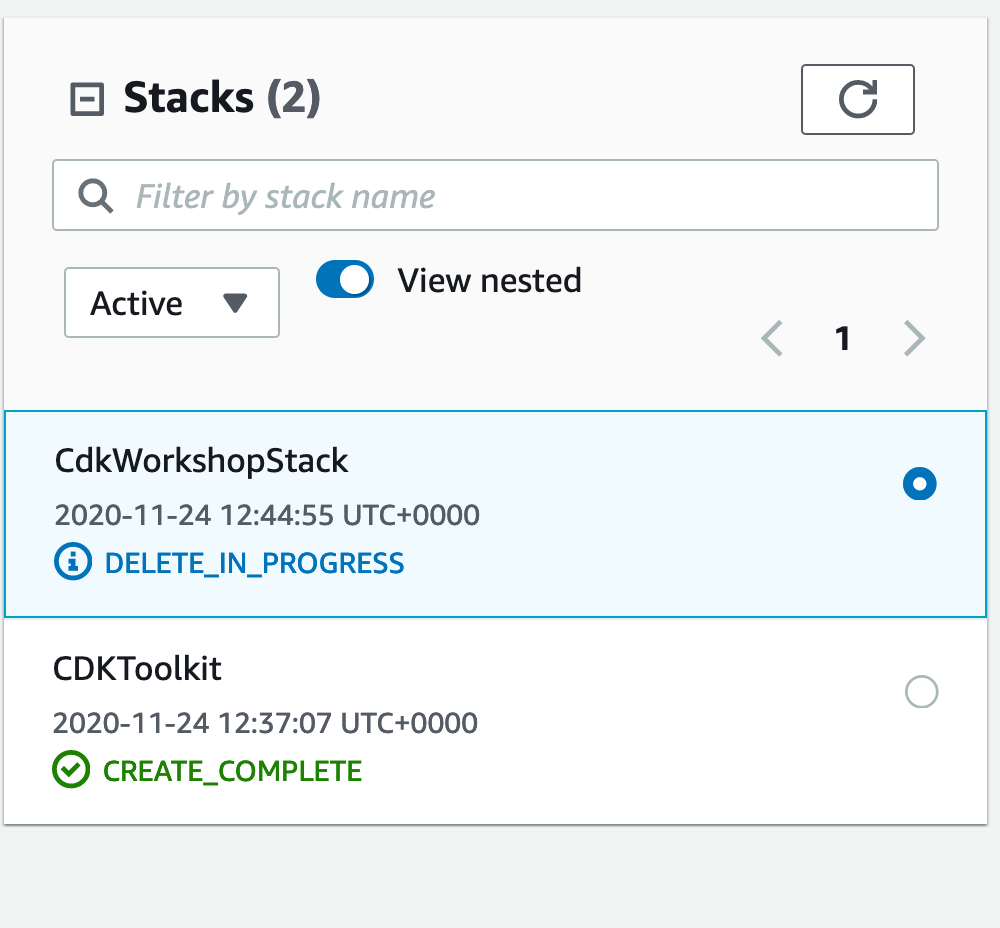
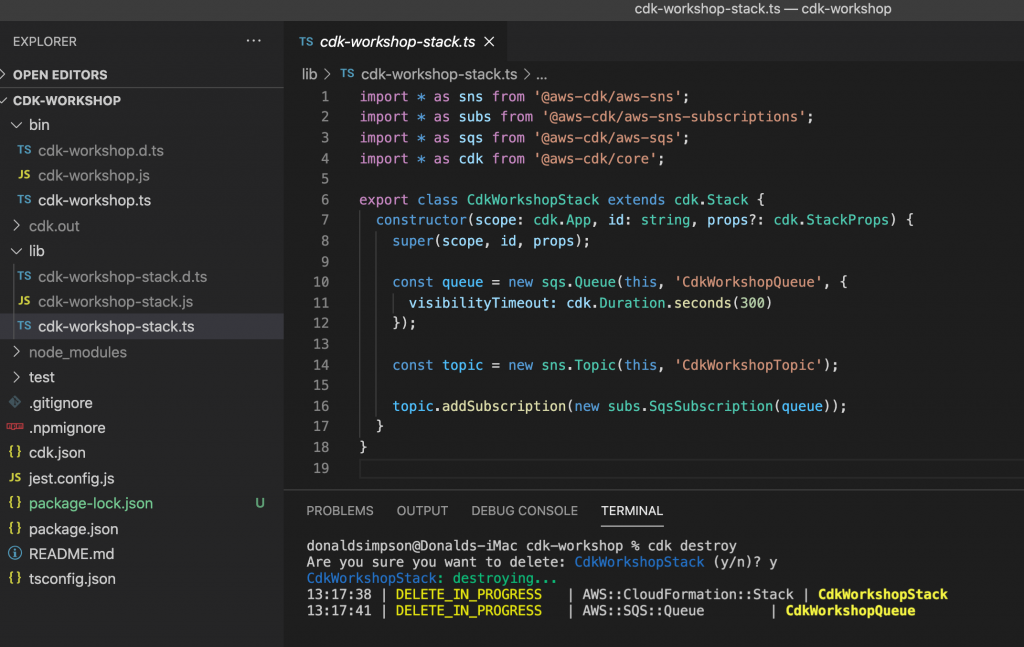
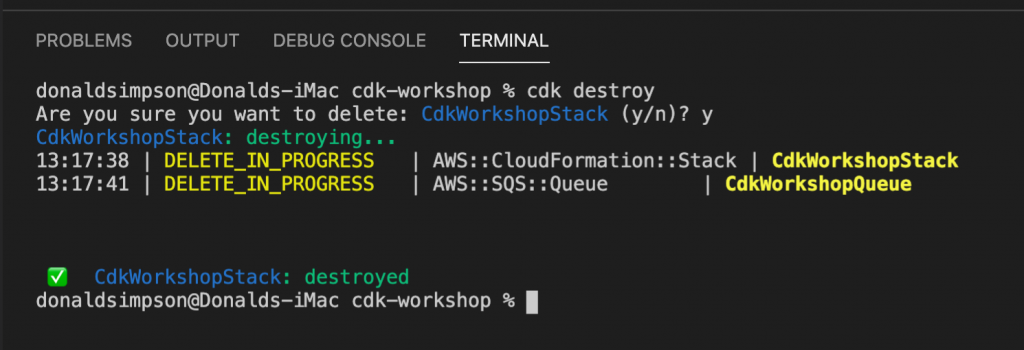
to delete the example stack and clean up, simply do
cdk destroy
That’s it – the local environment is set up and can connect to the AWS account, a very simple app has been built, tested, deployed and deleted, and the one-off CDK bootstrapping has been done.