Sun server migration

The people of eBay kindly provided me with a Sun 900 38u rack cabinet for much, much cheapness. They also chucked in a wopping v890, a couple of Storedge 3300’s and something 2u-sized and servery that I’ve not yet managed to identify or attempt to power on.

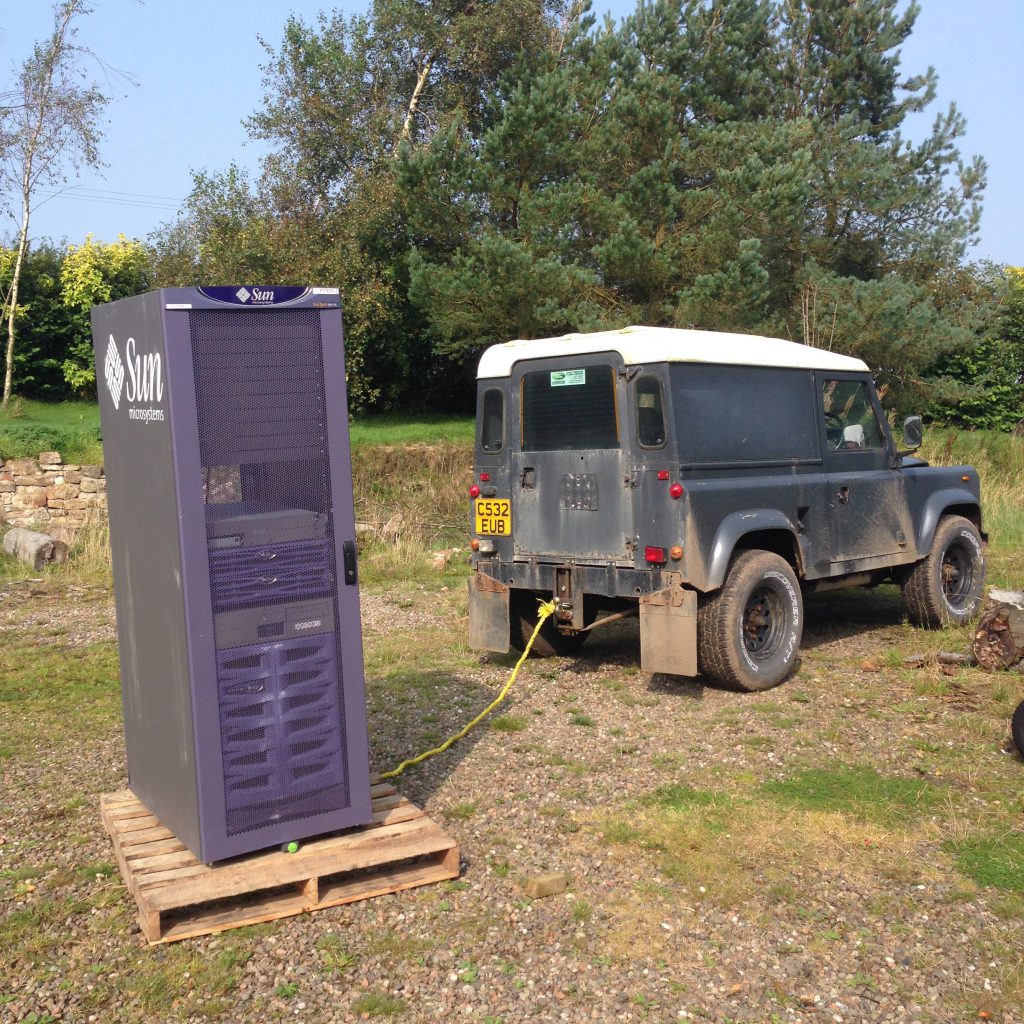
Seeing a Sun cabinet being towed across the countryside by a mad man in a Landrover Defender is not a regular occurence, so I thought I’d share pics of the process…

It was delivered on a pallet, which was collapsing under the incredible weight of all the steel inside the cabinet; it must weigh about the same as a small car:

img_7855

The Landy won the tug of war, but only just…

img_7858

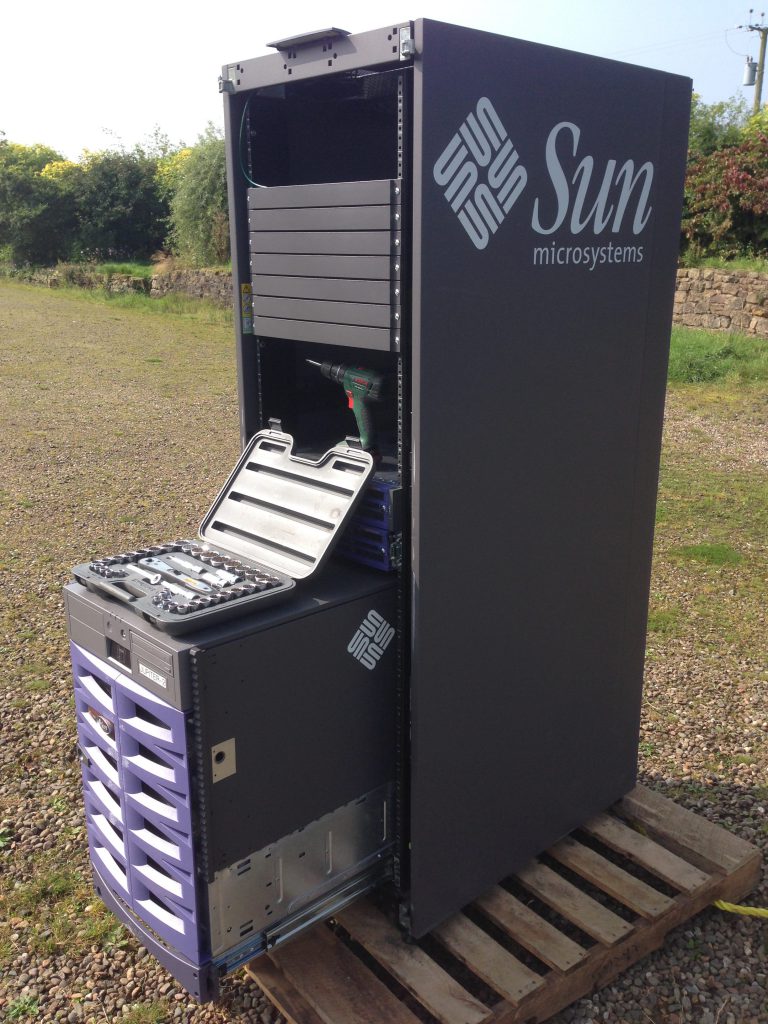
I had to partially dismantle the thing:

img_7865

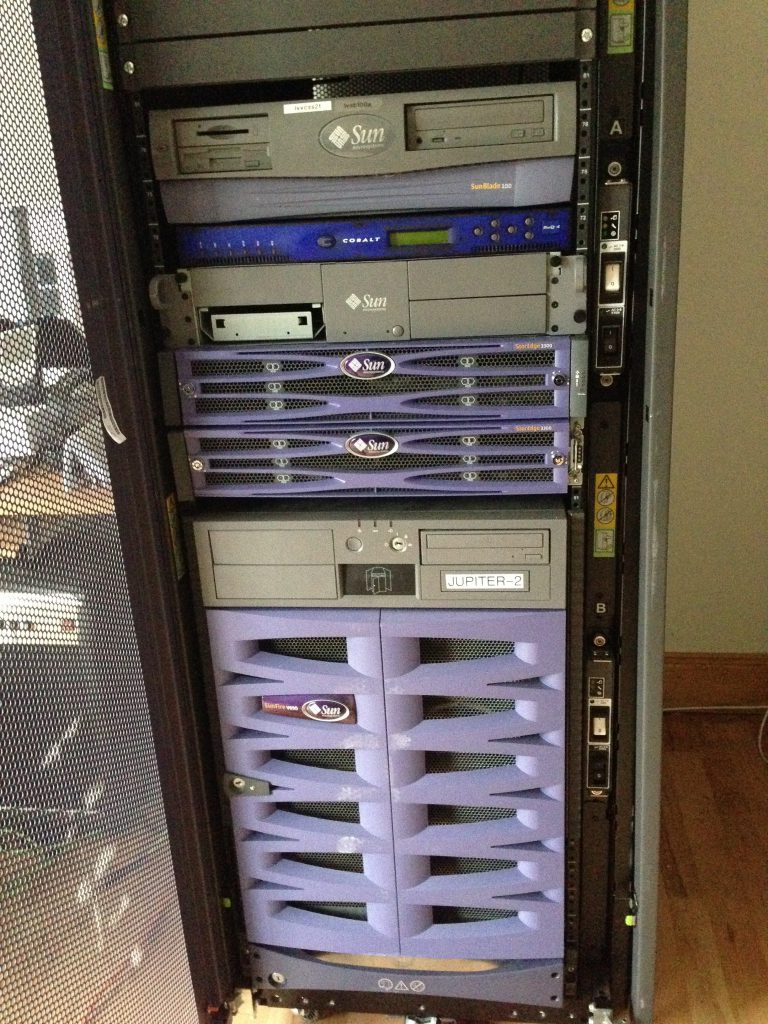
but it was soon restocked with some new additions when it was safely indoors – my old Cobalt 550 server and a SunBlade 100 I had sitting around.

img_7884

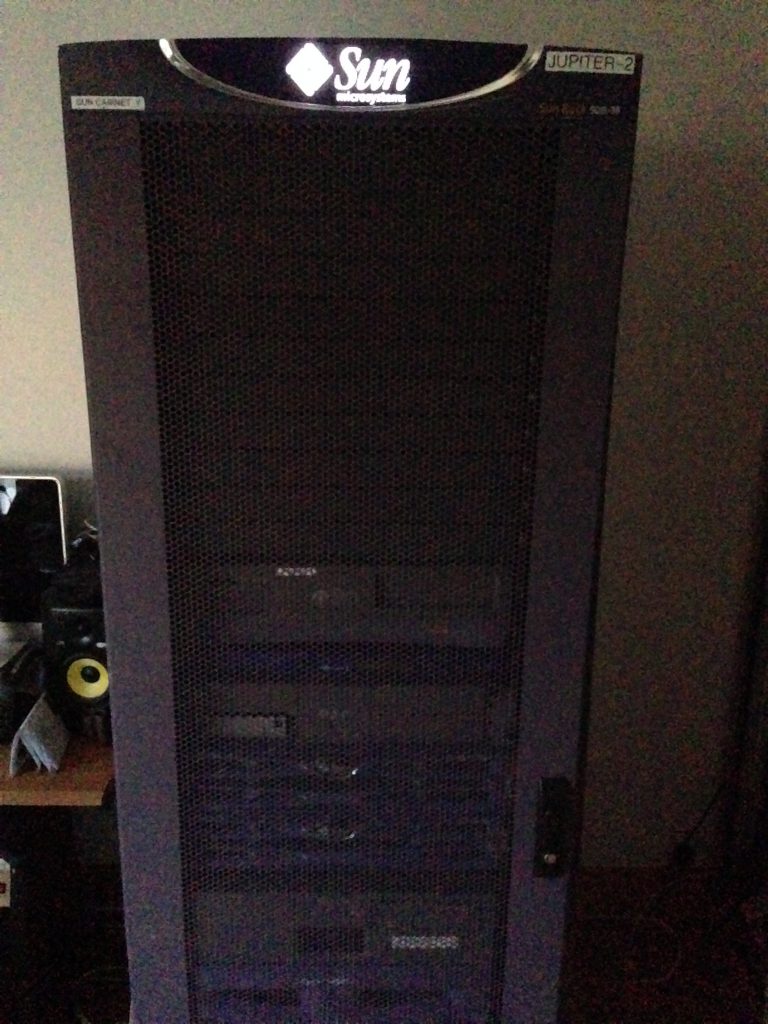
I’ve not had a chance to fire up the v890 yet, need to speak to eBay about some disks first, but I did power on the Sun Microsytems light on the top – my wife now refers to it as “that geeky vending machine thingy”…

img_7882Will post progress!

Solaris 10 on ESXi5, with SunRay Server and Clients

About 10 years ago, I bought a SunRay 1g Client box with the plan of setting it up as a thin client to the (physical and very noisy) Sun Solaris Server I was running at the time. The old Sun server sadly didn’t last much longer, and I replaced it with a FreeBSD one before I managed to get the SunRay up and running… so it sat in a cupboard until recently.

The new plan is to use the SunRay 1g as a thin client to a Solaris VM running on my ESXi5 server. This seems like a good idea as it gives me a way to access and manage the ESX server without having to fire up another machine – plus, I think SunRay clients are awesome bits of kit – if I didn’t have an iMac I would use these, as they are silent, boot instantly, use hardly any power and make no noise… it seems like the ideal compliment to an ESX server.

Here’s a pic of my SunRay client…
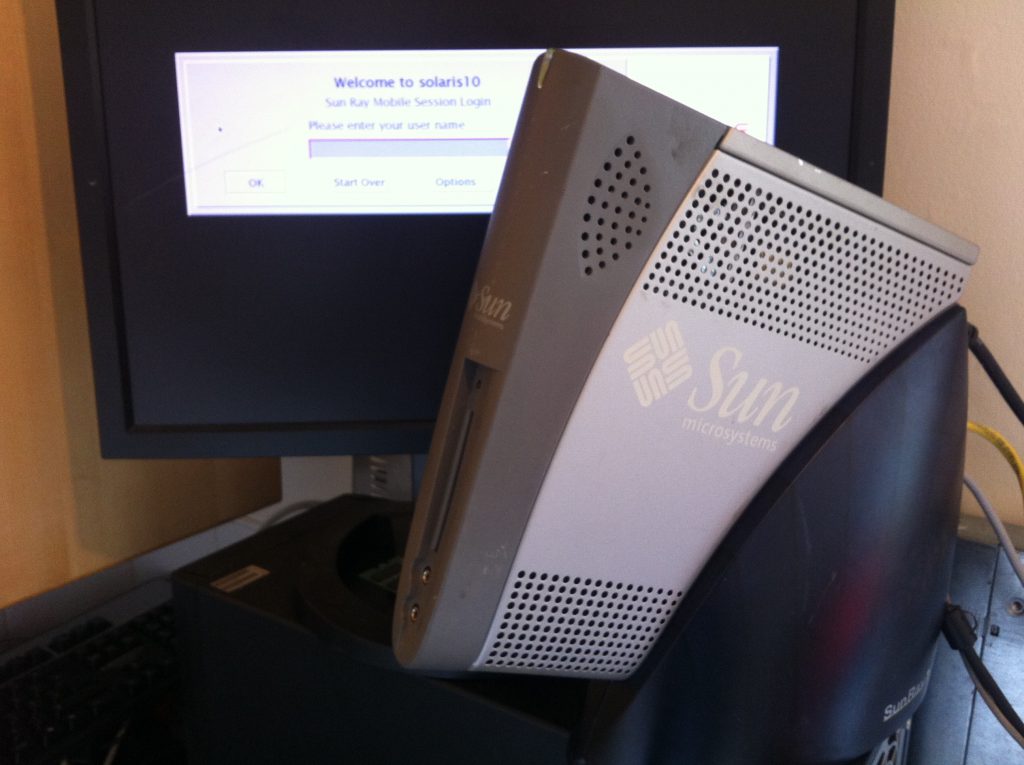
So, here are some notes, links and pics on installing an Oracle Solaris 10 Virtual Machine on ESXi5, setting up the SunRay Server Software, and getting the SunRay client (finally) working…

From the Oracle site, Sun Ray Clients are:

“… simple, low-cost devices that are ideal for displaying server-hosted virtual desktops. With no moving parts and no local operating system to manage, Sun Ray Clients provide a cost-effective, highly functional thin client alternative to desktop and laptop computers and reduce many of the problems associated with traditional desktop deployments.”

http://www.oracle.com/us/technologies/virtualization/061984.html

They need a Server running the SunRay Server Software to connect to – I think you can use Linux these days but I wanted to set up a Solaris host anyway, so I went with the traditional approach – albeit running on VM Ware.

None of this was very difficult, and the only slight issue I had was getting DHCP set up correctly; as I understand it, Sun Ray clients need to be sent additional information when they get an IP address, and that means it’s easier to set up the SunRay Server as your DHCP server – once I’d done that (and configured my Router to act as a DHCP Relay, handing DHCP requests over to the Solaris host), it all worked well.

Install Solaris 10 on VMWare ESXi5:

I downloaded the DVD image from Oracle, and then uploaded it to the data store on the ESX Server, created a new VM and set it to mount the image as a DVD drive at boot time. The spec of my Solaris 10 VM is 8GB RAM, 2x vCPU and 500G disk for now – I will change this later when I see how it performs.

Install VM Ware tools:
mkdir / vmwaretools/

cp /cdrom/vmwaretools/vmware-solaris-tools.tar.gz .

# tar zxvf vmware-solaris-tools.tar.gz – that didn’t work – no GNU tar :-(

gunzip vmware-solaris-tools.tar.gz

tar xvf vmware-solaris-tools.tar

cd vmware-tools-distrib/

./vmware-install.pl

All done, much better 🙂

Setup  DHCP & NIS on Solaris 10

This command starts up the (GUI) DHCP Manager wizardy thing, which will prompt you for all required info to set up DHCP:
/usr/sadm/admin/bin/dhcpmgr &

As as I understand it, your SunRay clients will look for a DHCP server to (also) give them the details of the SunRay Server to connect to. I coudln’t see a way to use my existing DHCP server (my broadband router) and still be able to tell the clients how to connect to the Solaris Server – that would have been preferable for me.

cp /etc/nsswitch.dns /etc/nsswitch.conf

add the google DNS Server and the internal IP of my router to /etc/resolv.conf….

echo "nameserver 8.8.8.8" >> /etc/resolv.conf
echo "nameserver 192.168.0.1" >> /etc/resolv.conf

Install SunRay Server Software (SRSS)

This was all pretty simple, my notes are brief but there’s a decent guide here:

http://docs.oracle.com/cd/E22662_01/E22659/html/Installing-Howto-Install.html

I downloaded the installer and extracted it to a tar file on another host beforehand, which was handy as I hadn’t sorted out GNU tar yet…

mkdir /sunrayinstall

cd /sunrayinstall

scp don@myubuntuserver:/tmp/V32065-01.zip .

unzip V32065-01.zip

cd srs_5.3.0.0-SunOS.i386/

./utinstall

export SRSS_INST=/opt/SUNWut

# Enable LAN Access:

$SRSS_INST/sbin/utadm -L on

$SRSS_INST/sbin/utrestart

Things to look at later:

connector for vmware: http://docs.oracle.com/cd/E21907_01/PDF/EN/SRVMWC1dot2InstallGuide.pdf

Here are some of the other commands and checks I looked at while getting it running…

/opt/SUNWut/sbin/utdesktop

/opt/SUNWut/sbin/utgstatus

/opt/SUNWut/sbin/utquery -d 192.168.0.58

/opt/SUNWut/sbin/utsetup

/opt/SUNWut/sbin/utconfig

tail -1000f /var/opt/SUNWut/log/messages
Install Apache Tomcat for SunRay Server Software

I’m not sure if this is necessary?

cd /opt/apache-tomcat

cd bin

export JRE_HOME=/usr

./catalina.sh start
Setup NTP on Solaris 10
ls -al /etc/inet/ntp.*

touch /var/ntp/ntp.drift

cp /etc/inet/ntp.client /etc/inet/ntp.conf

svcadm enable svc:/network/ntp

date

Here’s a picture of the new Admin Tool – I only have 2 SunRay clients to manage (and even fewer users!), but I may still have to search eBay for some Smart Cards…

Update: I now have an unopened pack of smart cards (50 I think?) – a gift from a Solaris admin chum!
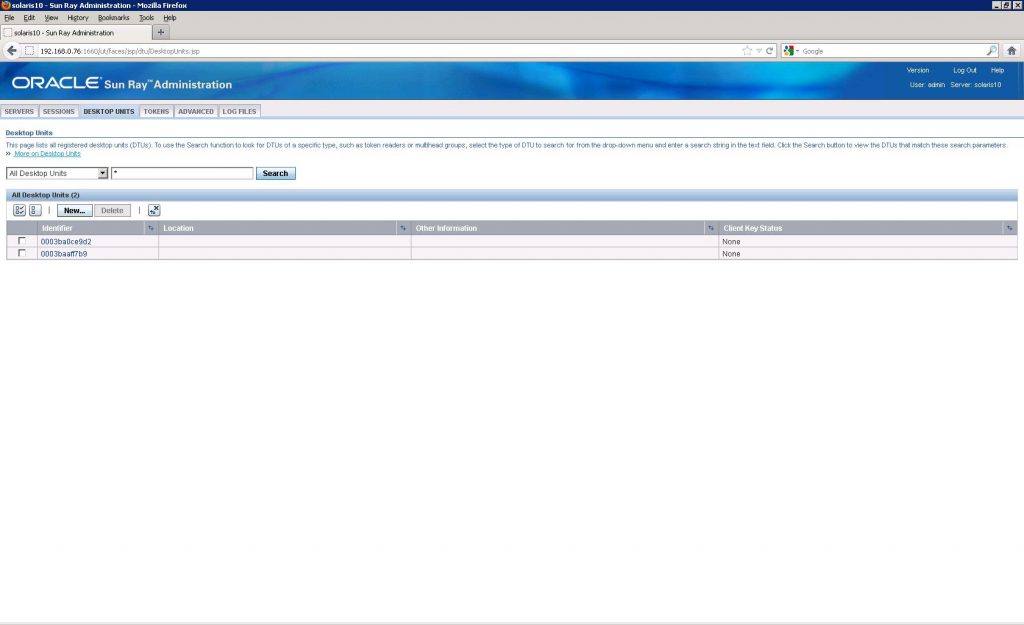
http://docs.oracle.com/cd/E19214-01/820-0412/new_admin_tool.html

Once that was all done and my Router was configured to relay DHCP requests to the DHCP Server running on the Solaris 10 VM, I was able to switch on my SunRay 1g client and be presented with a logon screen – yay!

And finally, here’s a pic of the SunRay client sitting on top of the HP ProLiant ML110 G6 ESXi5 home lab server, which is running the Solaris 10 Virtual Machine it’s connecting to…
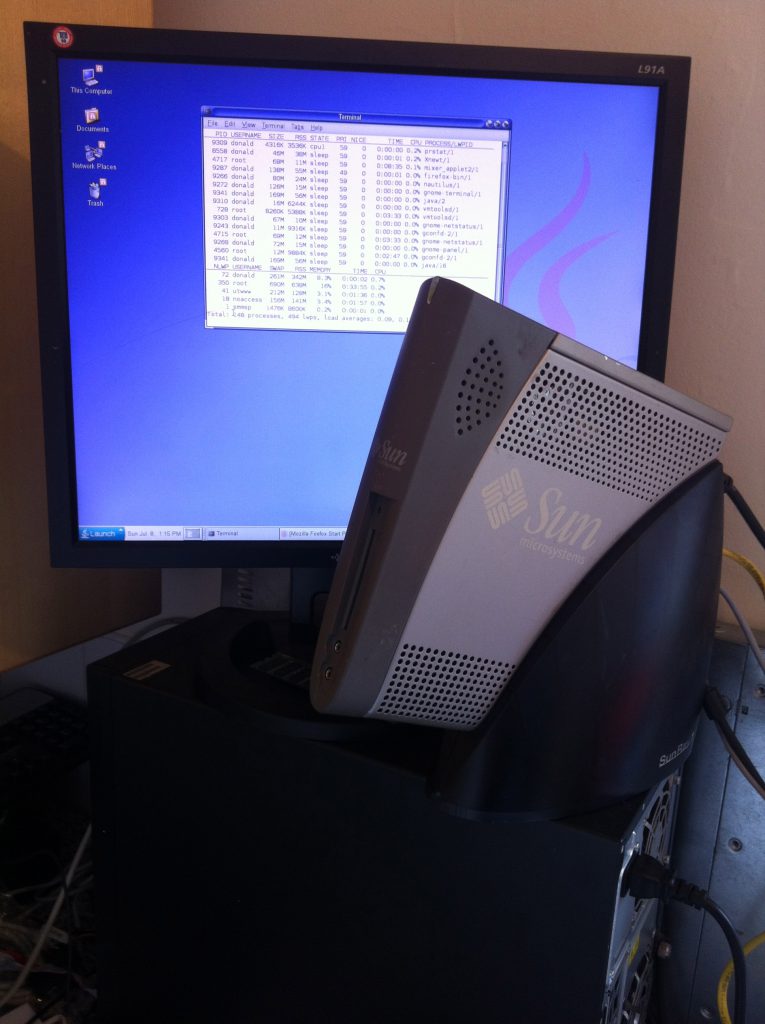
VM Ware ESXi under VM Ware Fusion

Hardware

I’m looking at getting a new home lab/server set up, and am seriously considering ordering one of these:

HP ProLiant ML110 G6 Quad Core X3430

It will need filled with memory and a load of disk space, but I reckon that’s still a whole lot of server for the money.

The Plan

The plan is to install VM Ware ESXi 5 on to it (using the USB Drive), and manage the server through the remote VM Ware vSphere Client app. This will allow me to create new Virtual Machines and migrate my existing appliances over to this server, then I can retire the old servers these have been running on. I’m also wanting to develop some automation processes for managing VM’s – creating new ones, bringing them up and down etc using Jenkins to orchestrate the processes, so this will allow me to work on that too.

Before ordering the ML110 I wanted to take a better look at the installation of ESXi – it doesn’t sound difficult, but while I’ve used it often I’d never set it up before so wanted to see what was involved.

VM Ware ESXi 5 Installation under Fusion on an iMac

It’s a little bit crazy and recursive, but, I realised I may be able to do this on my iMac under VM Ware Fusion, which it turns out does allow you to install ESX as a Virtual Machine itself…. which you can then use to manage and create new (Virtual?) Virtual Machines – a bit of a brain-ouch, and it’s clearly not going to be fast, but it’s good enough for my testing.

Installing ESXi is very straightforward – I selected the obvious option of “VM Ware ESX” in Fusion on my iMac, told it I had an image I wanted to use and pointed it at the VM Ware ESXi 5 ISO image I had downloaded from VM Ware (you need to register then fumble about their site for a while to find and download the free version – that’s the way I did it anyway). Keep a note of the serial number they give you, as that will remove the 60 day trial restriction later.

Fusion suggested a 40G file system for this instance and allocated 2GB RAM and 2 cores, which I was quite happy to run with for my test. Speaking of RAM – there was a restriction on the amount of physical RAM you could use with the free version of ESXi 5 – it was 8GB a while ago but this has now been increased to something more sensible – 32GB I think?

There are no surprises or major decision needed during the install of ESXi 5 itself – it took all of 5 minutes to run through and reboot, and that was with it running as a Virtual Machine on an overloaded iMac – on proper hardware like the HP ProLiant ML110 G6 Quad Core X3430 that I’m looking at, it would be loads faster.

When the install is done, there’s nothing more to see on the ESXi (VM), apart from the HTTP address it gives you to connect to the ESXi Host and access a simple web page it serves with links to download the VM Ware vSphere Client application to another host and start managing your server. This address was given by DHCP in my case – I think you can specify or change this easily if you want to.

Client Installation

Downloading the VM Ware vSphere Client took a while (longer than installing ESXi did!) as it came from the VM Ware site rather than being directly served by the ESXi host. Now for the bad news… for clients, you have a choice of running either Windows or Linux. No mention of an OSX vSphere client, so I had to fire up a Windows VM just to set up the client app on… not what I had been hoping for – there’s a petition asking VM Ware to sort this out here:

http://communities.vmware.com/thread/128538?start=525&tstart=0

When I get things running I could create a VM on my ESXi host which I can RDP on to, but that’s still a pretty ugly solution – if the Linux client is ok I’d go with that over the Windows one, and I think there’s also a Web Interface. But, part of the reason for me doing this in the first place is so that I can look in to the SDK and API’s for automating the creation of VM’s with VM Ware using Jenkins though, so I’ll grin and bear the Windows yuckness and see how things go.

Installing the vSphere client gets worse and worse though – my VM needed an update to its Microsoft .Not Framework (something I tend to avoid) which churned away for quite some time, and the console looks to be written in J# too (yes seriously – J# – what the… ?), which meant another “Framework upgrade” which took another while and a half – so the client set up ended up taking about 10 times longer than the server, and I had to run a Windows VM just for it… not too cool.

Once done, I could point my vSphere client at the IP address of the ESXi (VM) using its advertised IP address, the default user name (which I’d forgotten to take a note of – it’s “root”) and the password I’d specified during the install. This gets me to the Hypervisor where I can start creating and managing my own VM’s.

Cool stuff, despite the client letting things down.

Some Useful Solaris Commands

Here are a few (mostly) Solaris tips and tricks I have found useful and wanted to keep a note of.


prstat

This provides similar info to top on Linux boxes – you can run it as plain old prstat, or give it some options. I like prstat -a as it reports on both processes and users. As with all of these commands, the man pages have further details.


xargs

Not just a Solaris command, but this is very useful on any *NIX box – I frequently use it to translate the output from the previous command in to something that can be undertood by the next one, for example:

find . -type f -name *.txt | xargs ls -alrt

Will translate and pass the output of the “find” command to ls in a way that ls understands.


pargs

I use the pargs command when I need to get more information on a running process than the Solaris ps utility will give (there’s no -v option) if they have a lot of arguments.

Call pargs with the PID of your choice, and it will display a nice list of each argument that the process was started with, for example:

> pargs 16446
16446:  /usr/jdk/jdk1.6.0/jre/bin/java com.MyJavaProgram
argv[0]: /usr/jdk/jdk1.6/jre/bin/java
argv[1]: com.MyJavaProgram
argv[2]: MyFirstArgument.ini
argv[3]: SomeOtherArg.txt
argv[4]: AndAnotherArg

pargs can also display all of this info on one line with the -l option (useful for scripting), and if you call it with -e it also displays all of the Environment variables too.


pwdx

Simply pass it a PID and it will tell you the current working directory for that process.


[g]rep

When writing a shell script that queries running processes, I often find my own script showing up in the results – for instance a script that does a “ps -eaf | grep MyProcessName” may pick up the java process I’m after (the running instance of “./MyProcessName“) and the grep process-check itself (as in the “ps -eaf | grep MyProcessname“).

A handy way to avoid this is by changing your search criteria to “grep [M]yProcessName” instead. Grep interprets (and effectively ignores) the square brackets, with the result that your grep query no longer matches its own search 🙂


I will add more when I think of them, if you have any good ones then please post them!

Pin It on Pinterest

%d bloggers like this: