MLOps for DevOps Engineers – MiniLM & MLflow pipeline demo
By Donald Simpson – Published:
As a DevOps and SRE engineer, I’ve spent a lot of time building automated, reliable pipelines and cloud platforms. Over the last couple of years, I’ve been applying the same principles to machine learning (ML) and AI projects.
One of those projects is CarHunch, a vehicle insights platform I developed. CarHunch ingests and analyses MOT data at scale, using both traditional pipelines and applied AI. Building it taught me first-hand how DevOps practices map directly onto MLOps: versioning datasets and models, tracking experiments, and automating deployment workflows. It’a a new and exciting area but the core idea is very much the same, with some interesting new tools and concepts added.
To make those ideas more approachable for other DevOps engineers, I have put together a minimal, reproducible demo using MiniLM and MLflow.
The simplest way to try this demo is with the included Makefile; that way all you need is Docker installed
# clone the repo
git clone https://github.com/DonaldSimpson/mlops_minilm_demo.git

cd mlops_minilm_demo

# build and run everything (training + MLflow UI)
make run
That one ‘make run’ command will:
– Spin up a containerised environment
– Run the demo training script (using MiniLM embeddings + Logistic Regression)
– Start the MLflow tracking server and UI
Here’s a quick screngrab of it running in the console:
Once it’s up & running, open http://localhost:5001
in your browser to explore logged experiments
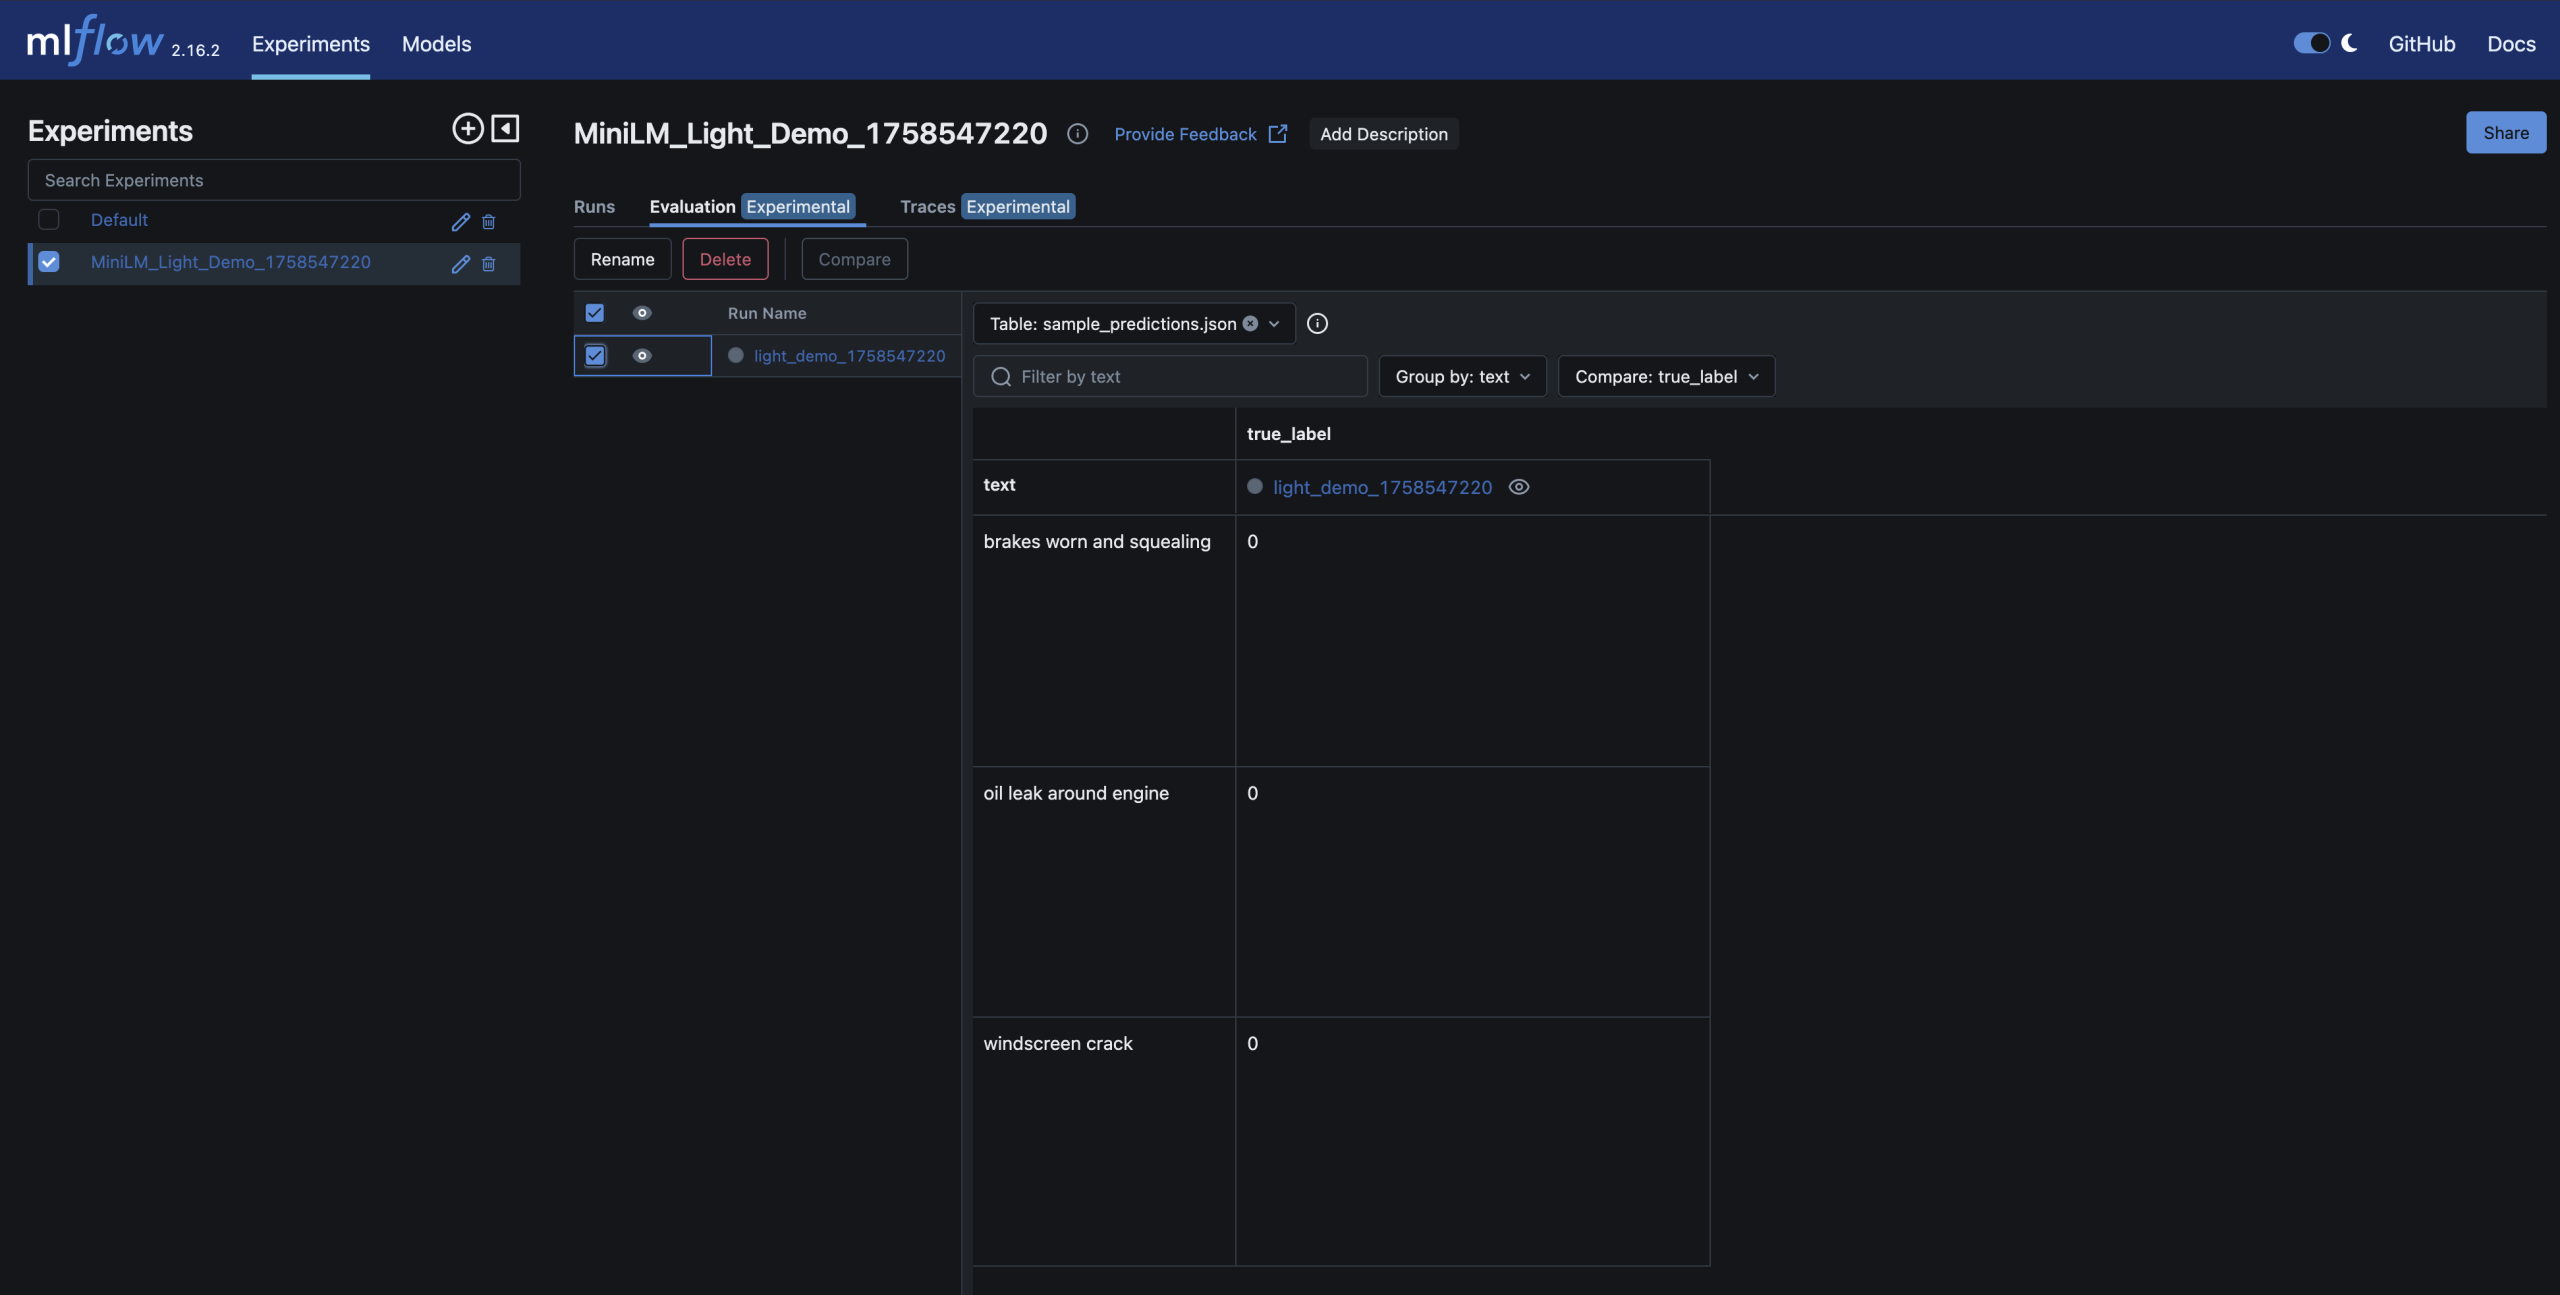
What the demo shows
– MiniLM embeddings turn short MOT-style notes (e.g. “brakes worn”) into vectors
– A Logistic Regression classifier predicts pass/fail
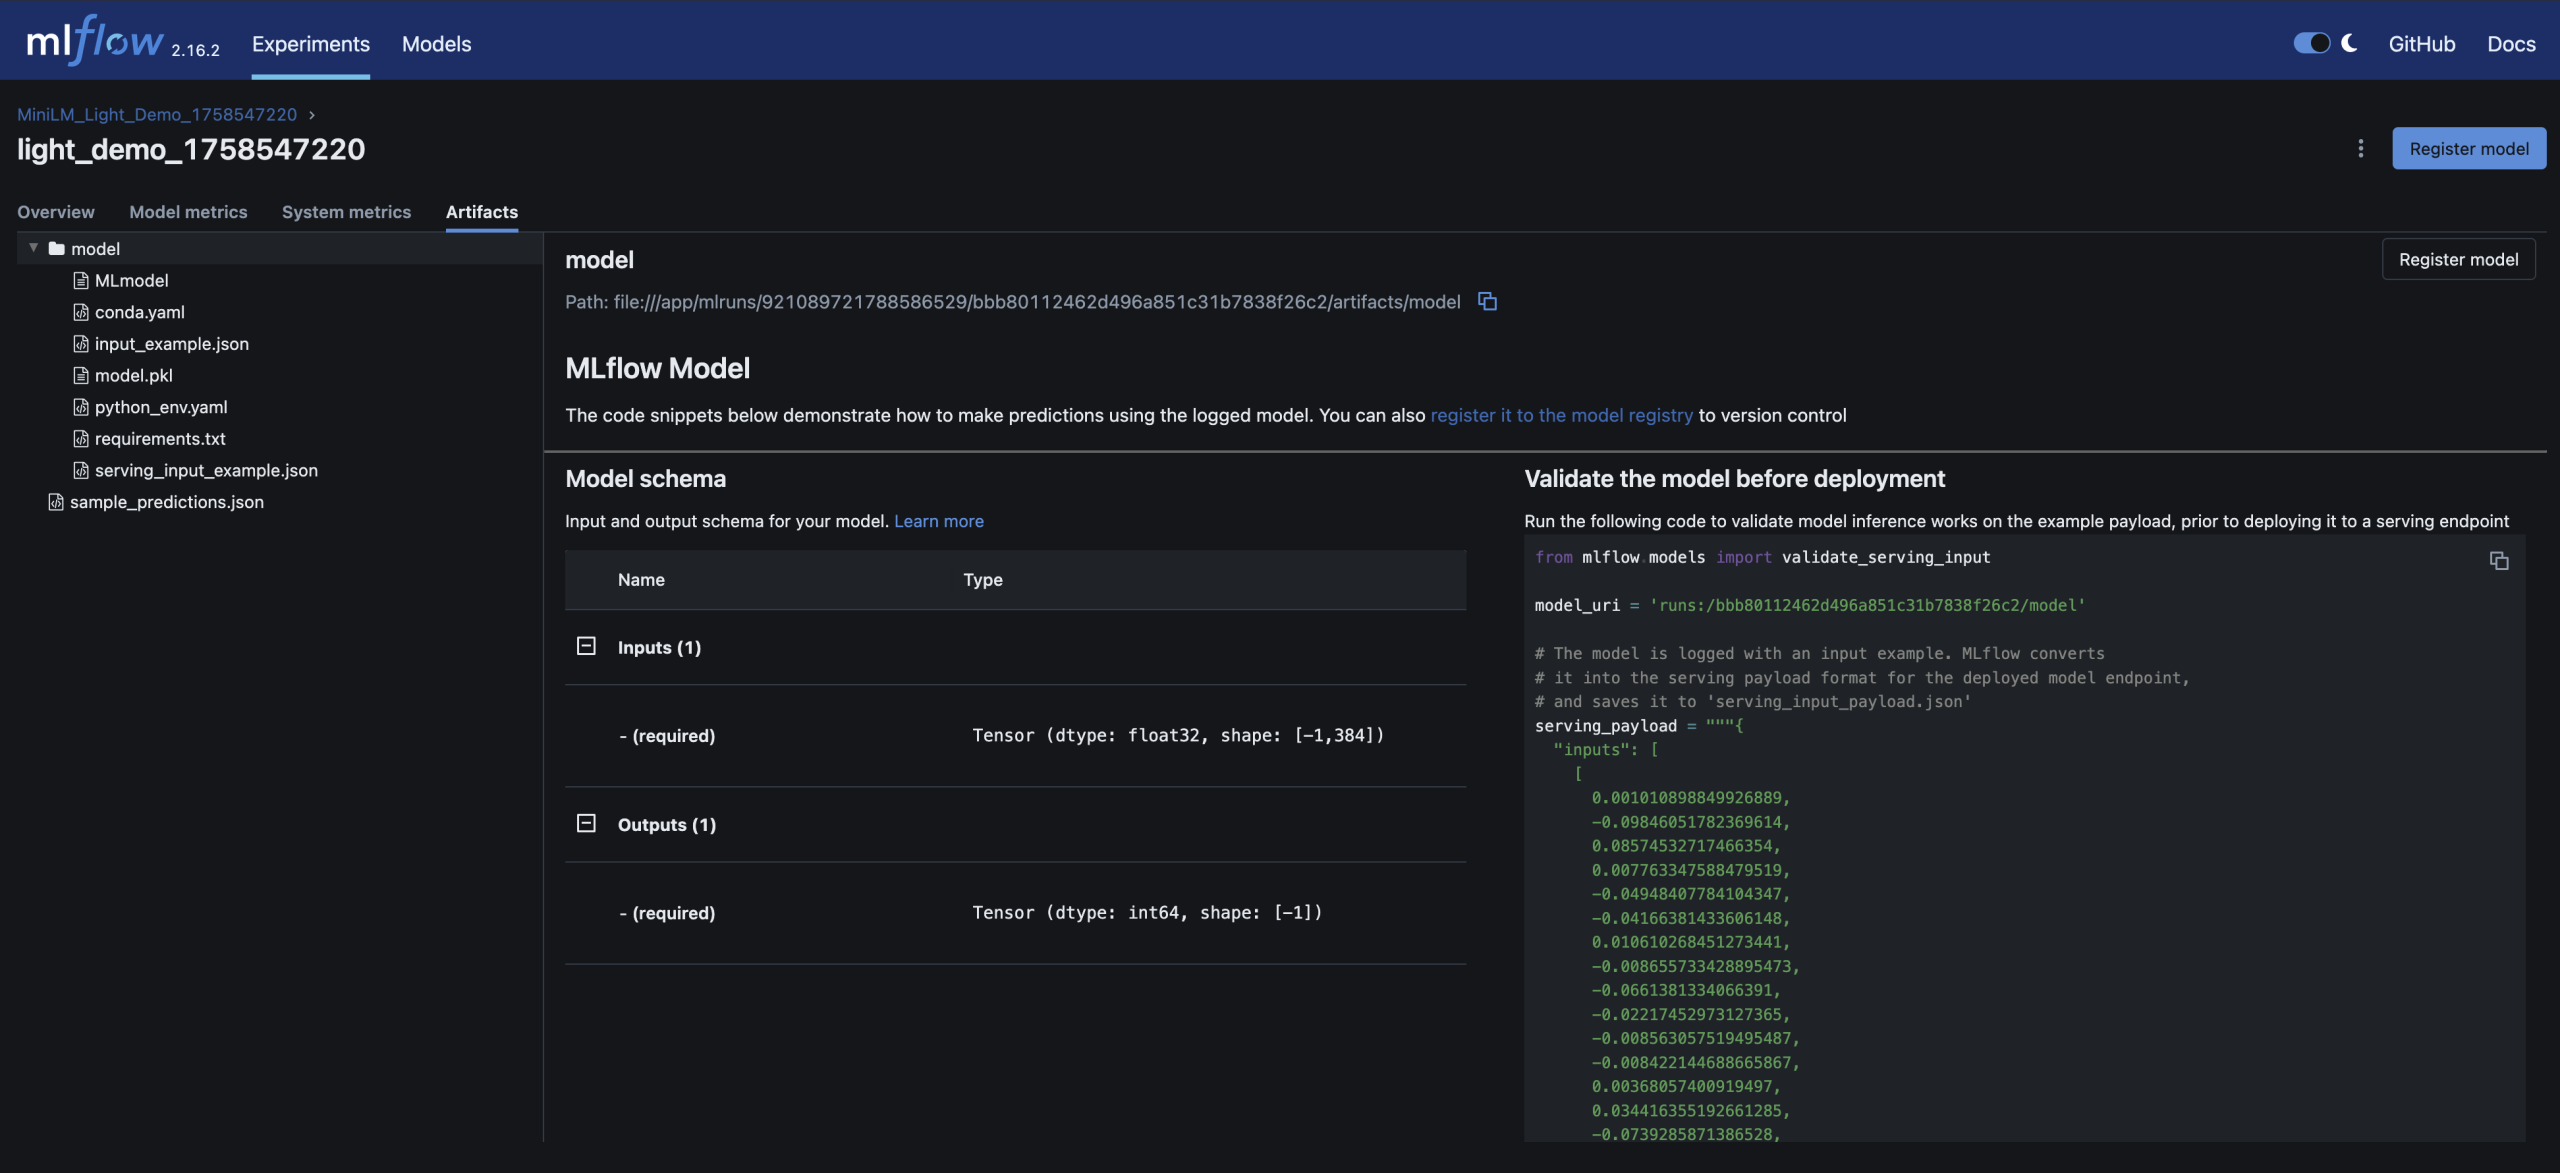
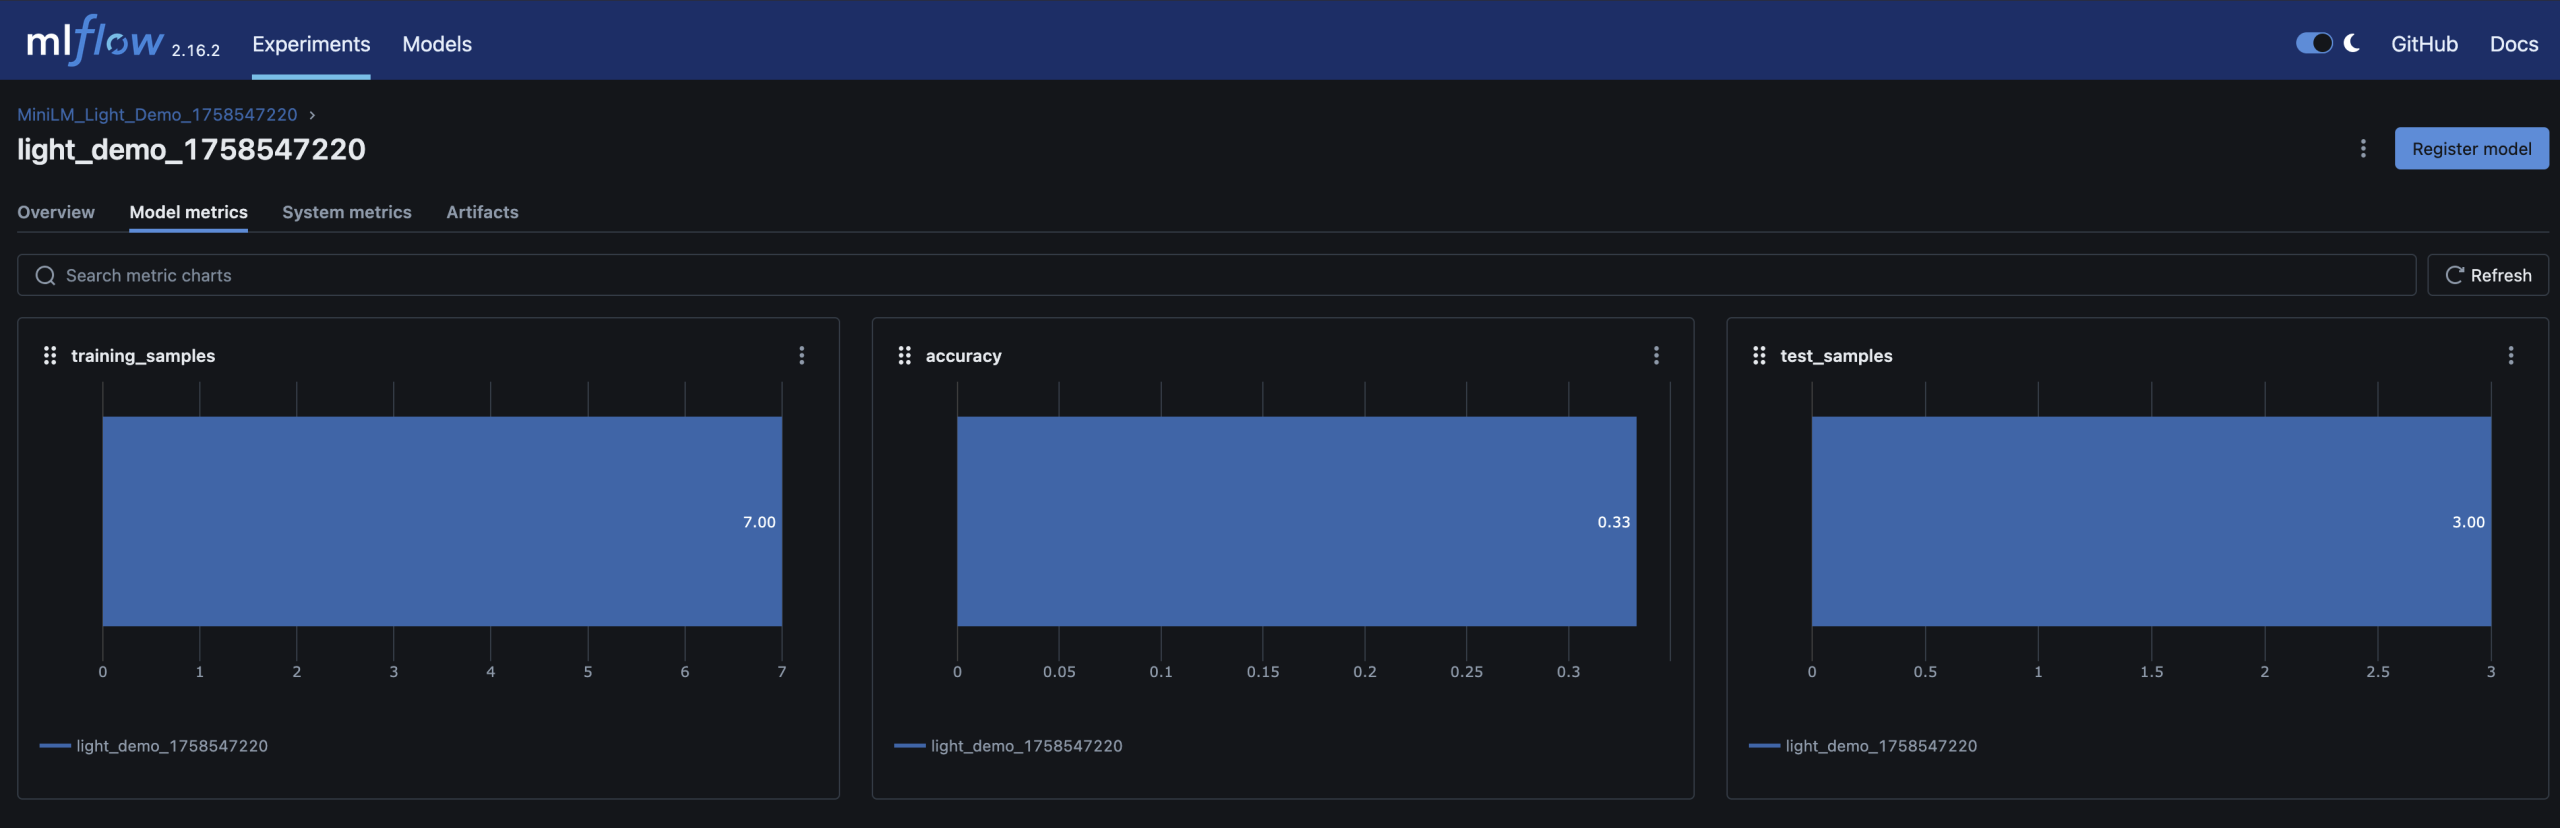
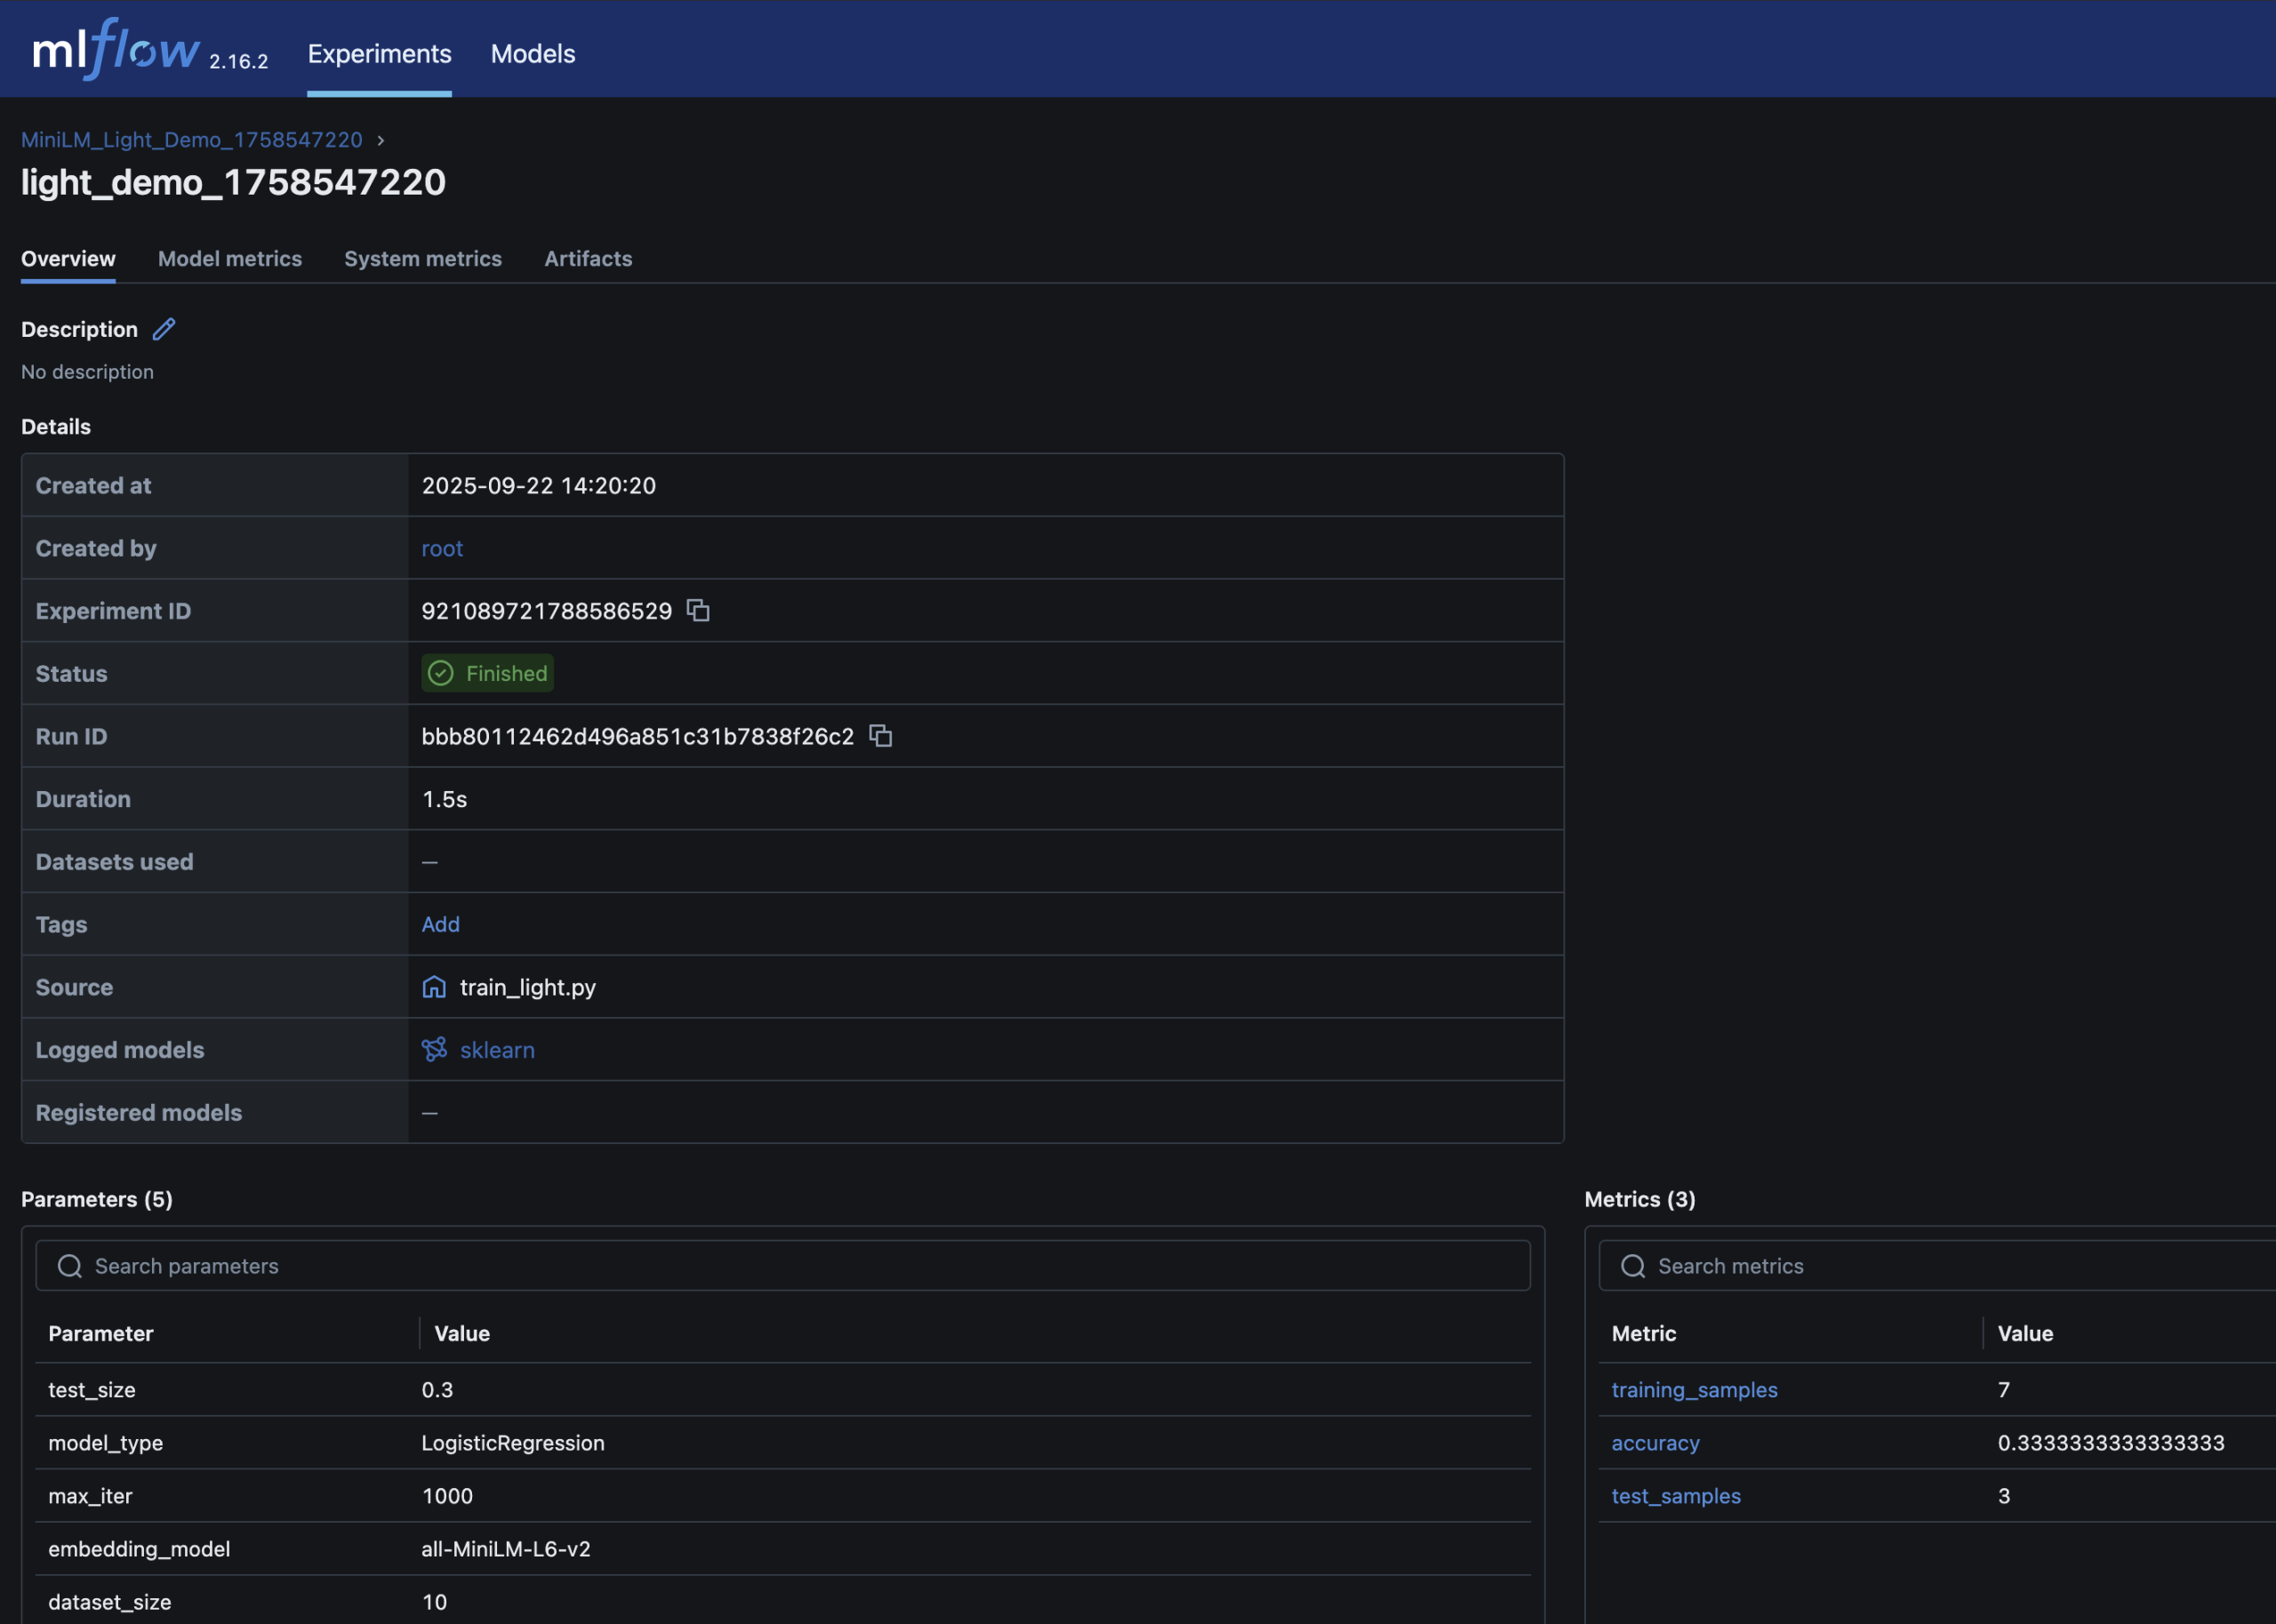
– Parameters, metrics (accuracy), and the trained model are logged in MLflow
– You can inspect and compare runs in the MLflow UI – just like you’d review builds and artifacts in CI/CD
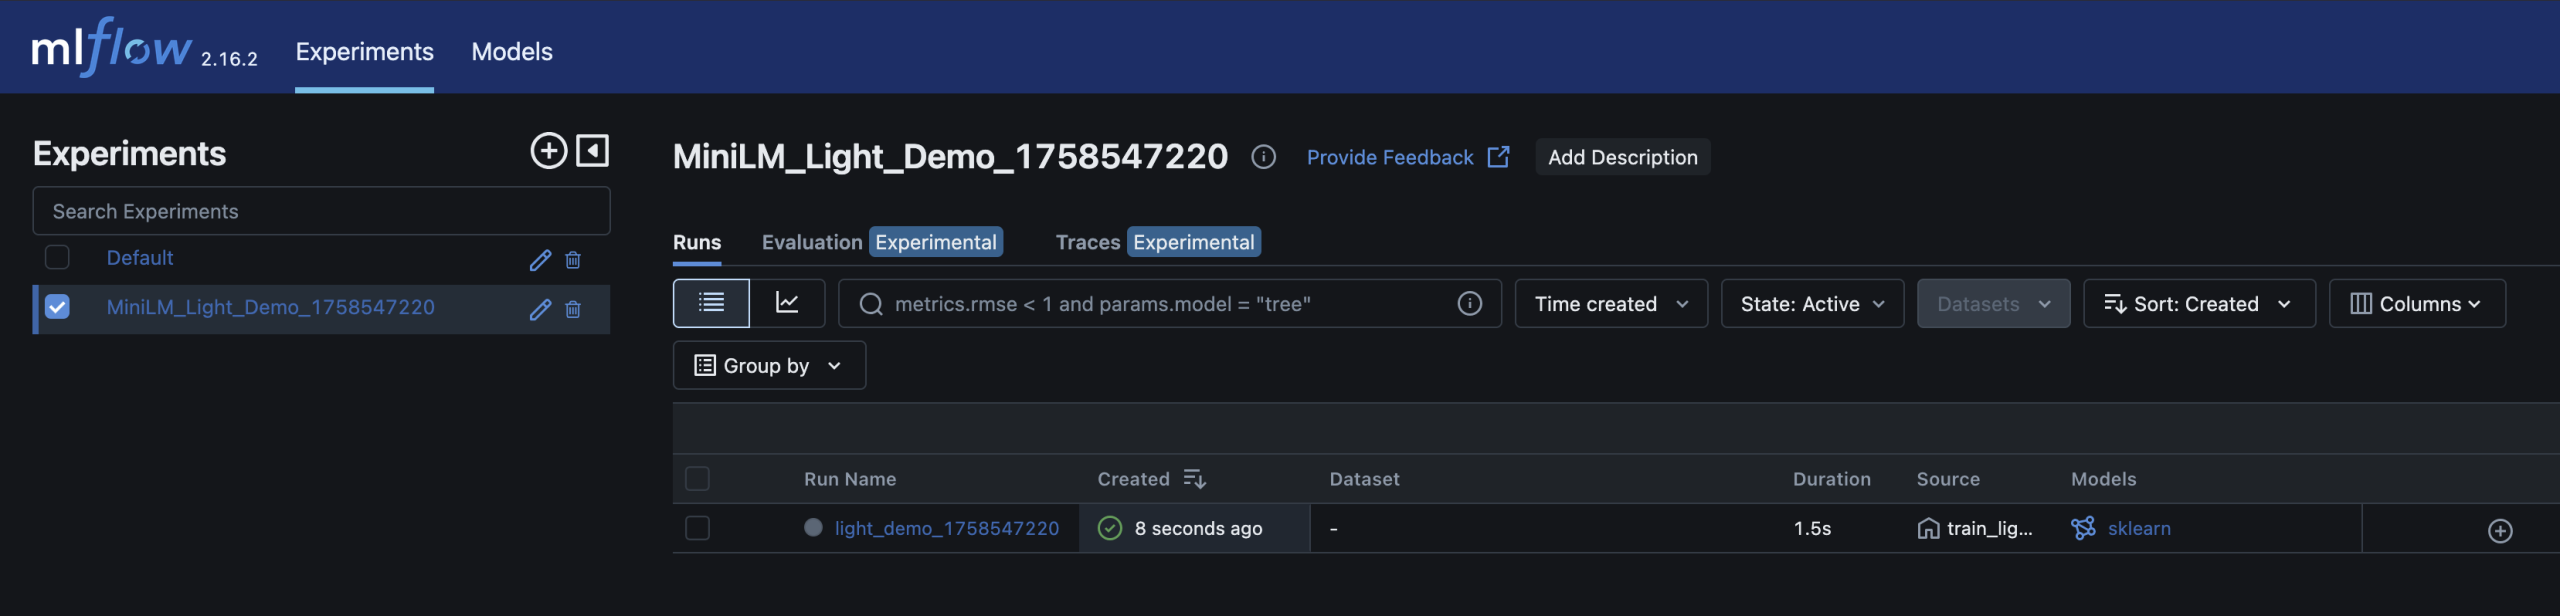
– Run detail; accuracy metrics and model artifact stored alongside parameters
Here are screenshots of the relevant areas from the MLFlow UI:
Why this matters for DevOps engineers
Familiar workflows: MLflow feels like Jenkins/GitHub Actions for models – every run is logged, reproducible, and auditable
Quality gates: just as builds pass/fail CI, models can be gated by accuracy thresholds before promotion
Reproducibility: datasets, parameters and artifacts are versioned and tied to each run
Scalability: the same demo pattern can scale to real workloads – this is a scaled down version of my local process
Other ways to run it
If you prefer, the repo includes alternatives:
Python venv: create a virtualenv, install requirements.txt, run train_light.py
Docker Compose: build and run services with docker-compose up --build
Make targets:make train_light (quick run) or make train (full run)
These are useful if you want to dig a little deeper and see exactly what’s happening
Next steps
Once you’re comfortable with this small demo, natural extensions are:
– Swap in a real dataset (e.g. DVLA MOT data)
– Add data validation gates (e.g. Great Expectations)
– Introduce bias/fairness checks with tools like Fairlearn
– Run the pipeline in Kubernetes (KinD/Argo) for reproducibility
– Hook it into GitHub Actions for end-to-end CI/CD
Closing thoughts
DevOps and MLOps share the same DNA: versioning, automation, observability, reproducibility. This demo repo is a small but practical bridge between the two
Working on CarHunch gave me the chance to apply these ideas in a real platform. This demo distills those lessons into something any DevOps engineer can try locally.
That post went as far as having a Kubernetes cluster up and running for local development. That was primarily focused on Mac, but once you reach the point of having a running Kubernetes Cluster with kubectl configured to talk to it, the hosting platform/OS makes little difference.
This second section takes a more detailed look at running Jenkins Pipelines inside the Kubernetes Cluster, and automatically provisioning Jenkins JNLP Agents via Kubernetes, then takes an in-depth look at what we can do with all of that, with a complete working example.
This post covers quite a lot:
Adding Helm to the Kubernetes cluster for package management
Deploying Jenkins on Kubernetes with Helm
Connecting to the Jenkins UI
Setting up a first Jenkins Pipeline job
Running our pipeline and taking a look at the results
What Next
Adding Helm to the Kubernetes cluster for package management
Helm is a package manager for Kubernetes, and like Minikube it is ideal for quickly setting up development environments, plus much more if you want to. Take a look through the Helm hub to see just some of the other things it can do.
On Mac you can use brew to install the local helm component:
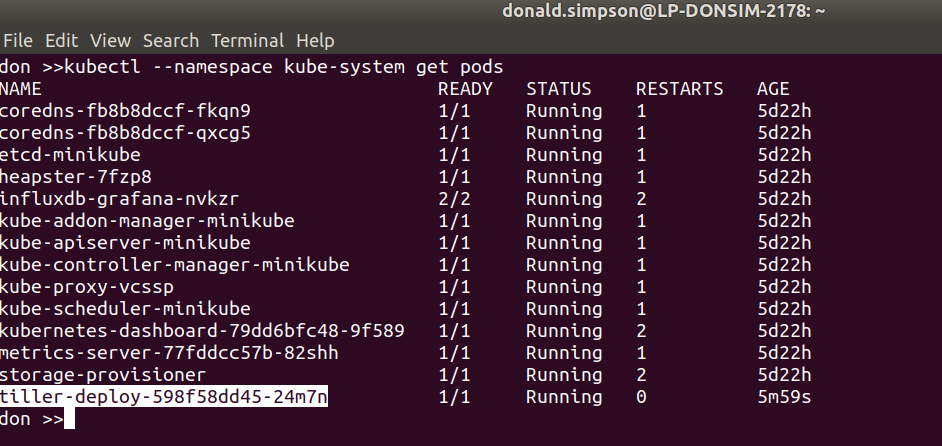
you should then see a tiller pod start up in your Kubernetes kube-system namespace:
Before you can use Helm we first need to initialise the local Helm client, so simply run:
helm init --client-only
as our earlier minikube addons command has configured the connectivity and cluster already. Before we can use Helm to install Jenkins (or any of the many other things it can do), we need to update the local repo that contains the Helm Charts:
helm repo update
Hang tight while we grab the latest from your chart repositories…
…Skip local chart repository
…Successfully got an update from the "stable" chart repository
Update Complete.
That should be Helm setup complete and ready to use now.
Deploying Jenkins on Kubernetes with Helm
Now that Helm is setup and can speak to our k8s instance, installing 100’s of software packages suddenly becomes very simple – including, Jenkins. We’ll just give the install a friendly name “jenki” and use NodePort to simplify the networking, nothing more is required for this dev setup:
obviously we’re skipping over all the for-real things you may want for a longer lived Jenkins instance, like backups, persistence, resilience, authentication and authorisation etc., but this bare-bones setup is sufficient for now.
Connect to the Jenkins UI
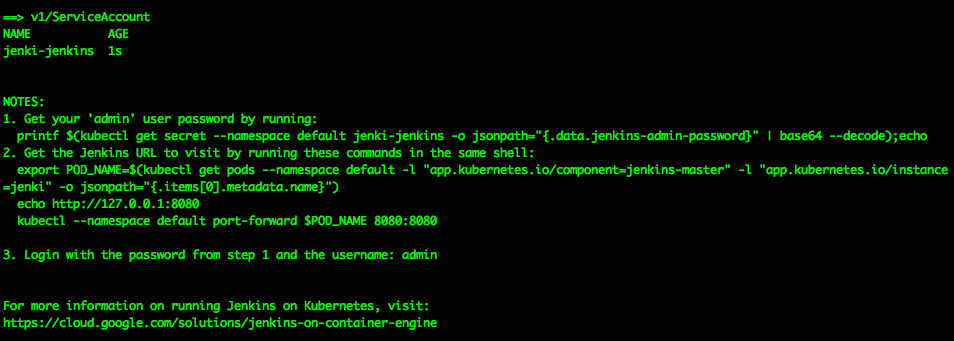
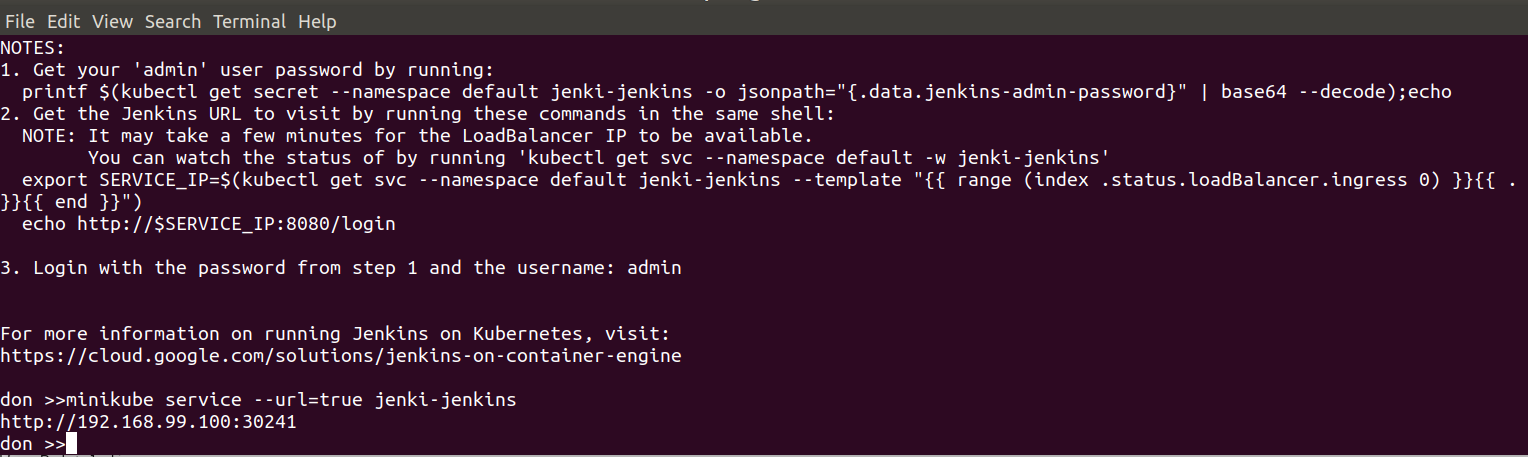
The Helm install should spit out some helpful info like this, explaining how to get the Jenkins Admin password and how to connect to the UI:
Get your ‘admin’ user password by running: printf $(kubectl get secret –namespace default jenki-jenkins -o jsonpath=”{.data.jenkins-admin-password}” | base64 –decode);echo
Get the Jenkins URL to visit by running these commands in the same shell: export POD_NAME=$(kubectl get pods –namespace default -l “app.kubernetes.io/component=jenkins-master” -l “app.kubernetes.io/instance=jenki” -o jsonpath=”{.items[0].metadata.name}”) echo http://127.0.0.1:8080 kubectl –namespace default port-forward $POD_NAME 8080:8080
Login with the password from step 1 and the username: admin
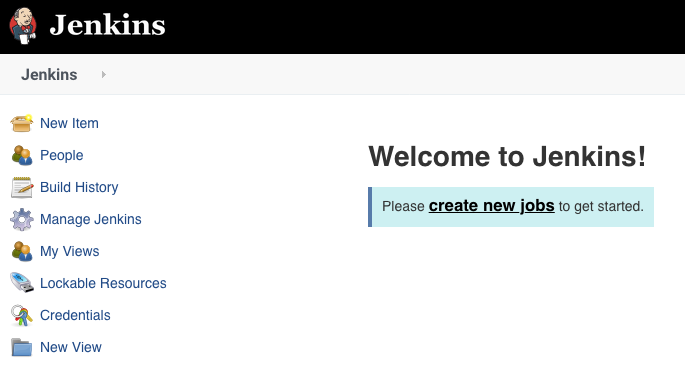
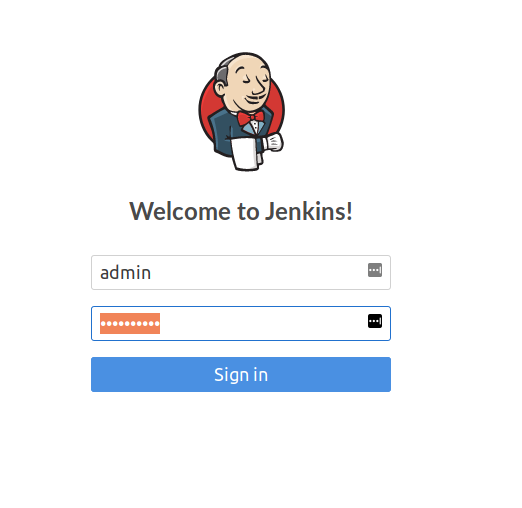
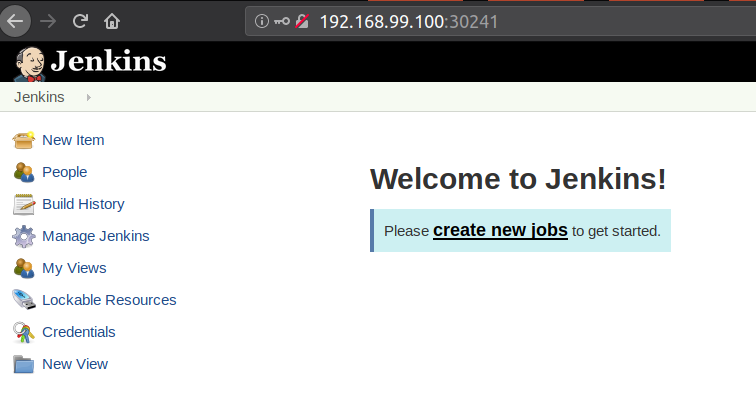
After following the steps to get the admin password and hit the Jenkins URL http://127.0.0.1:8080 in your desktop browser, you should see the familiar “Welcome to Jenkins!” page…
Pause a moment to appreciate that this Jenkins is running in a JVM inside a Docker container on a Kubernetes Pod as a Service in a Namespace in a Kubernetes Instance that’s running inside a Virtual Machine running under a Hypervisor on a host device….
turtles all the way down
there are many things I’ve skipped over here, including looking at storage, auth, security and all the usual considerations but the aim has been to quickly and easily get to this point so we can start developing the pipelines and processes we’re really wanting to focus on.
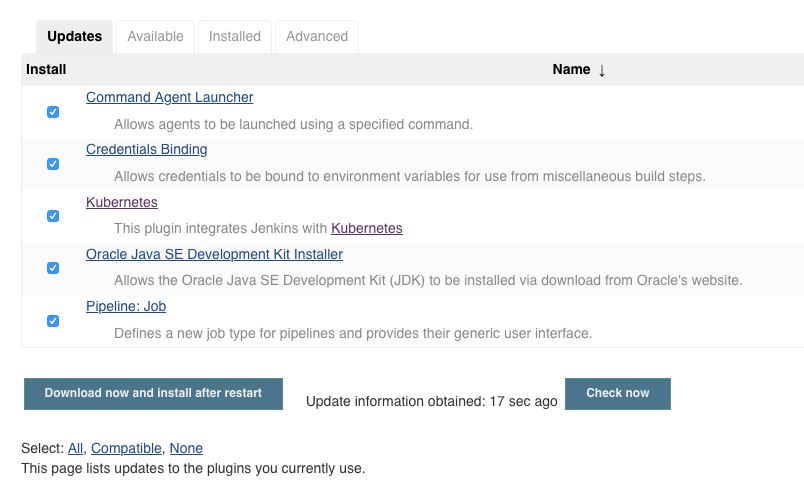
Navigating to Manage Jenkins then Plugins Manager should show some updates already available – this proves we have connectivity to the public Jenkins Update Centre out of the box. The Kubernetes Jenkins plugin is the key thing I’m looking for – select and update if required:
If you go to http://127.0.0.1:8080/configure you should see a link at the foot of the page to the new location for “Clouds”: http://127.0.0.1:8080/configureClouds/ – that should already be configured with sufficient settings for Jenkins to use your Kubernetes cluster, but it’s worthwhile taking a look through the settings and options there. No changes should be required here now though.
Setup a first Jenkins Pipeline job
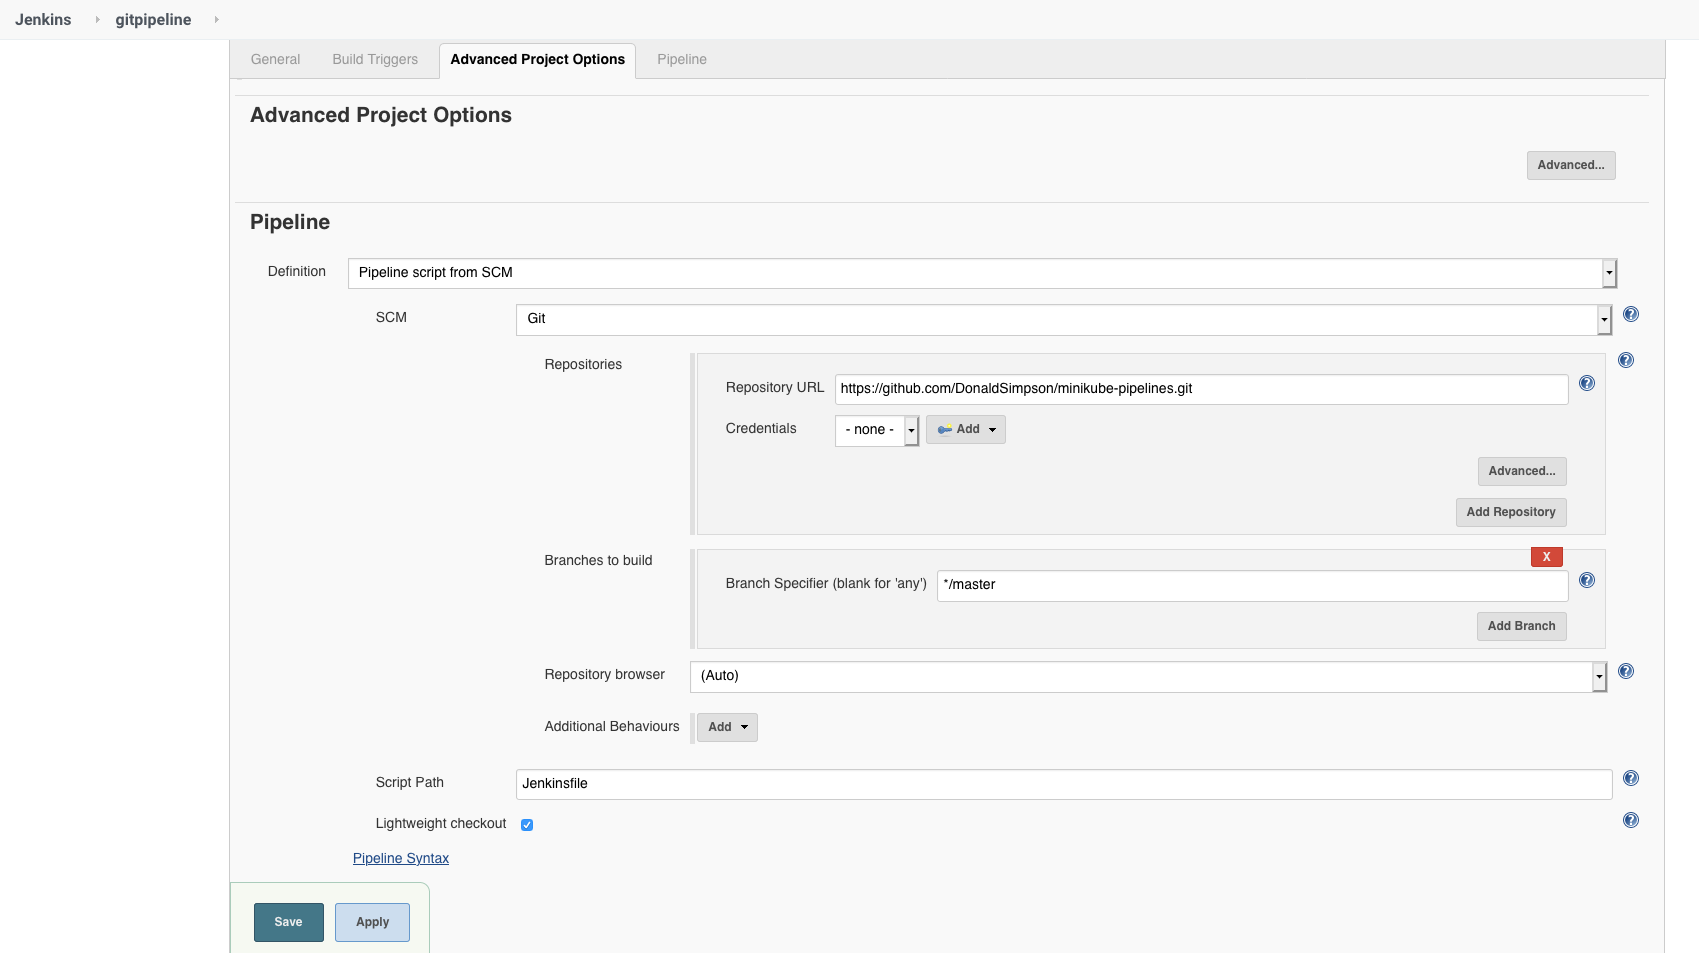
Create a new Jenkins Pipeline job and add the following settings as shown in the picture below…
In the job config page under “Pipeline”, for “Definition” select “Pipeline script from SCM” and enter the URL of this github project which contains my example pipeline code:
This file has been heavily commented to explain every part of the pipeline and shows what each step is doing. Taking a read through it should show you how pipelines work, how Jenkins is creating Docker Containers for the different Stages, and give you some ideas on how you could develop this simple example further.
Run it and take a look at the results
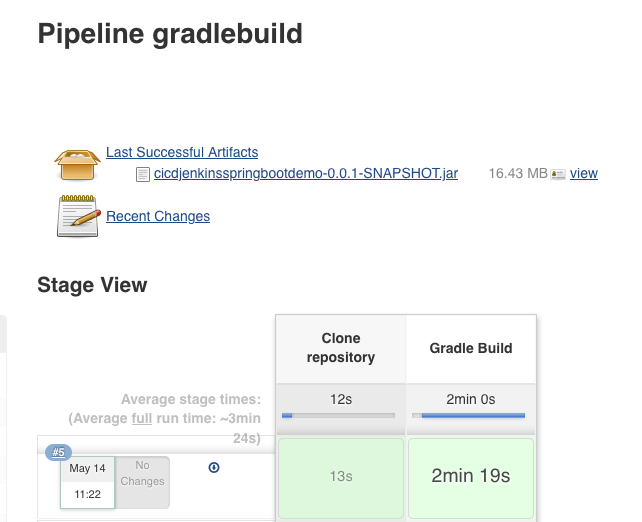
Save and run the job, and you should (eventually) see something like this:
The jobs Console Output will have a ton of info, showing everything from the container images being pulled, the git repo being cloned, the very verbose gradle build output and all the local files.
So in summary, what just happened?
Jenkins connected to Kubernetes via the Kubernetes plugin and its settings
A gradle Docker container was started and connected as a Jenkins JNLP Agent, running as another k8s pod
The gradle build stage was run inside that gradle container, using the source files checked out from git in the previous Stage
The newly built JAR file was archived so we could use it later if wanted
The pipeline ends, and k8s will clean up the containers
This pipeline could easily be expanded to run that new JAR file as an application as demonstrated here: https://github.com/AutomatedIT/springbootjenkinspipelinedemo/blob/master/Jenkinsfile#L5, or, you could build a new Docker image containing this version of the JAR file and start that up and test it and so on. You could also automate this so that whenever the source code is changed a build is triggered that does all of this automatically and records the result… hello CI/CD!
What next?
From the above demo you can hopefully see how easy it is to create an end to end pipeline that will automatically provision Jenkins Agents running on Kubernetes for you.
You can use this functionality to quickly and safely develop pipeline processes like the one we have examined, that run across multiple Agents, using each for a particular function/step in your workflow, leaving the provisioning and housekeeping work to the underlying Kubernetes cluster. With this, you can build or pull docker images, run them, test them, start them up as other Jenkins JNLP Agents and so on, all “as code” and all fully automated.
And after all that… ?
Being able to fire up Docker containers and use them as Jenkins Agents running on a Kubernetes platform is extremely powerful in itself, but you can go a step further and start using this setup to build, deploy and manage Kubernetes resources directly, too – from Jenkins Pipelines running on the same Kubernetes Cluster – or even from one Kubernetes to another.
We’ve seen during setup that we can use kubectl to manage the k8s cluster and its components – we can also do that from within containers and stages in our pipelines, wherever they are.
and contains an example pipeline and supporting files to build, lint, security scan, push to registry, deploy to Kubernetes, run, test and clean up the example “doncoin” application via a Jenkins pipeline running on Kubernetes.
It also includes outlines and suggestions for expanding things even further, in to a more mature and production-ready setup, introducing things like Jenkins shared libraries, linting and testing, automating vulnerability scanning within the pipeline, and so on.
Helm and Tiller – what they are, when & why you’d maybe use them
Helm and Tiller – prep, install and Helm Charts
Deploying Jenkins via Helm Charts
and WordPress w/MariaDB too
Wrap up
The below are mostly my technical notes from this session, with some added blurb/explanation.
Helm and Tiller – what they are, when & why you’d maybe use them
From the Helm site:
“Helm helps you manage Kubernetes applications — Helm Charts help you define, install, and upgrade even the most complex Kubernetes application. Charts are easy to create, version, share, and publish — so start using Helm and stop the copy-and-paste.”
Helm is basically a package manager for Kubernetes applications. You can choose from a large list of Stable (or not so!) ready made packages and use the Helm Charts to quickly and easily deploy them to your own Kubernetes Cluster.
This makes light work of some very complex deployment tasks, and it’s also possible to extend these ready-made charts to suit your needs, and to write your own Charts from scratch, or pass your own values to override default ones, or… many other interesting options!
For this session we are looking at installing Helm, reviewing some example Helm Charts and deploying a few “vanilla” ones to the cluster we created in the first half of the session. We also touch upon the life-cycle of Helm Charts – it’s similar to dockers – and point out some of the ways this could be extended and customised to suit your needs – more on this at a later date hopefully.
Helm and Tiller – prep, install and Helm Charts
First, installing Helm – it’s as easy as this, run on your laptop/host that’s running the Minikube k8s we setup earlier:
Tiller is the client part of Helm and is deployed inside your k8s cluster. It’s set to be removed with the release of Helm 3, but the basic functionality wont really change. More details here https://helm.sh/blog/helm-3-preview-pt1/
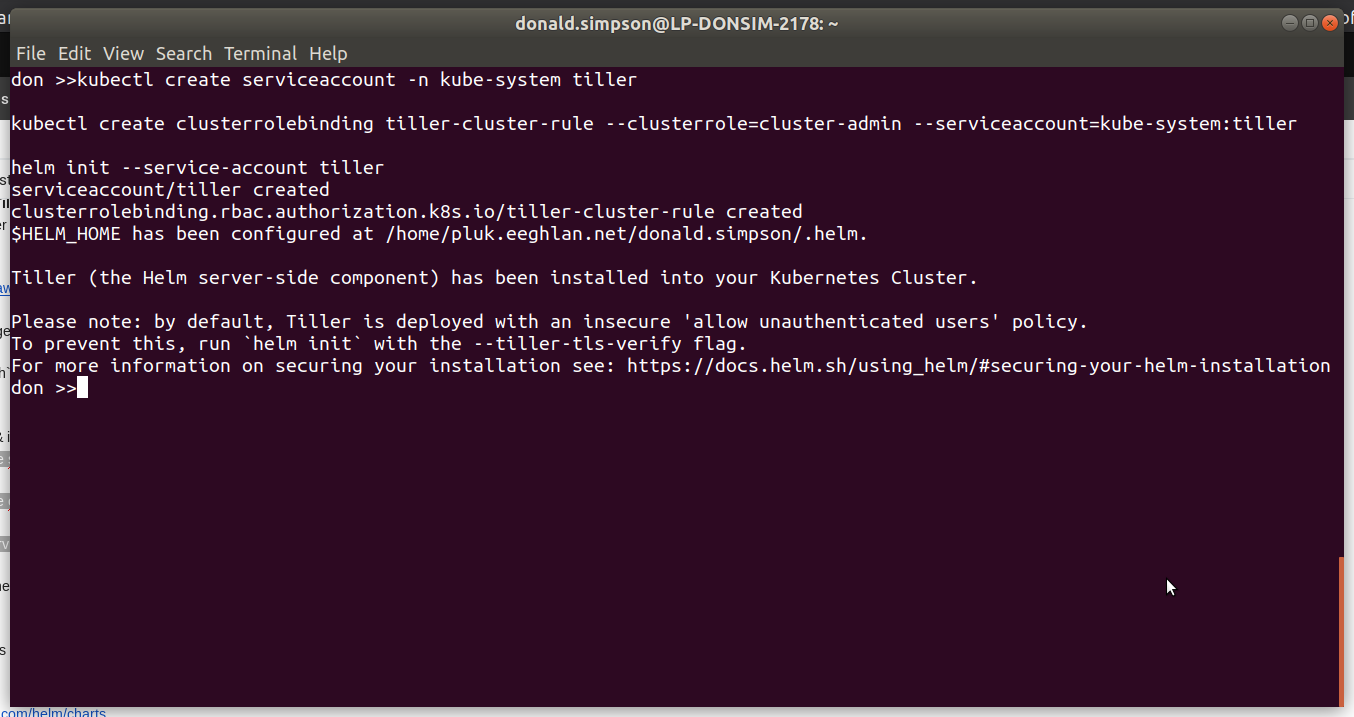
Next we do the Tiller prep & install – add RBAC for tiller, deploy via helm and take a look at the running pods:
now get the URL for the Jenkins service from Minikube:
minikube service --url=true jenki-jenkins
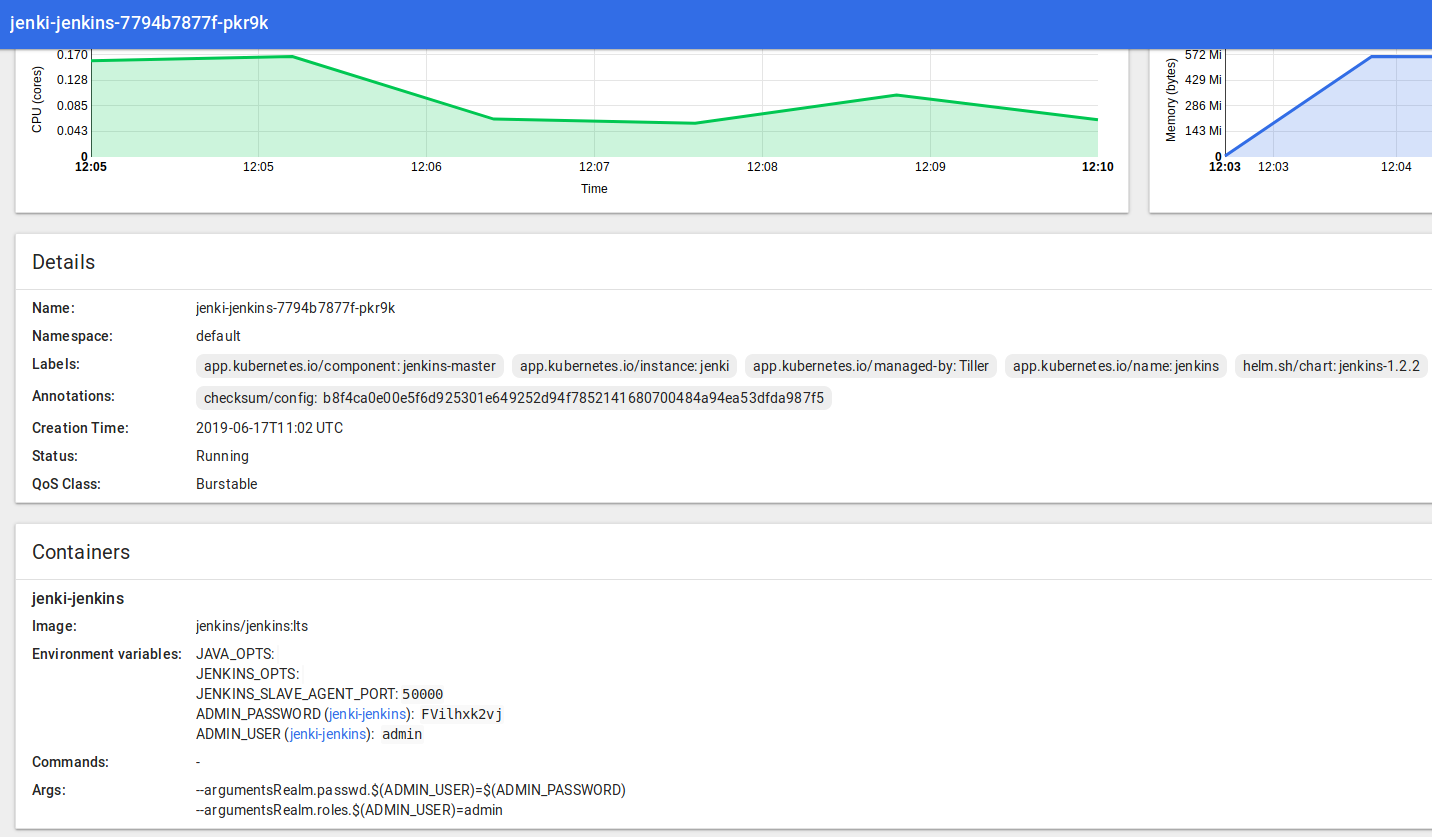
Hit that URL in your browser, and grab the password in UI from Pods > Jenki and log in to Jenkins with the user “admin”:
That’s a Jenkins instance deployed via Helm and Tiller and a Helm Chart to our Kubernetes Cluster running inside Minikube via a VirtualBox VM… all done in a few minutes. And it’s all customisable, repeatable, highly scaleable and awesome.
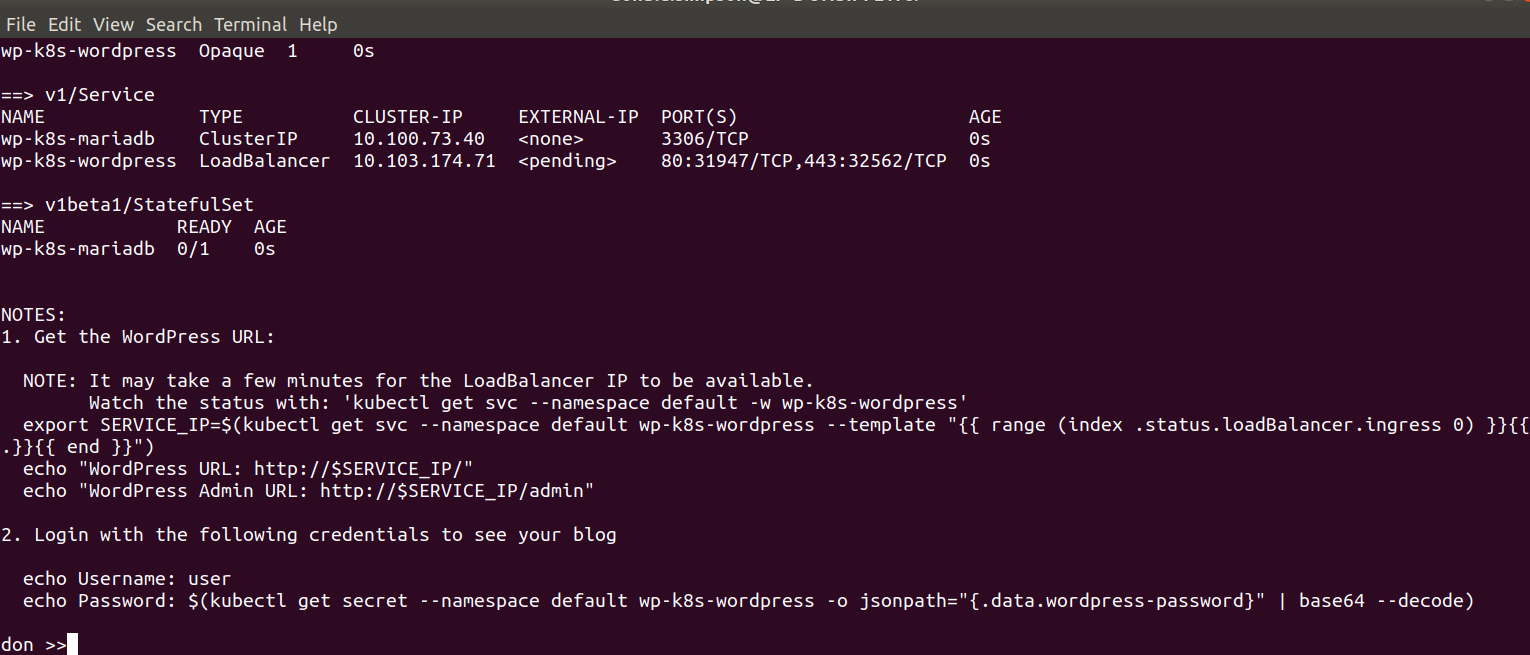
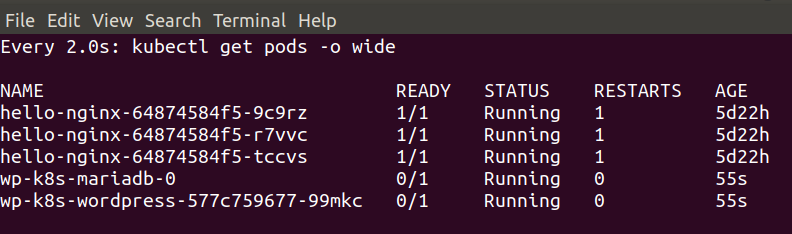
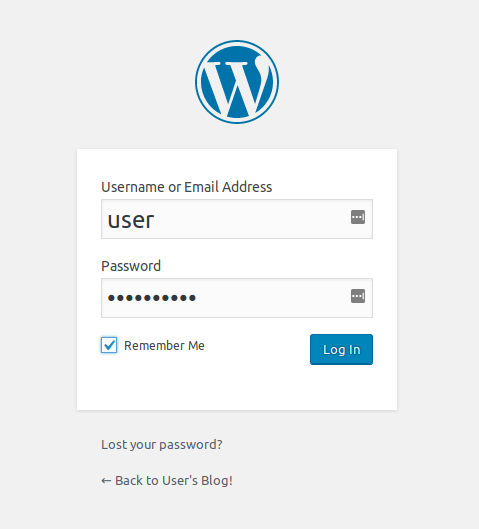
and WordPress w/MariaDB too
This was the “bonus demo” if my laptop wasn’t on fire – and thanks to some rapid cleaning up it managed fine – showing how quickly we could deploy a functional WordPress with MariaDB backend to our k8s cluster using the Helm Chart.
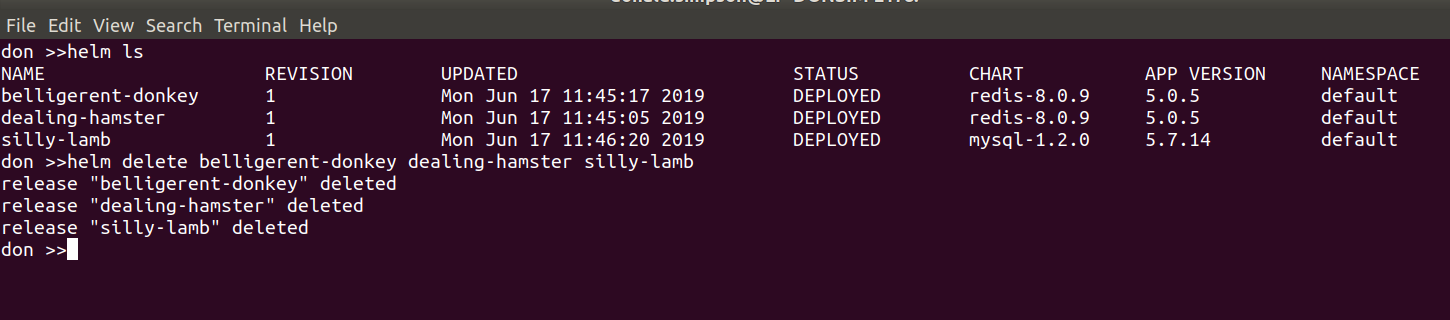
To prepare for this I did a helm ls to see all the things I had running. then helm delete --purge jenki, gave it a while to recover then had to do
kubectl delete pods <jenkinpod>
before starting the WordPress Chart deployment with
That’s it – we covered a lot in this session, and plan to use this as a platform to explore Helm in more detail later, writing our own Helm Charts and providing our own customisations to them.
Update: this follow-on post runs through setting up Jenkins with Helm then creating Jenkins Pipelines that dynamically provision dockerised Jenkins Agents:
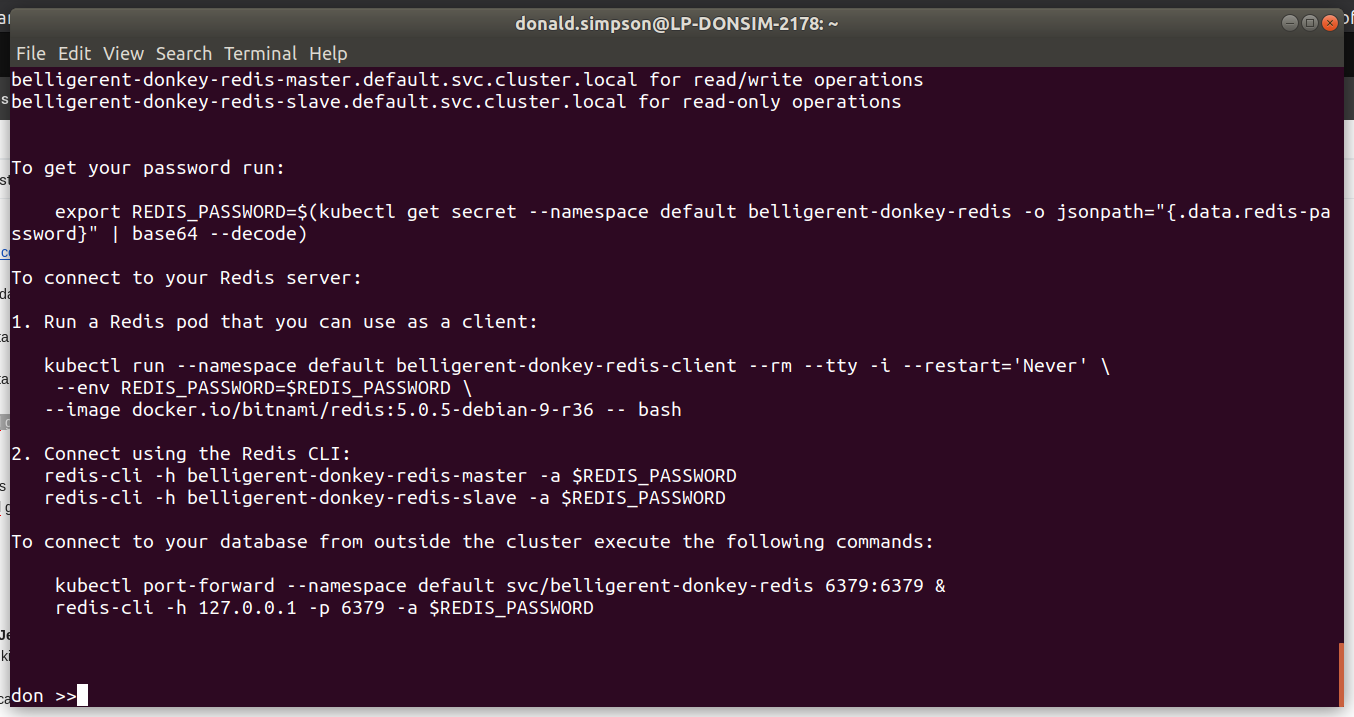
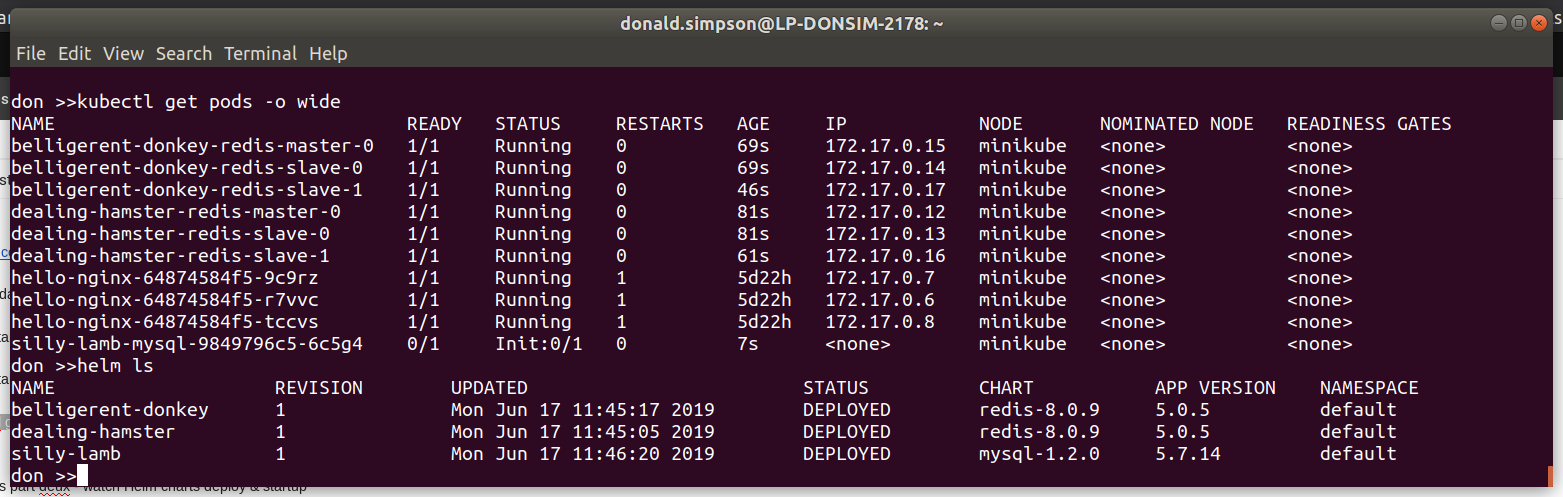
This is the first of two posts on Kubernetes and HelmCharts, focusing on setting up a local development environment for Kubernetes using Minikube, then exploring Helm for package management and quickly and easily deploying several applications to the cluster – NGINX, Jenkins, WordPress with a MariaDB backend, MySQL and Redis.
The content is taken from the practical/demo session I wrote and published in Github here:
One of the key objectives and challenges here was getting a useful local Kubernetes environment up and running as quickly and easily as possible for as wide an audience as we could- there’s so much to the Kubernetes ecosystem that it’s very easy to get side-tracked, and we could have (happily) spent a long time discussing the myriad of alternative possible solutions.
We plan to go “deeper” on all of this in future sessions and have an in-depth Helm session in the works, but for this session we were focused on creating a practical starting point.
</ramble>
Don
What is covered here:
Minikube – what it is (& isn’t) & why you’d use it (or not)
Kubernetes and Minikube components and concepts
setup for Mac and Linux
creating a first Kubernetes cluster in Minikube
minikube addons – what they are and how they can help you
minikube docker env – using DOCKER_HOST with minikube VM
Kubernetes dashboard with Heapster and Metrics Server – made easy by Minikube
kubectl – some examples and alternatives
example app – “hello (Kubernetes) world” minikube style with NGINX, scaling your world
Helm and Tiller – what they are, when & why you’d maybe use them
Helm and Tiller – prep, install and Helm Charts
Deploying Jenkins via Helm Charts
and WordPress w/MariaDB too
wrap up
Minikube – what it is (& isn’t) & why you’d use it (or not)
What it is, why you’d use it etc.
Local development of k8s – runs a single node Kubernetes cluster in a Virtual Machine on your laptop/PC.
All about making things easy for local development, it is not a production solution, or even close to it.
There are many other ways to run k8s, they all have their pros and cons and use cases. The slides from the Meetup covered this in more detail and include links for further info – they are available here:
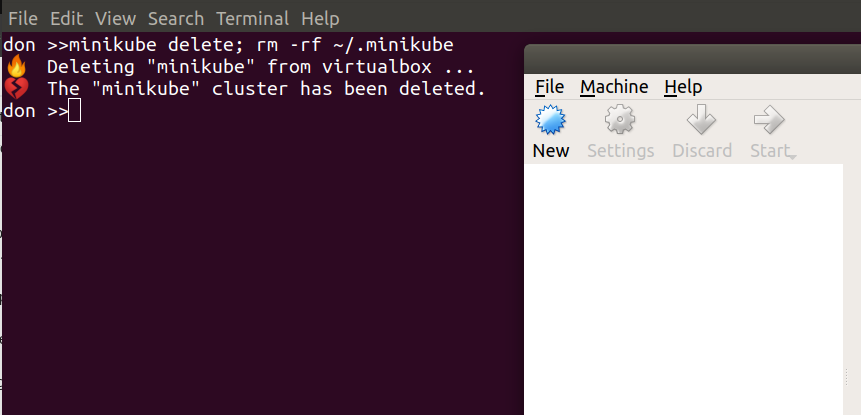
Cleanup/prep – if required, remove any previous cluster & settings
`minikube delete; rm -rf ~/.minikube`
Creating a first Kubernetes cluster in Minikube
Here we create a first Kubernetes cluster with Minikube, then take a look around in & outside of the VM.
With the above initial setup done, it’s as simple as running this in a shell:
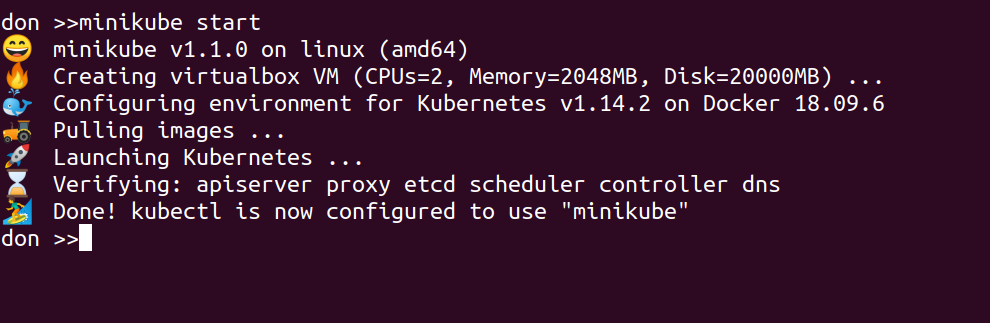
minikube start
Note you could optionally give this Cluster a name, if you are likely to have more than one for different branches of development for example. This is also where you could specify the VM provider if you want to use something other than VirtualBox – there are more details here:
This should produce output like the following, and it may well take a few minutes as the VM is downloaded and started, then a stack of Docker images are started up inside that….
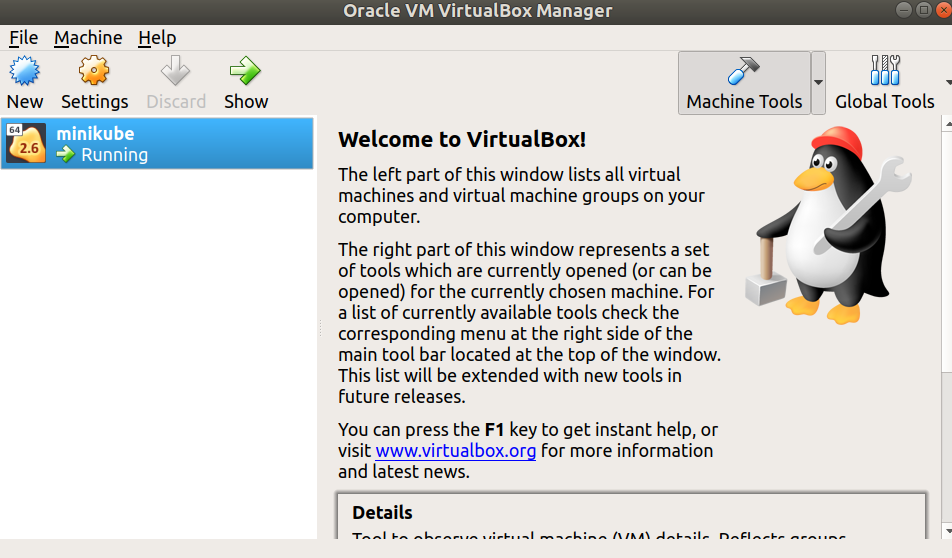
At this point you should be able to see the minikube VM running in the VirtualBox GUI:
Now it’s running, we can connect from our local shell directly to the one inside the running VM by simply issuing:
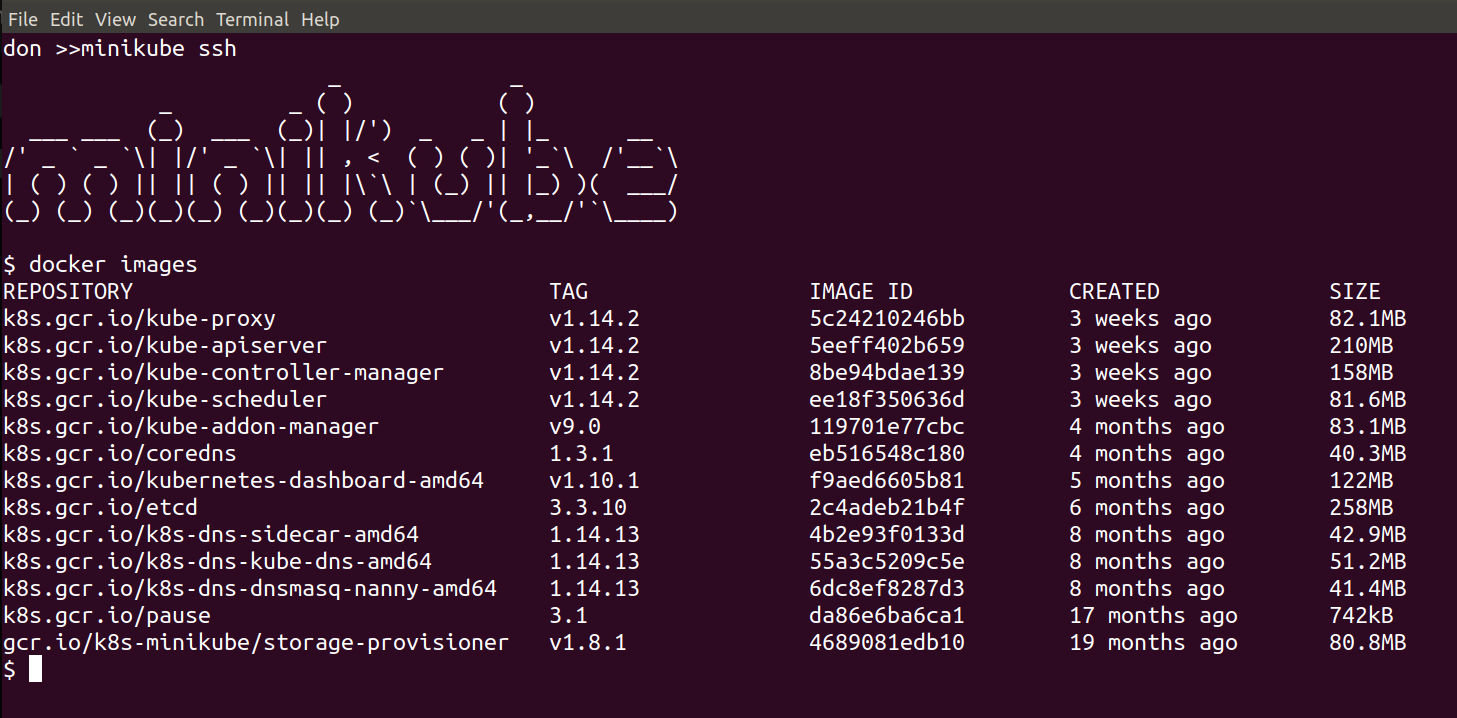
minikube ssh
This will put you inside the VM where the Kubernetes Cluster is being run, and we can see and interact with the running components, for example:
docker images
should show all of the downloaded images:
and you could do this to see the running containers:
docker ps
Quitting out of the VM puts us back on the local host, where we can use kubectl to query the status of the Minikube cluster – the initial setup has told kubectl about the Minikube-managed Kubernetes Cluster, meaning there’s no other setup required here:
kubectl cluster-info
kubectl get nodes
kubectl describe nodes
minikube addons – what they are and how they can help you
Show some of the ways minkube makes things easier for local dev
First, take a moment to look around these two local folders:
ls -al ~/.minikube; ls -al ~/.kube
These are where Minikube keeps its settings and the VM Image, and where kubectl settings are persisted – and updated by Minikube.
With Minikube you’ve often got the option to either use kubectl directly, or to use some Minikube built-in features to make your life easier.
Addons are one of these features, allowing you to very easily add – or remove – functionality from the cluster like this:
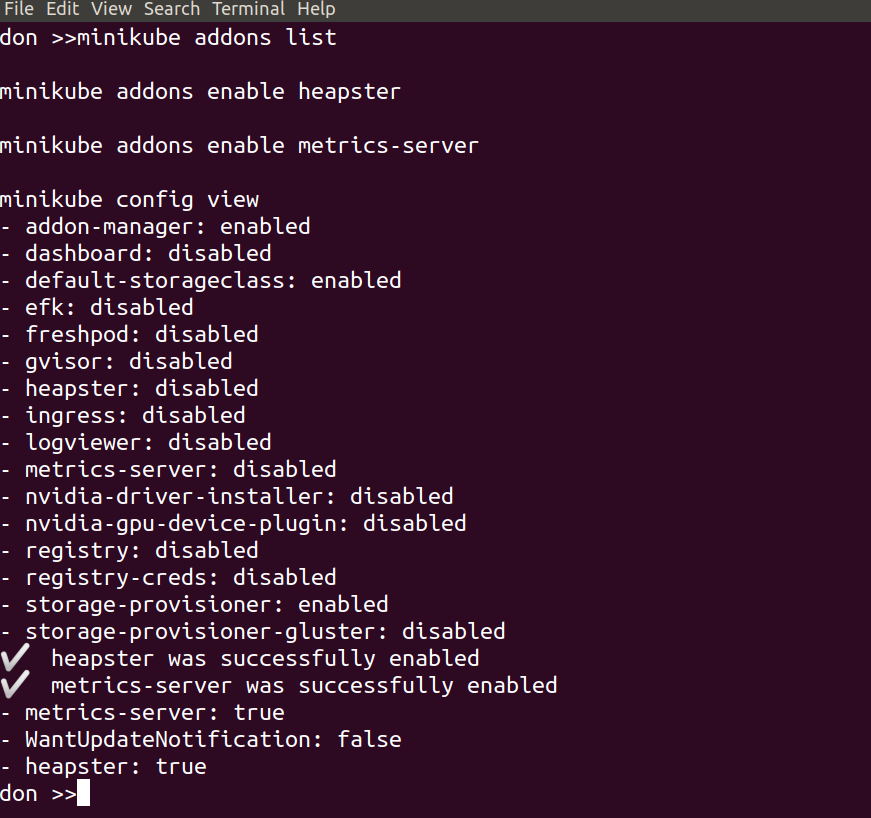
minikube addons list
minikube addons enable heapster
minikube addons enable metrics-server
With those three lines we’ve taken a look at the available addons and their current status, and selected to enable both heapster and the metrics server. This was done to give us cpu and mem stats in the Kubernetes Dashboard, which we will set up in a moment. The output should look something like this:
minikube config view
shows the current state of the config – i.e. what changes have been made, so we can keep a track of them easily.
kubectl --namespace kube-system get pods
now we can enable the dashboard:
minikube addons enable dashboard
and check again to see the current state
minikube addons list
we’ll connect to the Dashboard and take a look around in a moment, but first…
minikube docker env – using the DOCKER_HOST in you minikube VM – how & why
Minikube docker-env – setup local docker client to use minikube docker host
We’re going to look at connecting our local docker client to the docker host inside the Minikube VM. This is made easy by:
minikube docker-env
if you run that command on its own it wiull show you what settings it will export and you can set them by doing:
eval ${minikube docker-env}
From then on, in that shell, your local docker commands will use the docker host inside Minikube.
This is very useful for debugging and local development – when you change and deploy anything to your Kubernetes Cluster, you can easily tail the logs or check for errors or issues. You can also do all of this via the dashboard or kubectl too if you prefer, but it’s another handy and powerful feature from Minikube.
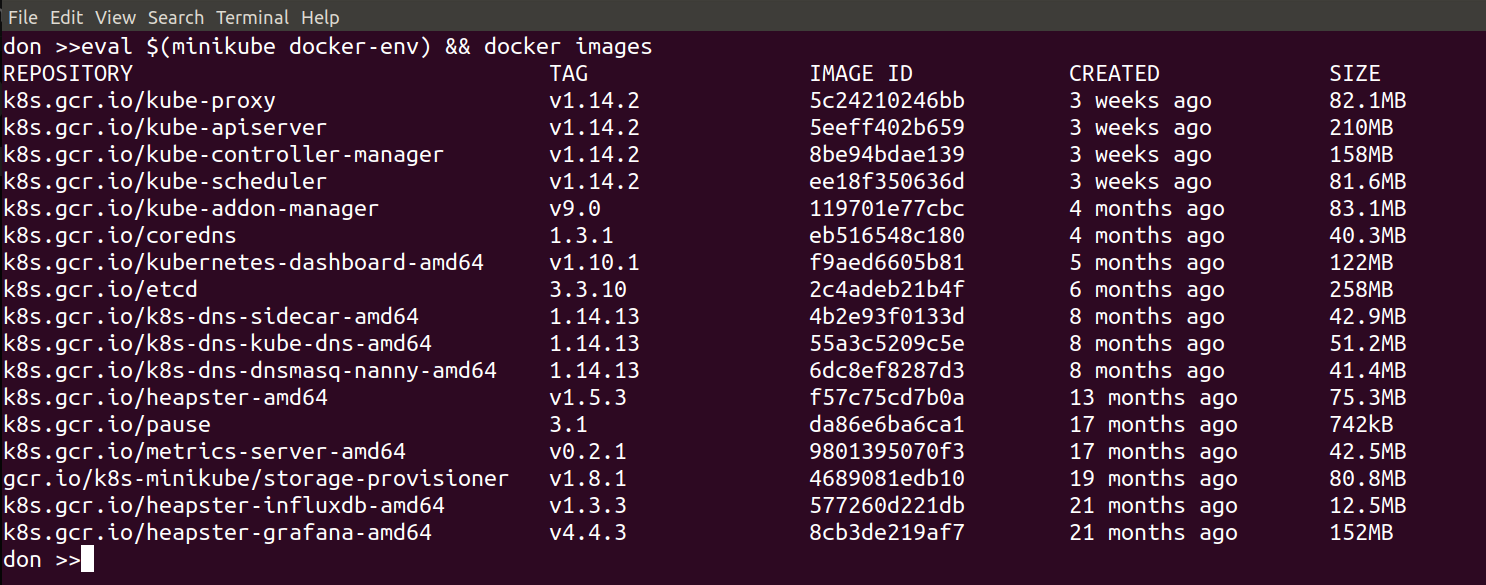
The following image shows the result of running this command:
so we can now use our local docker client to run docker commands like…
docker ps
docker ps | grep -i metrics
docker logs -f <some container id>
etc.
Kubernetes dashboard with Heapster and Metrics Server – made easy by Minikube
Minikube k8s dashboard – here we will start up the k8s dashboard and take look around.
We’ve delayed starting the dashboard up until after we enabled the metrics-server & heapster components we deployed earlier. By doing it in this order, the dashboard will automatically detect and use these components, giving us cpu & mem stats and a nicer looking dash, with no additional config required.
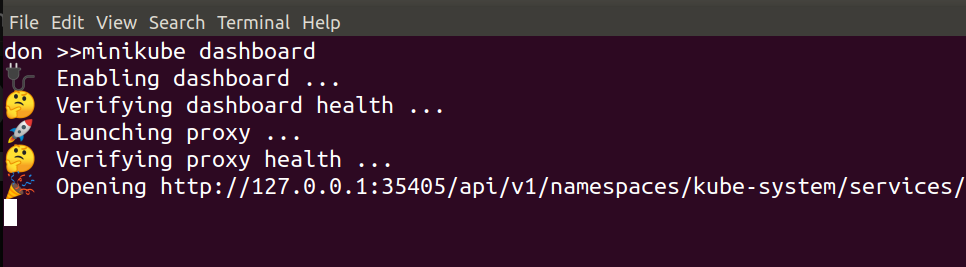
Starting the dashboard simply involved running
minikube dashboard
and waiting for a minute…
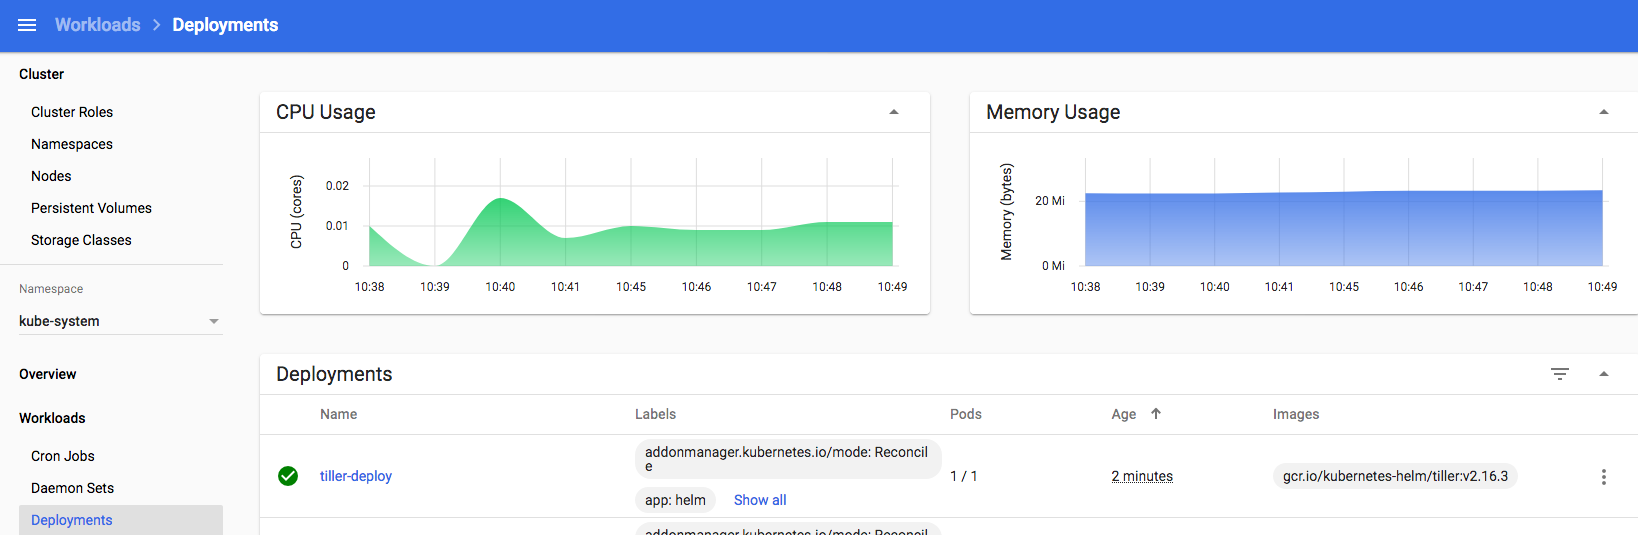
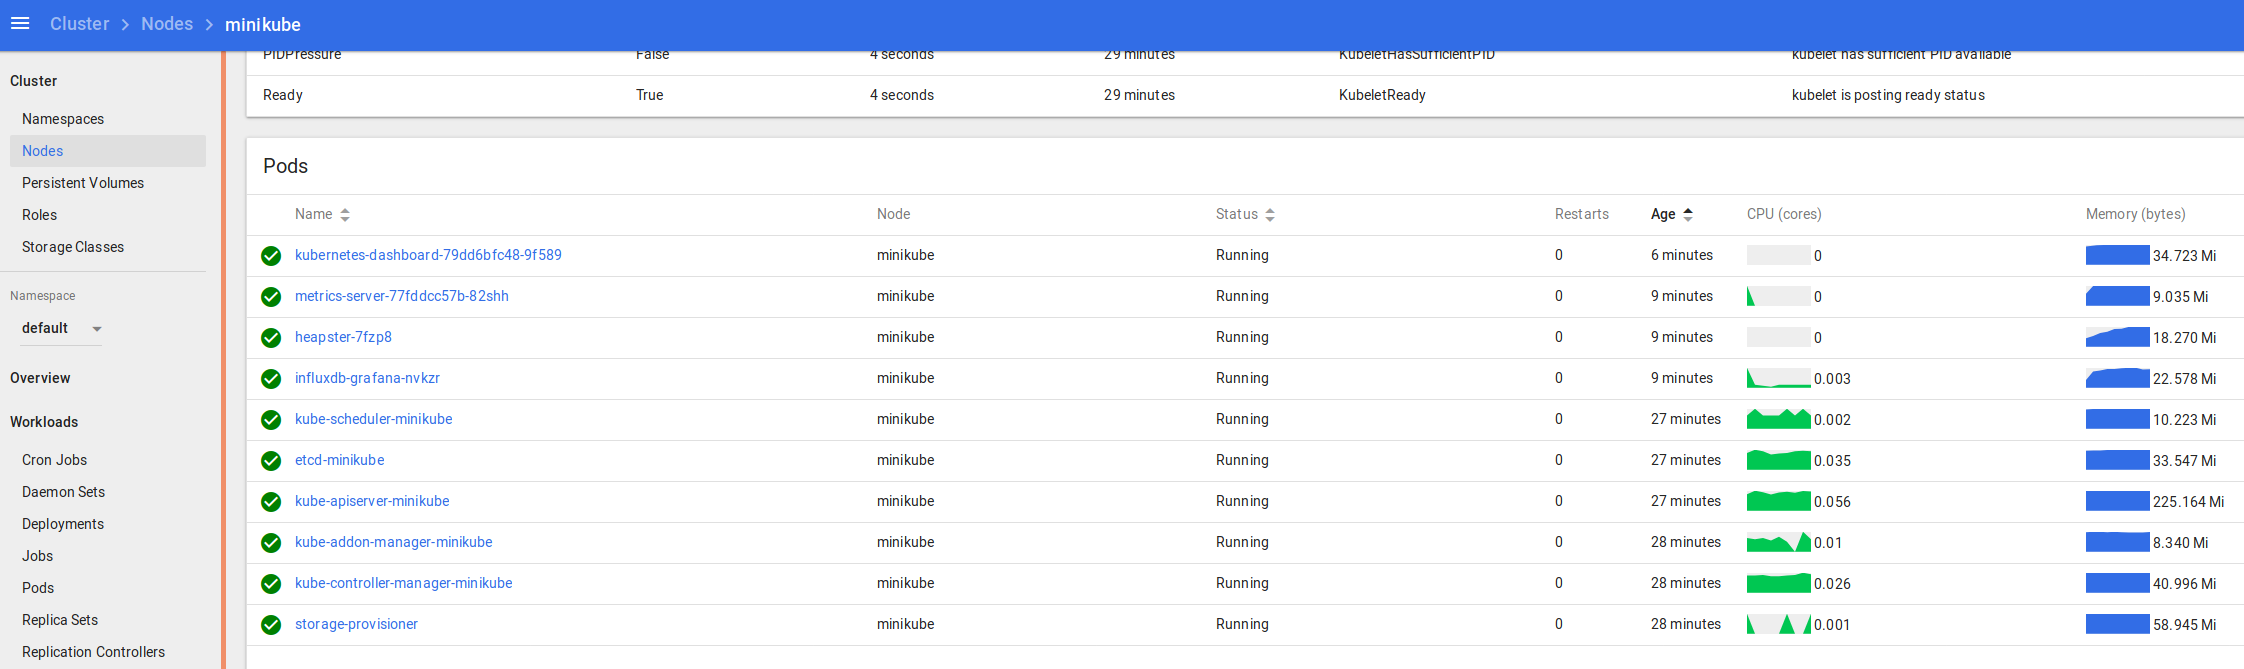
That should fire up your browser automatically, then you can take a look around at things like Default namespace > Nodes
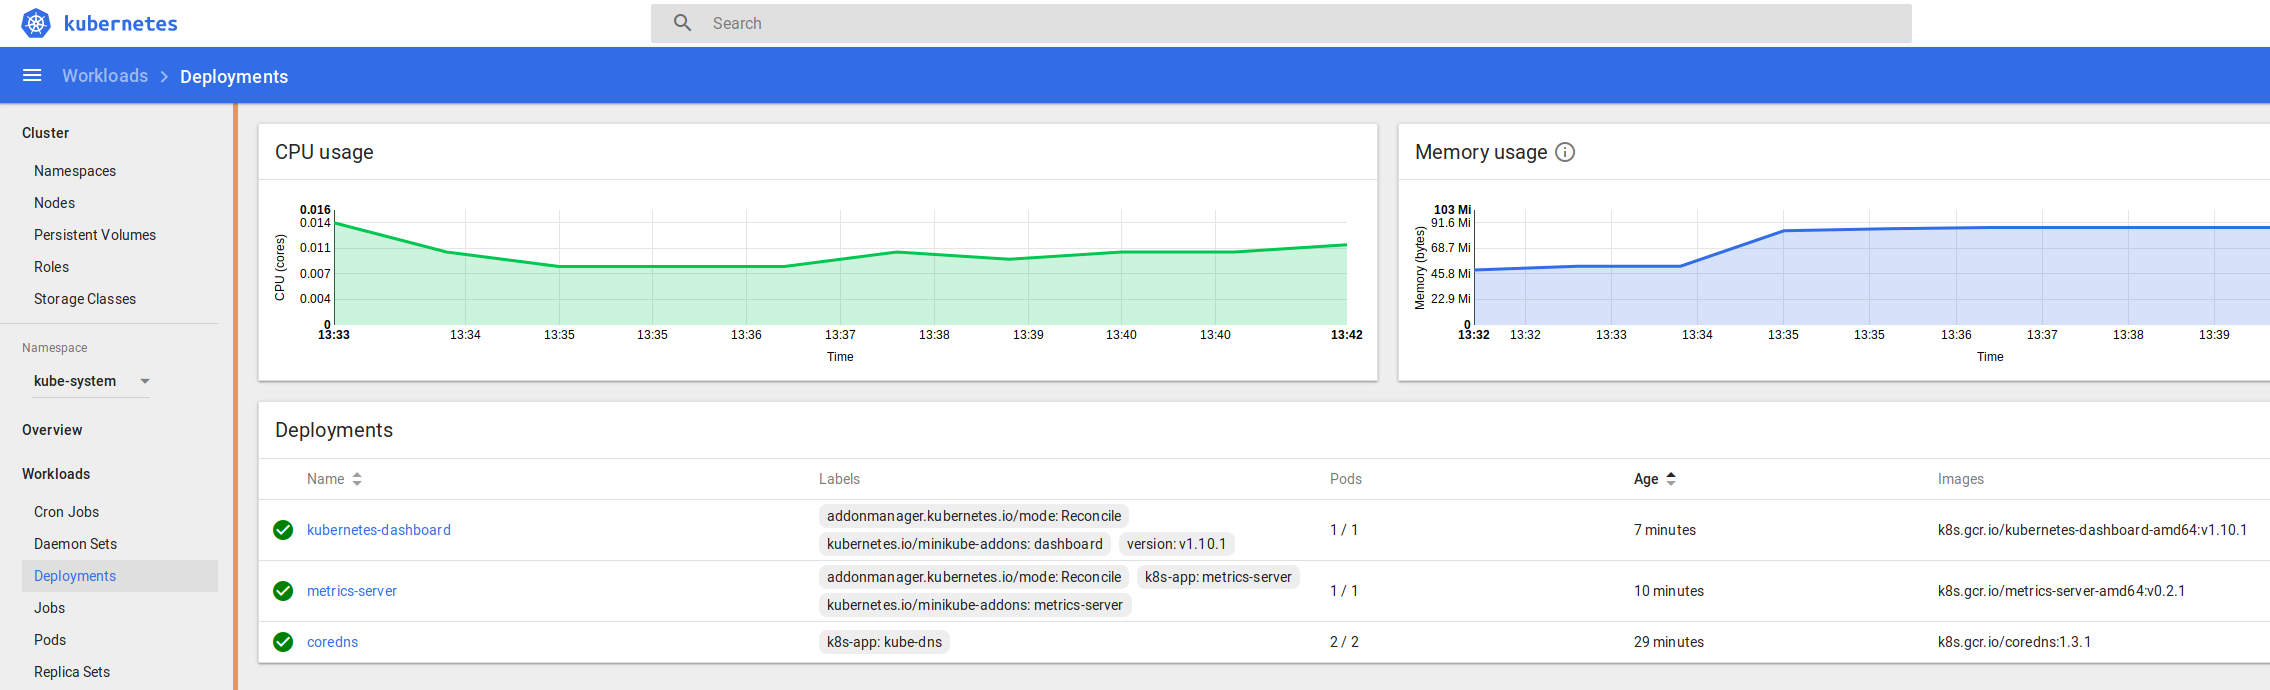
and in the namespace kube-system > Deployments
and kube-system > Pods
You can see the logs and statuses of everything running in your k8s cluster – from the core components we covered at the start, to the dashboard, metrics and heapster we enabled recently, and the application we’re going to deploy and scale up soon.
kubectl – some examples and alternatives
# kubectl command line – look at kubectl and keep an eye on things kubectl get deployment -n kube-system
kubectl get pods -o wide -n kube-system
kubectl get services
kubectl
example app – “hello (Kubernetes) world” minikube style with NGINX, scaling your world
Now we’ll deploy the most basic application we can – a “Hello World” style NGINX docker image.
It’s as simple as this, where nginx is the name of the docker image you want to deploy, hello-nginx is the label you want to give it, and port 80 is where you want it to listen:
kubectl run hello-nginx --image=nginx --port=80
that shouldn’t take long, and you can watch the progress like this:
We are presenting a Kubernetes-related Meetup on Wednesday 5th June in Edinburgh.
This time we explore setting up a local development environment for Kubernetes using Minikube and Helm Charts. We will deploy NGINX to the Cluster and scaled it up and down, then use Helm Charts to deploy Jenkins, WordPress and MariaDB.
if you’d like to join in please book a space via our Meetup (below) – it’s free, and the Peoples Postcode Lottery are kindly hosting the event and providing the beer and pizza too! Wednesday 5th June 2019 from 6:30 PM in the Peoples Postcode Lottery offices at 28 Charlotte Square in Edinburgh.
Kubernetes – getting started with Minikube, Helm and Tiller
Wednesday, Jun 5, 2019, 6:30 PM
Wemyss House 28 Charlotte Square Edinburgh, GB
38 Members Went
In collaboration with Hays and the People’s Postcode Lottery, Automated IT Solutions are running a Meetup on Kubernetes with Minikube, Helm and Tiller. The session starts off with an overview of the main Kubernetes concepts and components, then runs through building your own local Kubernetes Cluster with Minikube. After deploying and scaling our fi…
I have been planning this session for ages, and hope that it will become the basis for several future talks and ideas, including deploying Blockchain to a Kubernetes cluster, then adding a Ruby and Sinatra based application that will use it.
Deploying Openshift to AWS with HashiCorp Terraform and Ansible
Tuesday, Oct 16, 2018, 6:15 PM
HAYS 7 Castle St, Edinburgh EH2 3AH Edinburgh, GB
30 Members Went
In this session we look at Infrastructure as Code and Configuration as Code, as we demonstrate how to use these approaches to deploy RedHat OpenShift to AWS with HashiCorp Terraform and Ansible. We start off with configuring AWS credentials, then use HashiCorp Terraform to create the AWS infrastructure needed to deploy and run our own RedHat OpenSh…
Hays office on the 2nd floor
7 Castle St, Edinburgh EH2 3AH · Edinburgh
What:
Deploying Openshift to AWS with HashiCorp Terraform and Ansible
Agenda:
In this session we look at Infrastructure as Code and Configuration as Code, as we demonstrate how to use these approaches to deploy RedHat OpenShift to AWS with HashiCorp Terraform and Ansible.
We start off with configuring AWS credentials, then use HashiCorp Terraform to create the AWS infrastructure needed to deploy and run our own RedHat OpenShift cluster.
We then go through using Ansible to deploy OpenShift to AWS, followed by a review of the Cluster, then take a quick look at troubleshooting any issues you may encounter.
There will be a break in the middle for beer & pizza courtesy of Hays, and we will wrap things up with a quick Q&A and feedback session.
If you would like to bring your own laptop and follow along, please do!
Who:
Intermediate Linux and some AWS knowledge is useful but not essential.
Automated IT Solutions are running a new Meetup in Edinburgh on Friday 18th May, check out the details and register for this free session here – beer, pizza and free HashiCorp stickers included!:
Vagrant from scratch to LAMP stack
Friday, May 18, 2018, 6:15 PM
HAYS 7 Castle St, Edinburgh EH2 3AH Edinburgh, GB
18 Members Attending
Automated IT Solutions are presenting a session on HashiCorp Vagrant: “from scratch to LAMP stack” by Adam Cheney. In this session you will learn: – Vagrant basics, introduction and usage – How to install and configure Vagrant – Provisioning VMs with Vagrant and Ansible followed by a live demonstration/workshop of building a LAMP stack within Vagra…