Here are some pics and updates on my recent attempts at milling my own wood. This had been on my wood-related TODO list for a long time. The aim was to free up some room in my woodpile by creating planks that I can then try and make things out of – and to have some fun doing so.
All of the wood is local beech, I’m using up old trunks first but plan to do some green milling later, including milling another fallen tree with a nice straight trunk “in situ” then bringing the planks home to dry.
Tools & Setup
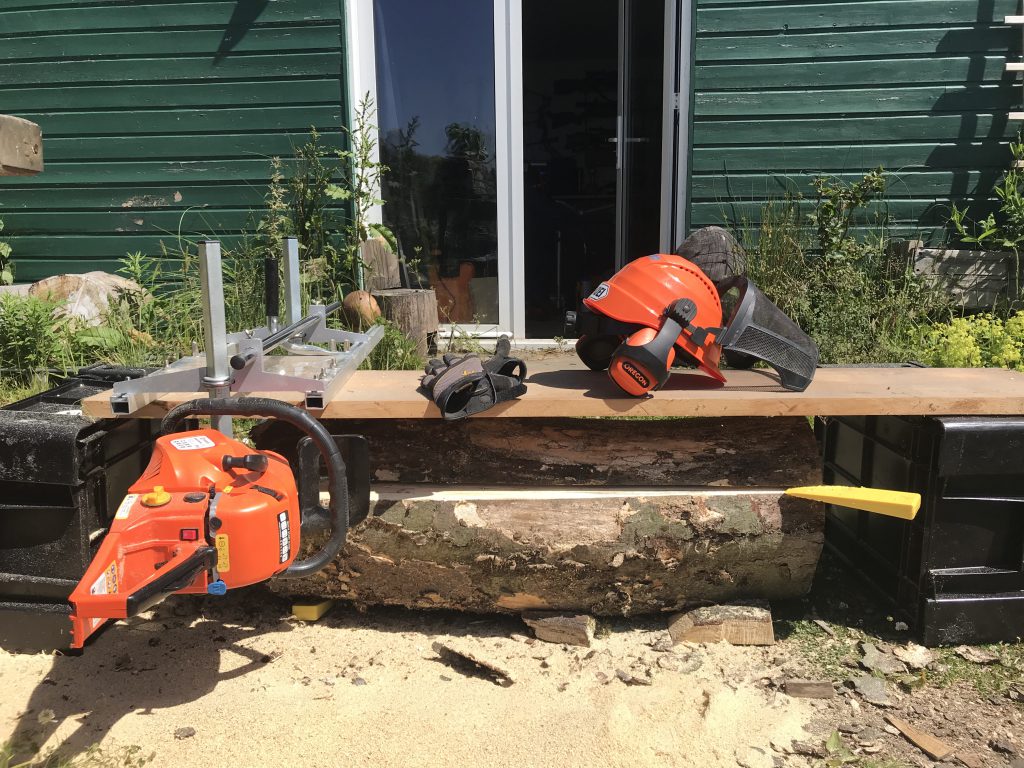
Chainsaw: you need a powerful chainsaw for milling, especially if you want to run a long enough bar to mill wider trunks, which I hope to do later. I really really wanted a large Husqvarna or Stihl but the cost for something of the right spec for this job was waaaay over my budget.
Searching for >60cc chainsaws I found this one by Parker:
£80-odd quid for a 62cc Chinese chainsaw with 2 year guarantee and some extras bits ‘n pieces!?! Sounds far too good to be true, but further reading led me to reviews of similar cheap gear being used, mostly with good results, and folk referring to it as Chinese Milling, or “Chilling” 🙂
Bar & Chain: the 20″ bar that came with the Parker was ok but too small and the chains were cross-cut. I ordered a 28″ bar and Archer ripping chain from these guys – very happy with the parts and the service:
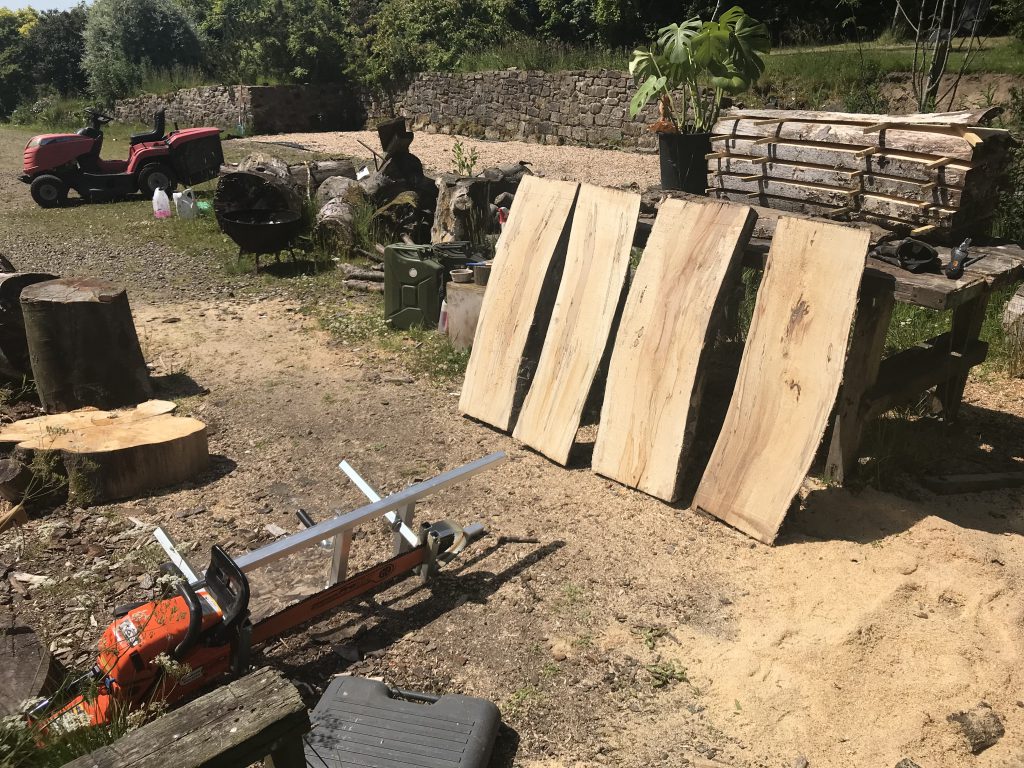
Pics of the end result – cheapo Chinese saw, 28″ bar, ripping chain and EcoMill together:
First attempt
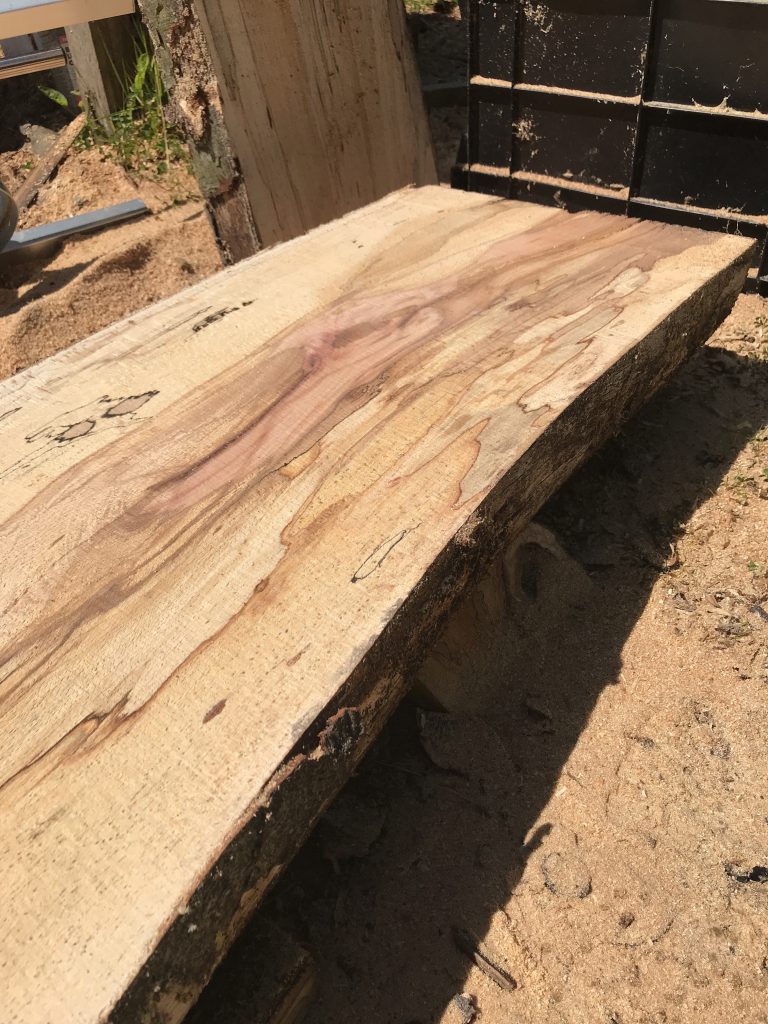
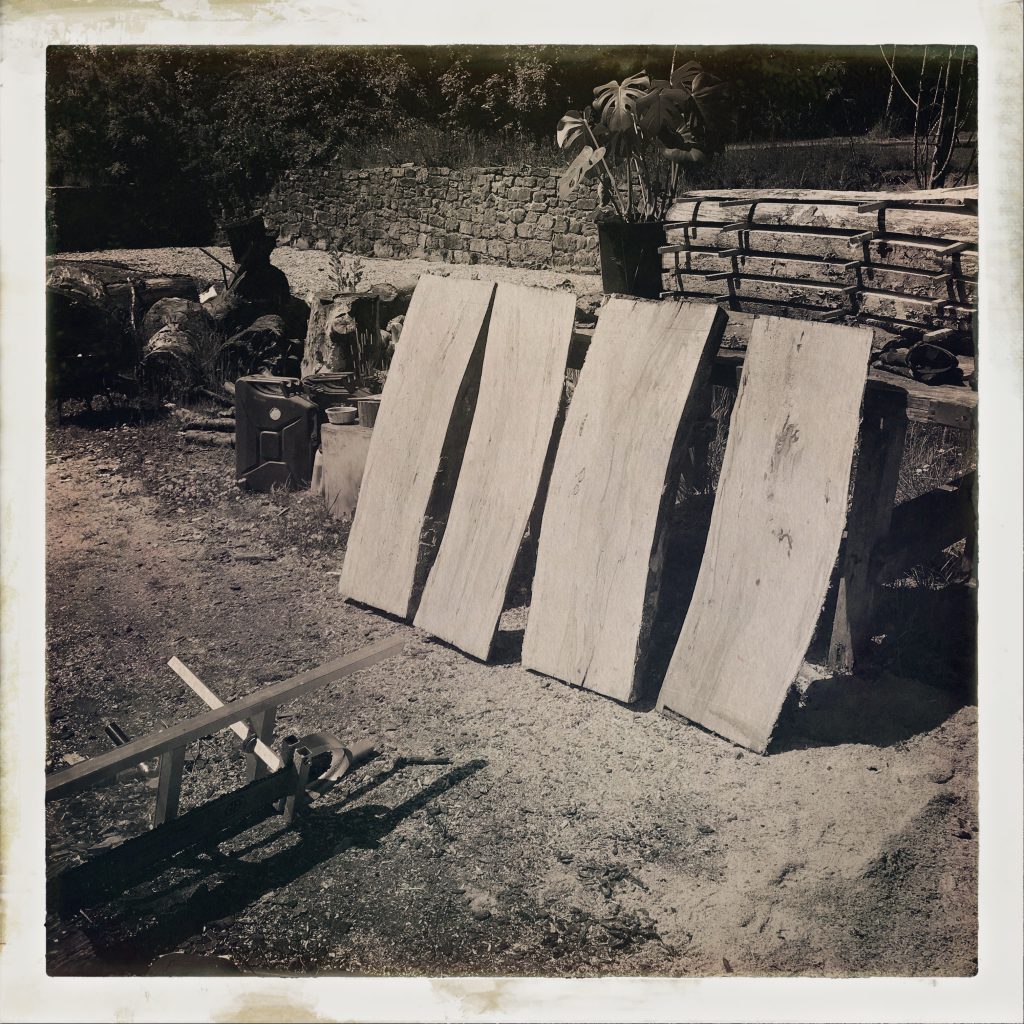
The first cut is not only the deepest, but the most important and most difficult too – I tried the old approach of screwing a straight plank to the top of the log, then running the saw/mill over this to give me a flat initial cut.
It went ok, but I think the log rolled a little towards the end – it was only small so easy done. This means that all subsequent cuts follow the same slight curve – the planks are still ok, but a lesson learned. These planks are narrow enough to run through my planer/thicknesser later anyway.
The waste/kerf from the ripping chain is noticeably smaller (narrower) and much finer than with a cross-cut chain. The saw runs surprisingly well and starts really easily. It makes a fair bit of noise but for the money it’s superb. I didn’t try to rush or force the cut, pretty much let the chain pull itself through, and I am very happy with the results.
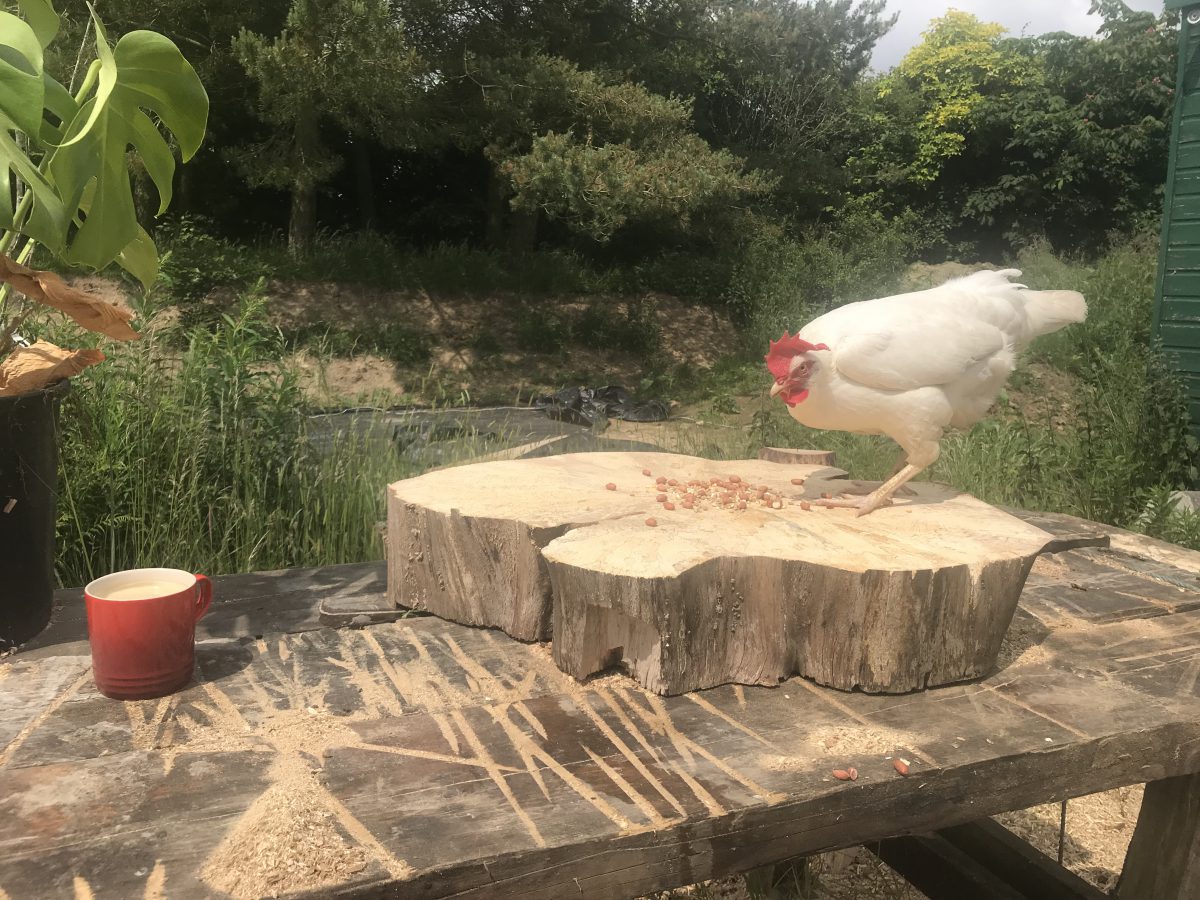
Pics of the first small-scale test – the chicken was grudgingly impressed.
“Not too bad… for a first attempt.”
Second attempt
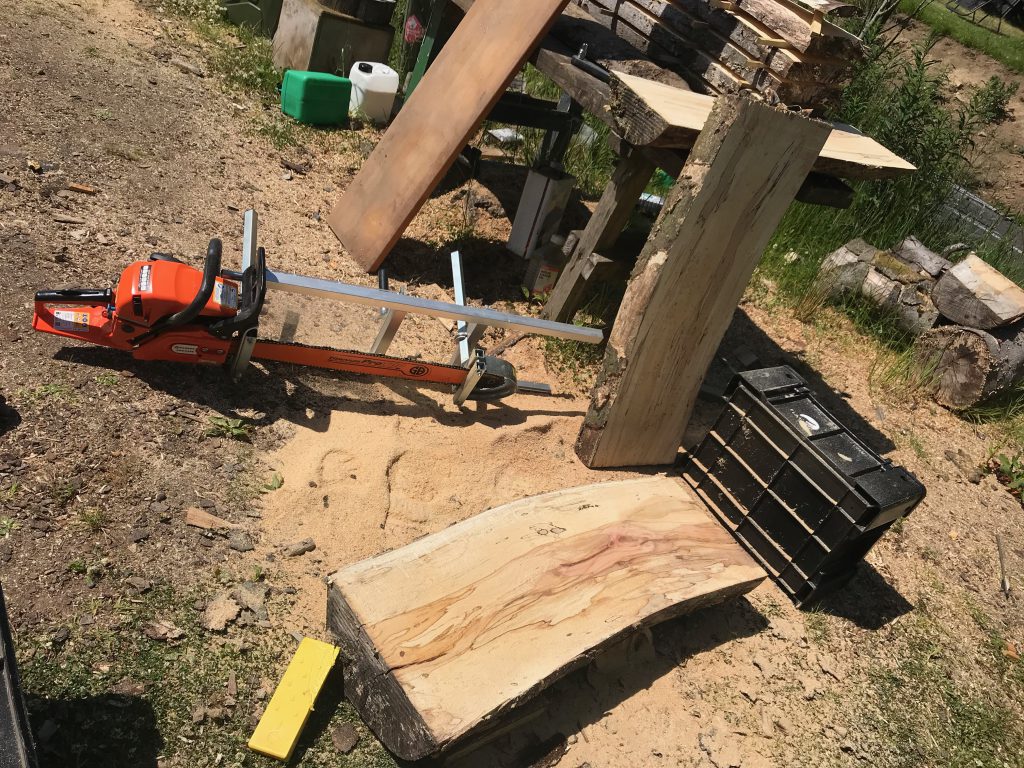
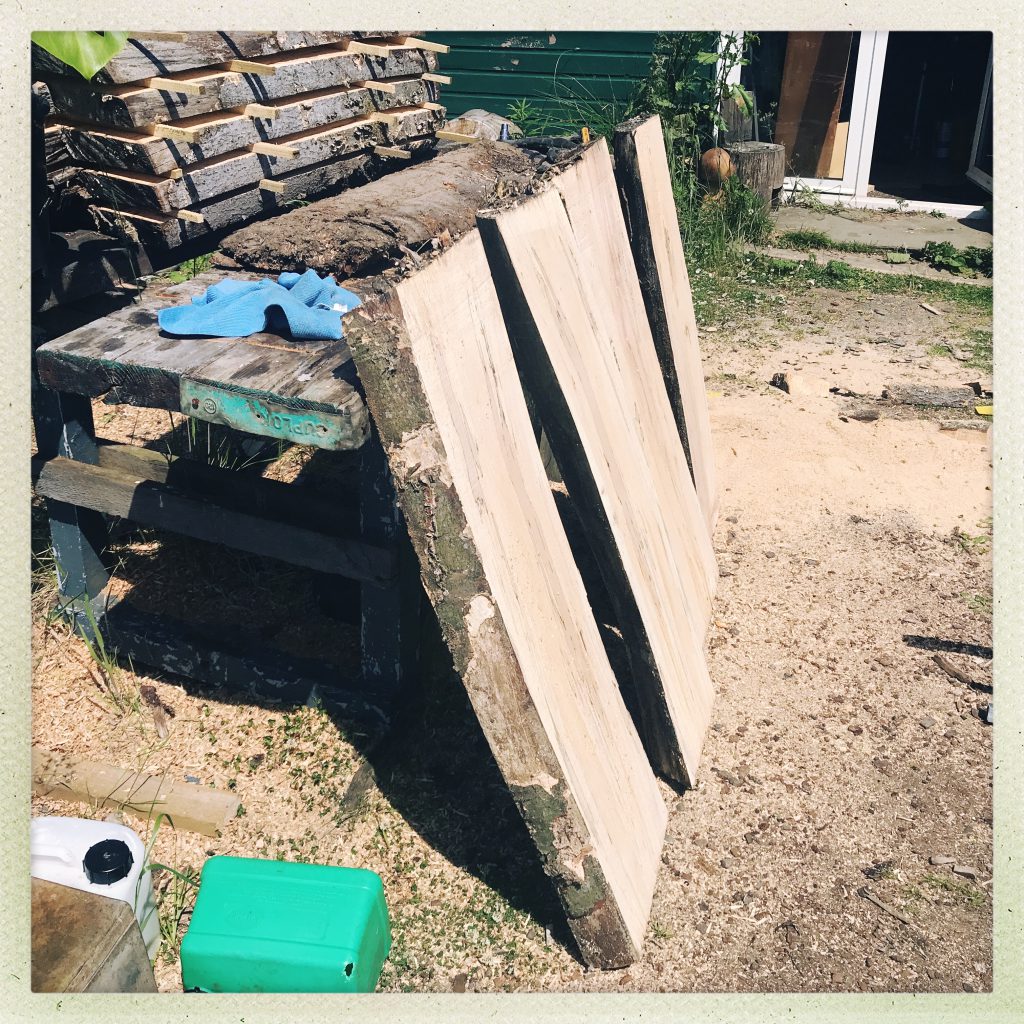
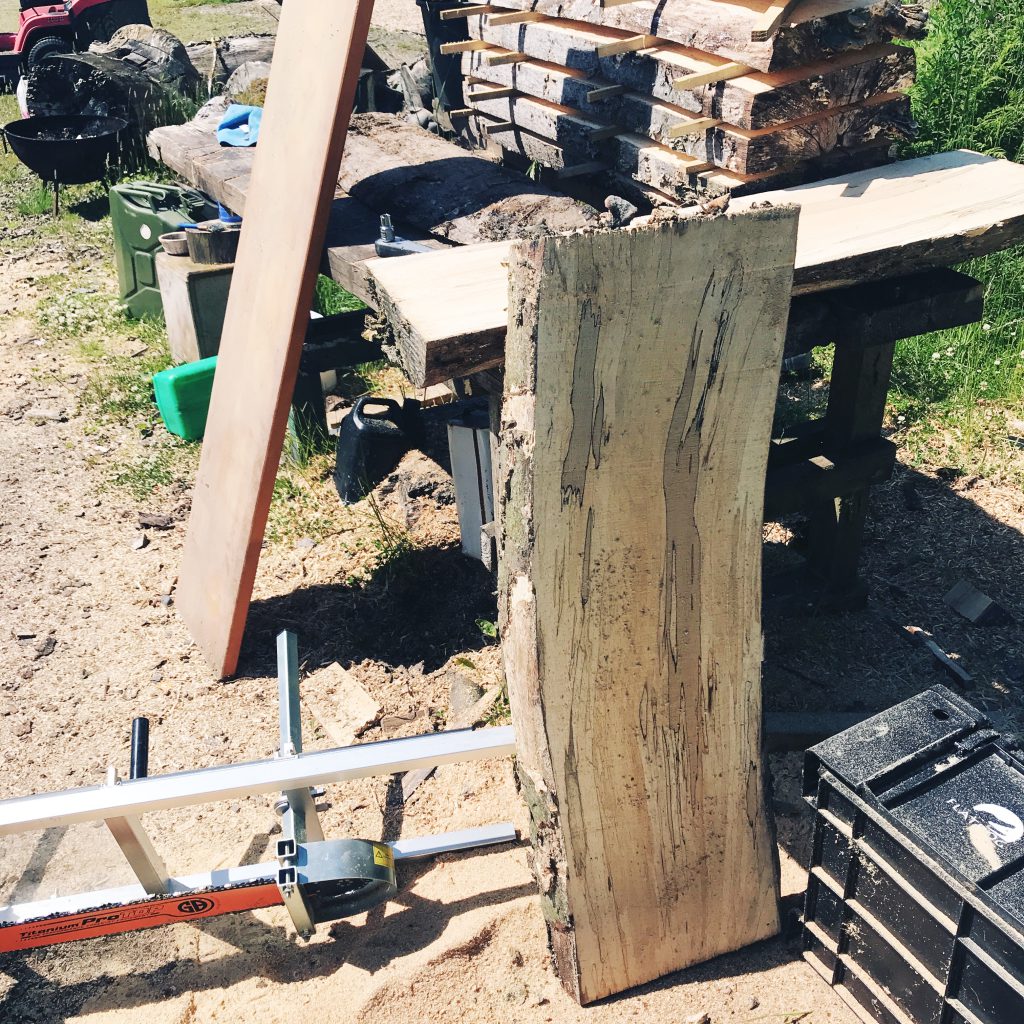
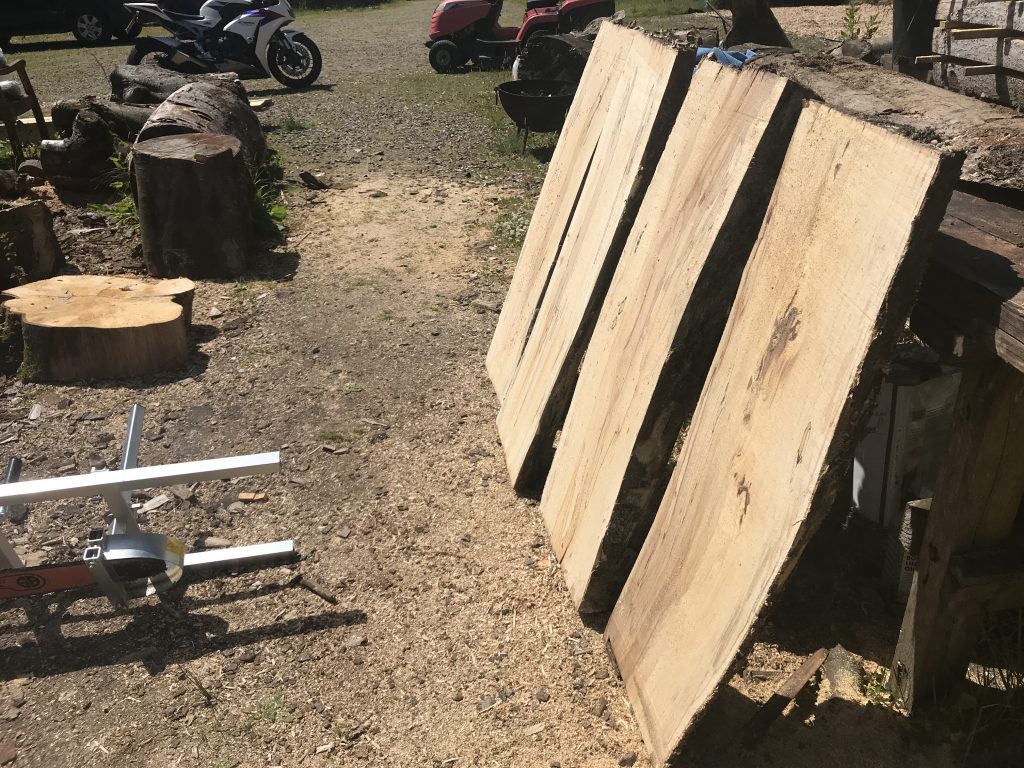
This time I tried using a bigger plank sitting on a crate at either end for the first cut, with the log sitting unattached underneath but secured with a load of wedges to stop it rolling/moving. This took longer to set up but worked much better.
First cut setup
Just cut…
Flattening Sled/Jig
Here are pics of a similar-ish setup I use to flatten large slabs. It’s a “jig” made from a couple of clamped planks (from my daughters old bed), with a “sled” made from a couple of 30mm angle iron sections joined together with Gorilla Tape & wooden blocks to keep it the right width and stop it coming off the rails. All of this keeps the router level while I run it from side to side, moving the sled up and down the jig to flatten the wood.
The router bit is a “1/2-Inch Shank 2-Inch Cutting Diameter Double Flute Carbide Tipped Cleaning Bottom Router Bit Cutter“… so there you go. It’s now done quite a lot of work and still cuts quickly and easily.
This setup is very versatile – I used it to create these too:
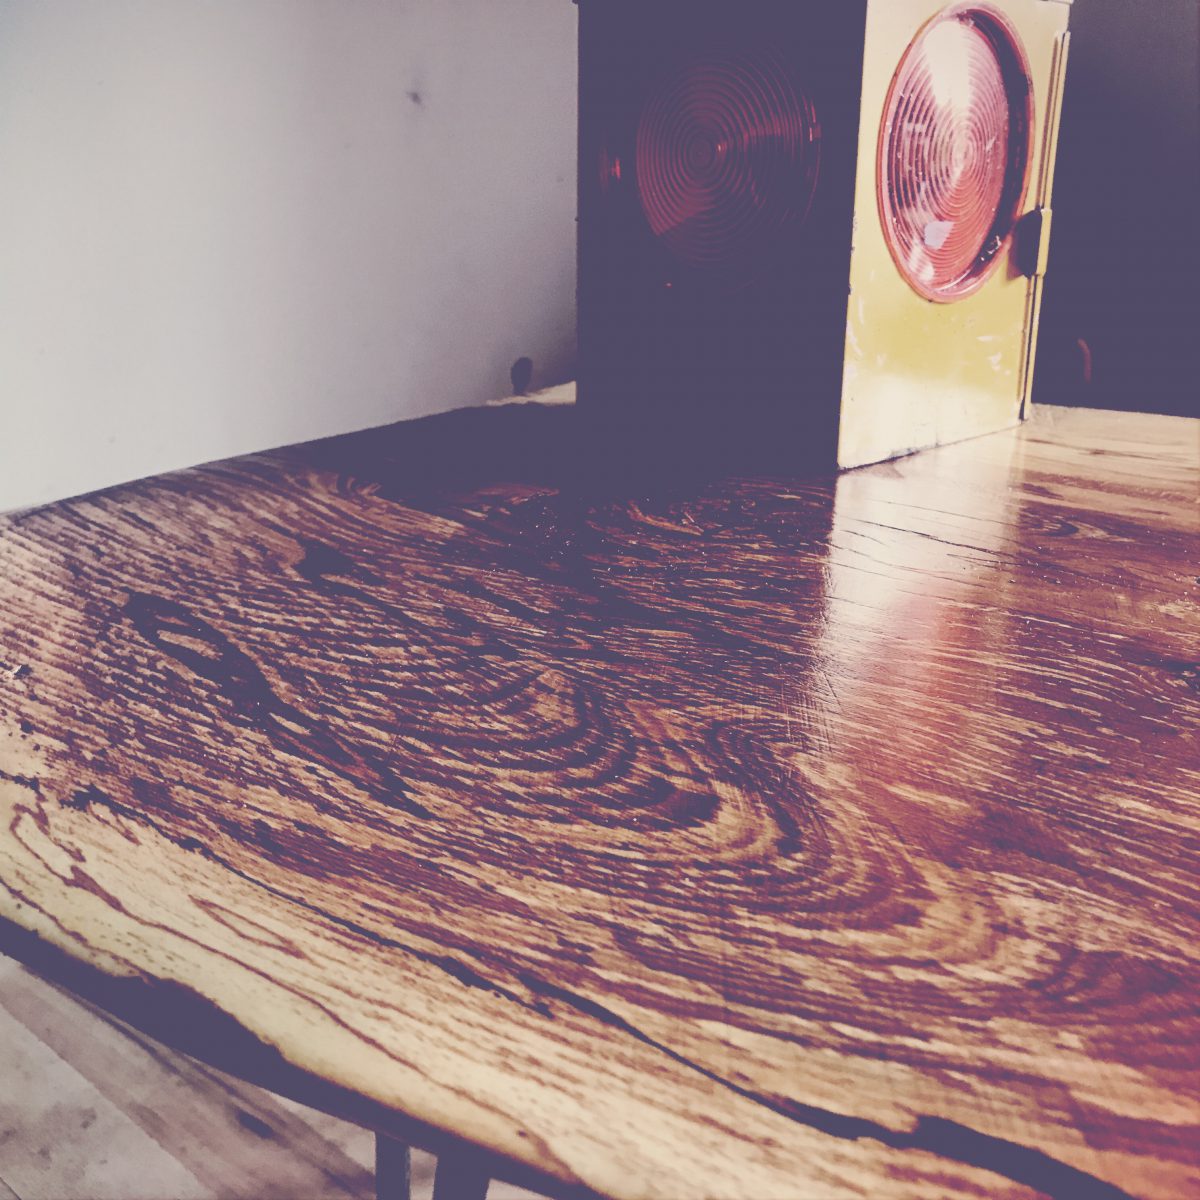
Pics of three tables I’ve made recently – all are from the same beech tree that fell over in the wind about 4 years ago.
Small
– this one is being used as a plant stand. It was narrow enough to fit through the 12″ thicknesser then was finished with a hand planer. The legs are beech branches.
Medium
– this one has some nice spalting lines around the edges. Flattening this was the first test of my home-made “router sled jig slab flattening contraption” (not sure what to call it, but it worked!) which I’ll post details of another time.
– this one weighs a ton and has some interesting features and curves.
It was initially cut from a massive log with a chainsaw “freestyle” as my milling setup wasn’t ready at the time. There are still 2 or three slightly wider and more uniform slabs still to come from the remains of this log, hopefully.
The “router-sled-jig-contraption” was used to flatten both sides, then it was sanded (and sanded and sanded again) to a very smooth finish and varnished with a tough matt glaze.
These three-prong hairpin legs were made by Designer Legs too.
This is the first of two posts on Kubernetes and HelmCharts, focusing on setting up a local development environment for Kubernetes using Minikube, then exploring Helm for package management and quickly and easily deploying several applications to the cluster – NGINX, Jenkins, WordPress with a MariaDB backend, MySQL and Redis.
The content is taken from the practical/demo session I wrote and published in Github here:
One of the key objectives and challenges here was getting a useful local Kubernetes environment up and running as quickly and easily as possible for as wide an audience as we could- there’s so much to the Kubernetes ecosystem that it’s very easy to get side-tracked, and we could have (happily) spent a long time discussing the myriad of alternative possible solutions.
We plan to go “deeper” on all of this in future sessions and have an in-depth Helm session in the works, but for this session we were focused on creating a practical starting point.
</ramble>
Don
What is covered here:
Minikube – what it is (& isn’t) & why you’d use it (or not)
Kubernetes and Minikube components and concepts
setup for Mac and Linux
creating a first Kubernetes cluster in Minikube
minikube addons – what they are and how they can help you
minikube docker env – using DOCKER_HOST with minikube VM
Kubernetes dashboard with Heapster and Metrics Server – made easy by Minikube
kubectl – some examples and alternatives
example app – “hello (Kubernetes) world” minikube style with NGINX, scaling your world
Helm and Tiller – what they are, when & why you’d maybe use them
Helm and Tiller – prep, install and Helm Charts
Deploying Jenkins via Helm Charts
and WordPress w/MariaDB too
wrap up
Minikube – what it is (& isn’t) & why you’d use it (or not)
What it is, why you’d use it etc.
Local development of k8s – runs a single node Kubernetes cluster in a Virtual Machine on your laptop/PC.
All about making things easy for local development, it is not a production solution, or even close to it.
There are many other ways to run k8s, they all have their pros and cons and use cases. The slides from the Meetup covered this in more detail and include links for further info – they are available here:
Cleanup/prep – if required, remove any previous cluster & settings
`minikube delete; rm -rf ~/.minikube`
Creating a first Kubernetes cluster in Minikube
Here we create a first Kubernetes cluster with Minikube, then take a look around in & outside of the VM.
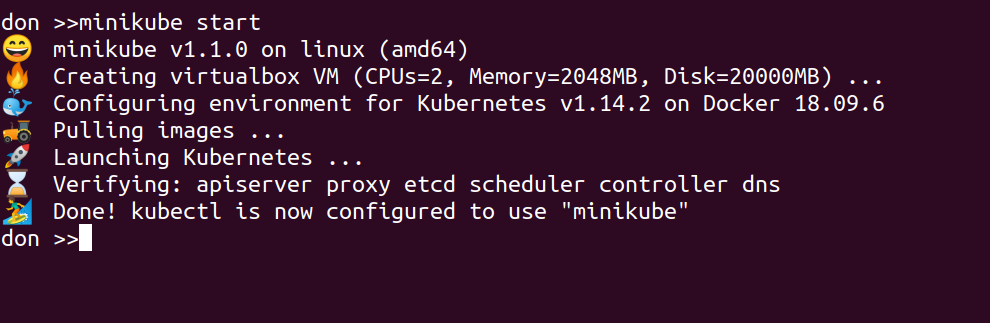
With the above initial setup done, it’s as simple as running this in a shell:
minikube start
Note you could optionally give this Cluster a name, if you are likely to have more than one for different branches of development for example. This is also where you could specify the VM provider if you want to use something other than VirtualBox – there are more details here:
This should produce output like the following, and it may well take a few minutes as the VM is downloaded and started, then a stack of Docker images are started up inside that….
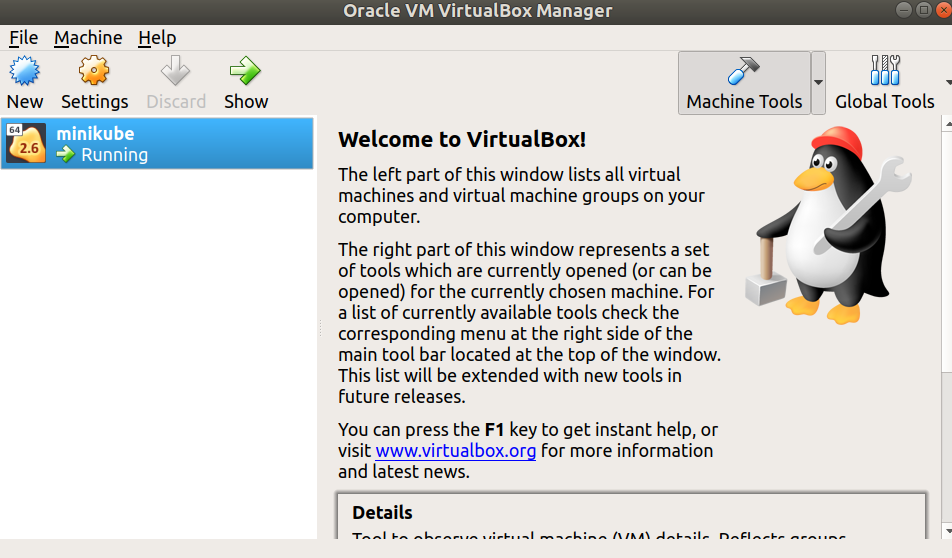
At this point you should be able to see the minikube VM running in the VirtualBox GUI:
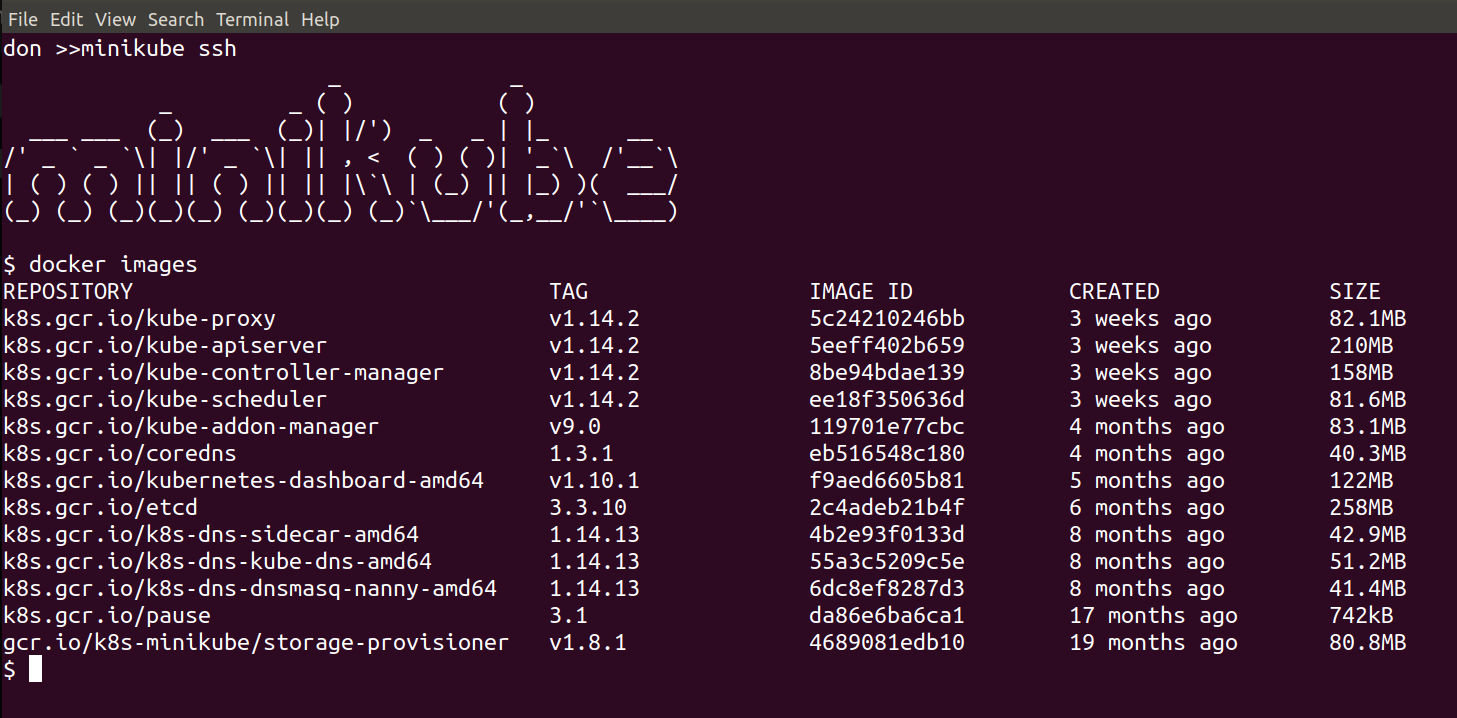
Now it’s running, we can connect from our local shell directly to the one inside the running VM by simply issuing:
minikube ssh
This will put you inside the VM where the Kubernetes Cluster is being run, and we can see and interact with the running components, for example:
docker images
should show all of the downloaded images:
and you could do this to see the running containers:
docker ps
Quitting out of the VM puts us back on the local host, where we can use kubectl to query the status of the Minikube cluster – the initial setup has told kubectl about the Minikube-managed Kubernetes Cluster, meaning there’s no other setup required here:
kubectl cluster-info
kubectl get nodes
kubectl describe nodes
minikube addons – what they are and how they can help you
Show some of the ways minkube makes things easier for local dev
First, take a moment to look around these two local folders:
ls -al ~/.minikube; ls -al ~/.kube
These are where Minikube keeps its settings and the VM Image, and where kubectl settings are persisted – and updated by Minikube.
With Minikube you’ve often got the option to either use kubectl directly, or to use some Minikube built-in features to make your life easier.
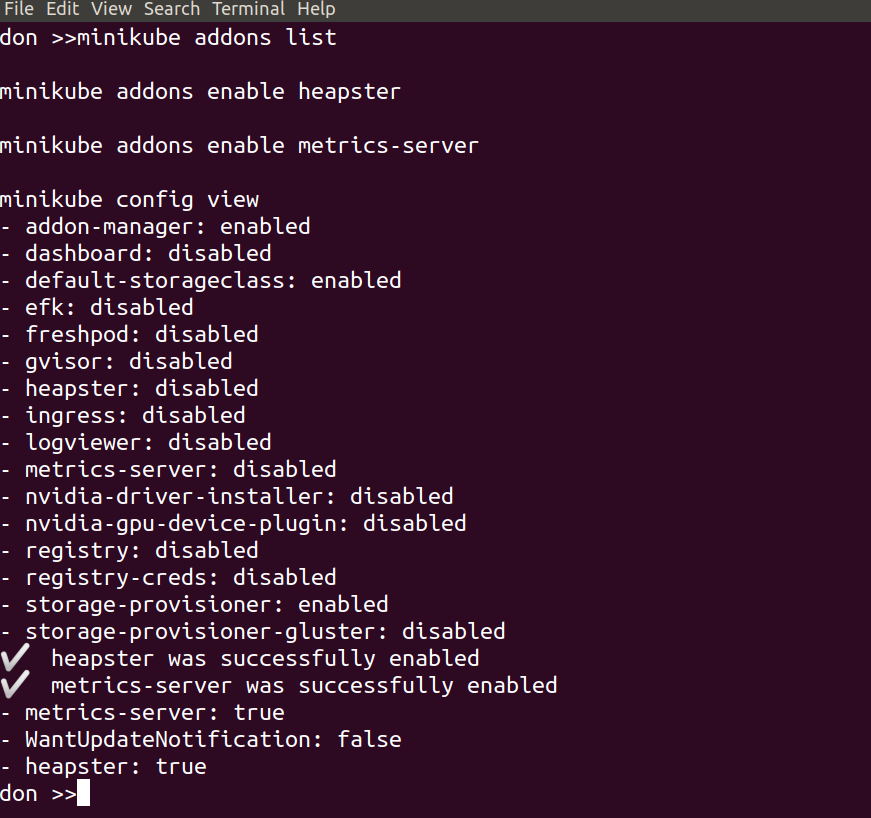
Addons are one of these features, allowing you to very easily add – or remove – functionality from the cluster like this:
minikube addons list
minikube addons enable heapster
minikube addons enable metrics-server
With those three lines we’ve taken a look at the available addons and their current status, and selected to enable both heapster and the metrics server. This was done to give us cpu and mem stats in the Kubernetes Dashboard, which we will set up in a moment. The output should look something like this:
minikube config view
shows the current state of the config – i.e. what changes have been made, so we can keep a track of them easily.
kubectl --namespace kube-system get pods
now we can enable the dashboard:
minikube addons enable dashboard
and check again to see the current state
minikube addons list
we’ll connect to the Dashboard and take a look around in a moment, but first…
minikube docker env – using the DOCKER_HOST in you minikube VM – how & why
Minikube docker-env – setup local docker client to use minikube docker host
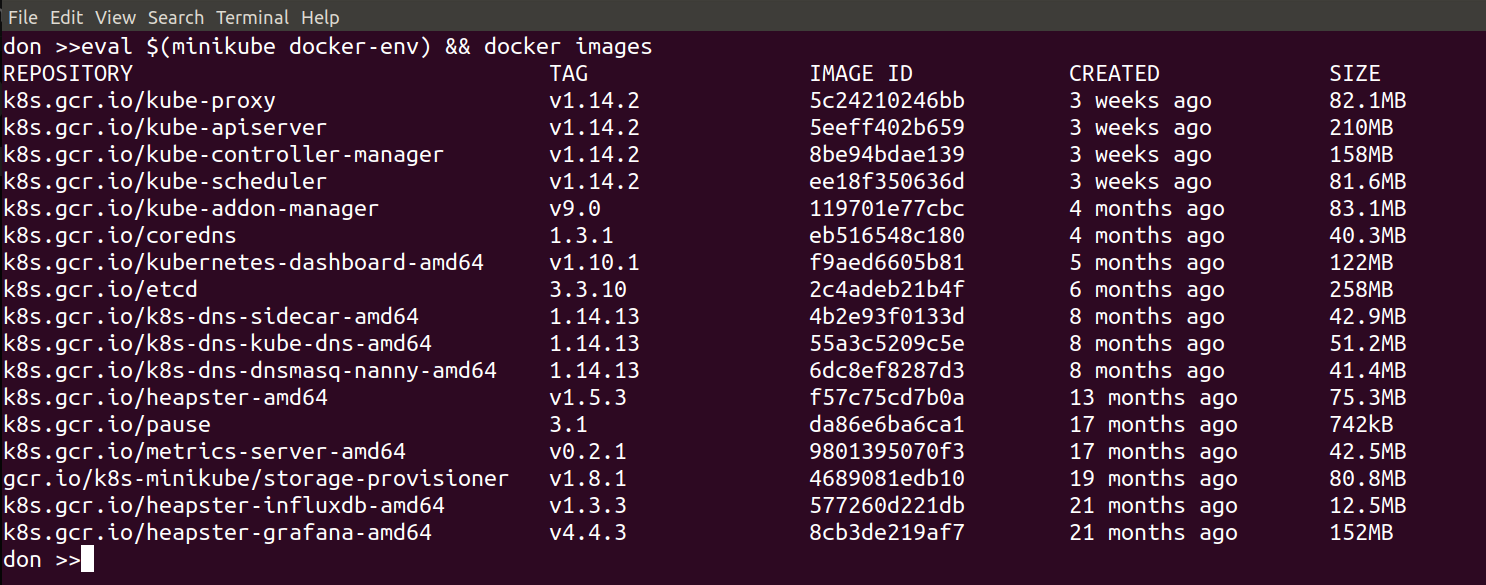
We’re going to look at connecting our local docker client to the docker host inside the Minikube VM. This is made easy by:
minikube docker-env
if you run that command on its own it wiull show you what settings it will export and you can set them by doing:
eval ${minikube docker-env}
From then on, in that shell, your local docker commands will use the docker host inside Minikube.
This is very useful for debugging and local development – when you change and deploy anything to your Kubernetes Cluster, you can easily tail the logs or check for errors or issues. You can also do all of this via the dashboard or kubectl too if you prefer, but it’s another handy and powerful feature from Minikube.
The following image shows the result of running this command:
so we can now use our local docker client to run docker commands like…
docker ps
docker ps | grep -i metrics
docker logs -f <some container id>
etc.
Kubernetes dashboard with Heapster and Metrics Server – made easy by Minikube
Minikube k8s dashboard – here we will start up the k8s dashboard and take look around.
We’ve delayed starting the dashboard up until after we enabled the metrics-server & heapster components we deployed earlier. By doing it in this order, the dashboard will automatically detect and use these components, giving us cpu & mem stats and a nicer looking dash, with no additional config required.
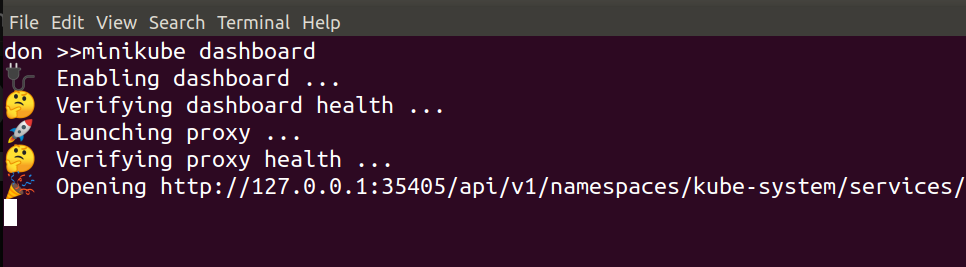
Starting the dashboard simply involved running
minikube dashboard
and waiting for a minute…
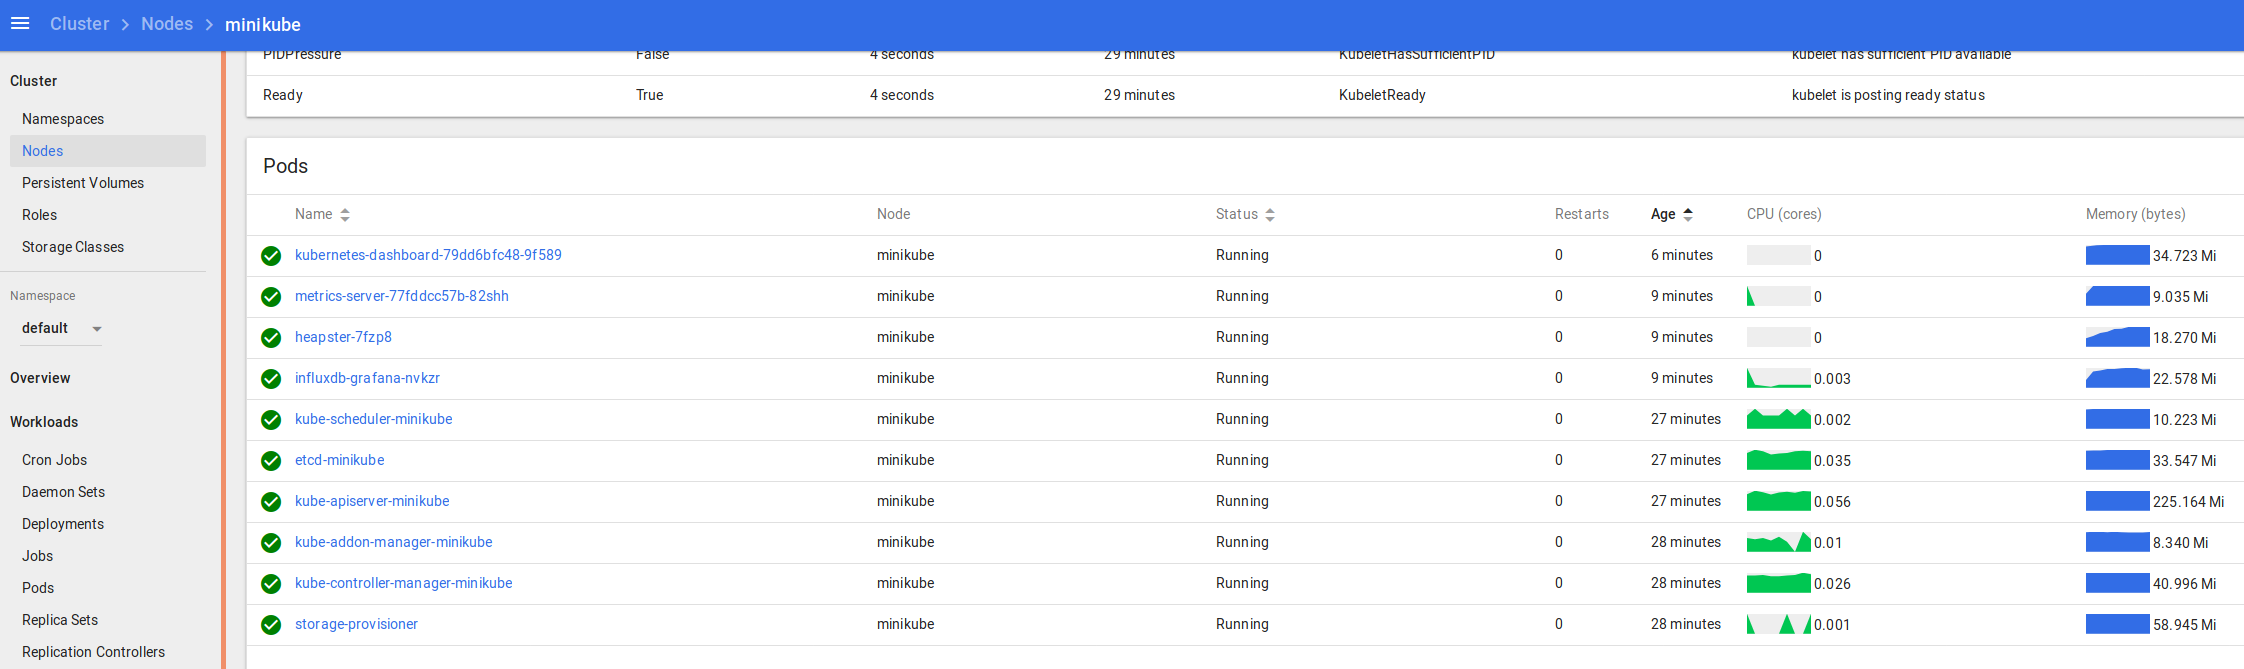
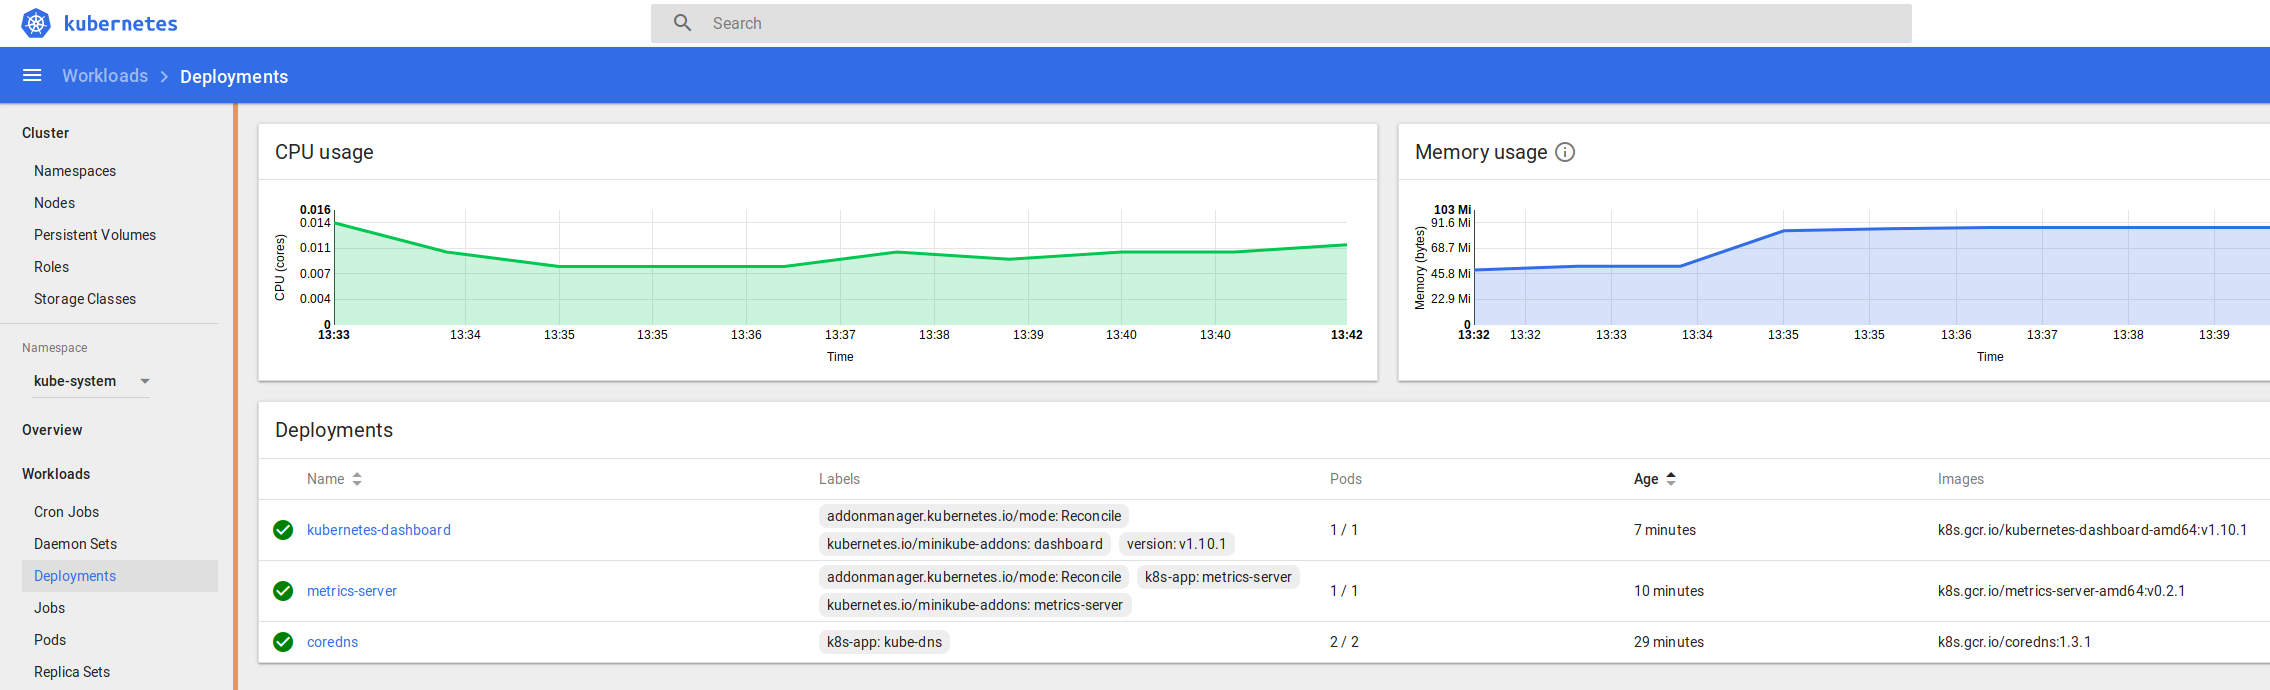
That should fire up your browser automatically, then you can take a look around at things like Default namespace > Nodes
and in the namespace kube-system > Deployments
and kube-system > Pods
You can see the logs and statuses of everything running in your k8s cluster – from the core components we covered at the start, to the dashboard, metrics and heapster we enabled recently, and the application we’re going to deploy and scale up soon.
kubectl – some examples and alternatives
# kubectl command line – look at kubectl and keep an eye on things kubectl get deployment -n kube-system
kubectl get pods -o wide -n kube-system
kubectl get services
kubectl
example app – “hello (Kubernetes) world” minikube style with NGINX, scaling your world
Now we’ll deploy the most basic application we can – a “Hello World” style NGINX docker image.
It’s as simple as this, where nginx is the name of the docker image you want to deploy, hello-nginx is the label you want to give it, and port 80 is where you want it to listen:
kubectl run hello-nginx --image=nginx --port=80
that shouldn’t take long, and you can watch the progress like this: