Information Radiators are used to provide people with feedback on the current status of code builds and automated tests in Continuous Integration and Agile development environments.
The basic idea is that when developers commit a code change, they can easily and quickly see that it has been picked up by the automated build process, and then (ideally within 10 minutes) see the result of their change; did the build succeeded and did the automated tests pass?
Martin Fowler’s description goes in to more detail on the ideas behind this approach and the function that Information Radiators serve.
The normal convention for these is to use colour coded blocks per build, using:
- Green for good/passing jobs
- Amber for either currently building/running jobs (or sometimes for unstable ones)
- Red for failed jobs
Generally you want to keep things as clean, simple and uncluttered as possible, but sometimes it is helpful to add in a bit more info.
Details I have occasionally found worth adding include things like;
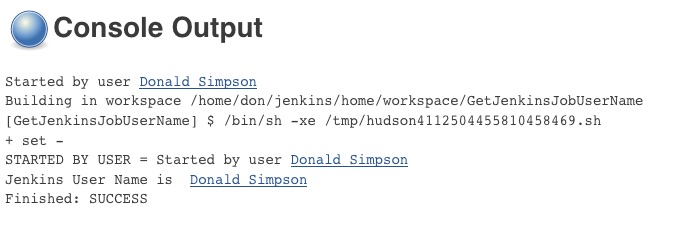
- name and/or picture of the user who triggered (or broke!) the build
- commit message from the code change that triggered the build
- build number
- history – number of recent fails or passes
- date/time last failed and last checked
if you use amber for “unstable” rather than “build in progress”, you may want to add text to say if the job is currently building – I often use the “spinning wheel” icon thingy from jenkins itself :
![]()
Why build your own?
There are tons of readily available plugins that allow you to quickly and easily produce a Radiator or Wall panel from Jenkins, so why go to the bother of making your own?
Plugins are usually linked to one Jenkins instance (the one they are running on) and I have often found that alone to be too restrictive – having too many different radiators all over the place makes things too cluttered and uncertain, and people can easily start to “switch off” from them all – having one screen that people can understand at a glance usually works best.
Changing requirements – developers are constantly wanting/looking to improve processes and often come up with ideas and requests for things to try that may help them do their jobs – adding a bit of information from another source, for example, or changing the colours used to a different shade, or adding curved borders etc etc…
What I have found often works best, is to get all of the data I am interested in inside a database then write my own simple but flexible presentation layer from scratch – this gives me all the flexibility I could want (or may find myself wanting or needing later…) and importantly, it also allows me to leverage additional benefits by combining data from Jenkins with data from elsewhere – this means I can easily produce reports, charts, metrics etc that present a view comprised from multiple data sources throughout an organisation – for example, you can then easily create reports that combine:
- jenkins – live information on the current state of builds and tests
- defects – data on bugs and changes pulled from bug tracking apps (usually via jenkins jobs)
- version control – the actual code change can be extracted from version control and linked to both the developer and bug details – the “svn log” command is useful for this
- environment monitors – state and health of environments; database and app server health, deployed patch and code levels etc (again, these are usually other Jenkins jobs!)
and you can add in anything else you can get your hands on 🙂
This allows you to track the flow of a change right through the development life cycle – from the initial change/requirement/defect to the change itself at the code/file level, then the testing and building of it and the eventual release. This is far more than you need for a simple Information Radiator, but using this approach means that you can easily reuse much of the work in different ways.
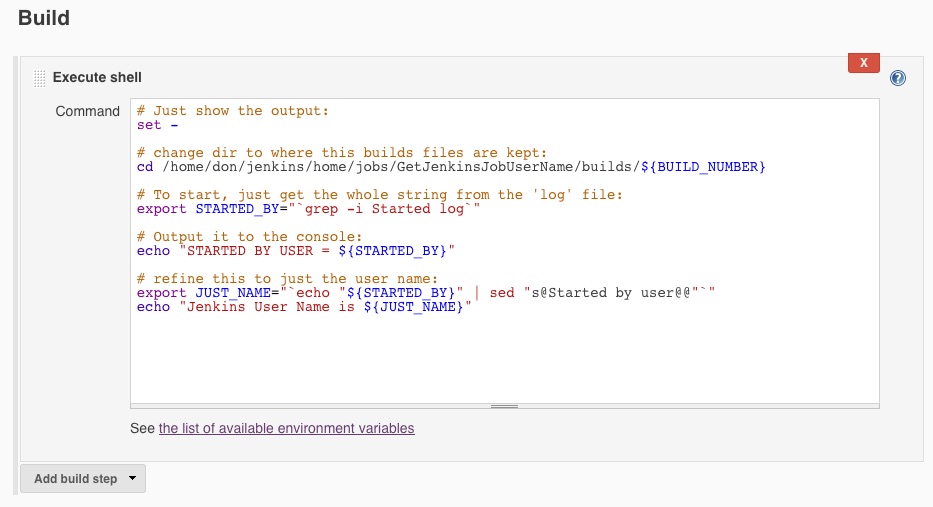
Part II covers the technical approach I use for Extracting data from Jenkins