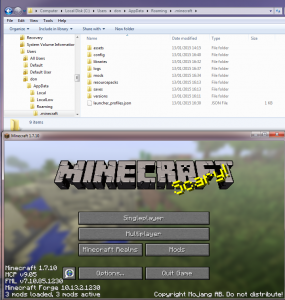
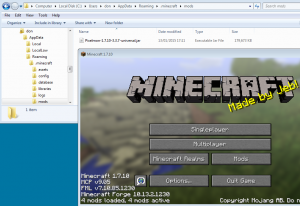
Minecraft Server Admin/Op commands

Minecraft Server Admin/Op commands are entered into the chat window and are preceded by a “/” when playing in-game, but when entering commands at the server console you need to miss out the preceding “/”.

(This table is copied from http://wiki.multiplay.co.uk/Minecraft/Operators and is here purely for my convenience and laziness)

Command Description Usage
help or ? Shows a list of server commands in the console or in-game. help
kick Removes player from the server with the message “Kicked by admin” kick username
ban Bans player from the server with the message “Banned by admin”, banned players who attempt to connect are presented with the message “You are banned from this server!” ban username
pardon Removes the specified player from banned-players.txt, allowing them to connect to the server again pardon username
ban-ip Bans an IP address from the server, the full IP address must be specified; wildcards are not valid. Players who are banned through this method will see “Your IP address is banned from this server!” when attempting to connect ban-ip ipaddress
pardon-ip Removes the specified IP from banned-ips.txt, allowing players with that IP to connect to the server again pardon-ip ipaddress
op Writes the players name to ops.txt, giving them access to the op commands op player
deop Removes a player from ops.txt, revoking their access to the op commands deop player
tp Moves the first player specified to the location of the second player specified tp player1 player2
give Gives a specified amount of a block, the ids are known as data values give player id amount
stop Gracefully stops the server stop
save-all Forces a server-wide level save save-all
save-off Disables terrain saving (useful for backup scripts) save-off
save-on Re-enables terrain saving. save-on
list Lists all currently connected players list
say Broadcasts a message to all players without a player name being shown and putting message in pink text say message
whitelist Enable or disable whitelisting (i.e. only listed players may join) whitelist on/off
whitelist Add or remove player from the whitelist whitelist add/remove player
whitelist list Lists all currently whitelisted players whitelist list
whitelist reload Reload the whitelist from white-list.txt whitelist reload
time Add to or set the world time. Amount may be a number between 0 and 24000, inclusive, where 0 is dawn and 12000 is dusk time add/set amount

Minecraft Server Admin tips – using the Linux screen command


Getting started with the Linux “screen” command:

This tip follows on from the the earlier post Minecraft and Minecraft Pocket Edition Servers on Ubuntu Linux

The Linux “screen” command is a very useful tool for managing one or many Minecraft and Minecraft Android/Pocket Edition processes.

First off, check you have screen installed on your Linux server by doing;

don@ubuntuserver:~$ which screen

that  should return something like:

/usr/bin/screen

if it doesn’t, you may need to install it like so:

sudo apt-get install screen

(or whatever works for your platform)

then you can start kicking off your Minecraft processes like this

 screen ./start.sh

when that’s up and running you can disconnect from the screen by doing

Ctrl-a d

This will detach you from the screen/console but leave the server running – meaning you can log off or go and do something else.

To reattach to the running screen (assuming there’s only one) and get back to the console at a later time, you just do this:

screen –r

If there is more than one screen sessions available you’ll be given a list of them, something like this:

There are several suitable screens on:
15772.pts-1.ubuntuserver(06/01/14 22:05:25)     (Detached)
2088.pts-4.ubuntuserver (06/01/14 15:20:59)     (Attached)
2013.pts-3.ubuntuserver (06/01/14 15:20:13)     (Detached)

from which you can then do:

screen -r [pid.]tty.host

using the pid and tty host values from that list, e.g. “screen –r 2013.pts-3.ubuntuserver” or “screen –r 15772.pts-1.ubuntuserver” in my example.

There are loads of other useful screen commands – check out the man page for further info – but the above allows me to manage multiple Minecraft servers easily.

Loading CSV data in to MySQL – random quotations app Part 1

Time for a new PHP and MySQL app – “Who said that?” – a search tool for famous quotations.

I created these two web applications a while back:

UK post code search
crossword solver

and then wrote this page:
Some PHP examples
detailing roughly how they were put together, but this time I wanted to create a searchable database of famous quotations, and focus on the MySQL side of things a bit more too (so that next time I will have a note of how I did it!).

I found a very nice CSV data file on http://thewebminer.com/download for free – I don’t really do Facebook much and don’t have a Twitter account so I thought/hoped they’d settle for a blog post in exchange…

After installing and setting up MySQL, connect to your database…

mysql –user=myuser –password=myusualpassword dev

— or connect without specifying a database/schema and do “show databases;”

mysql> show tables;
 +---------------+
 | Tables_in_dev |
 +---------------+
 | areacodes |
 | dictionary |
 +---------------+
 2 rows in set (0.02 sec)

For this little app, I want to create a new table with fields for each row in the CSV file
plus I’d like an auto_increment field to make fetching random numbers easier

CREATE TABLE quotes (
 id INT NOT NULL AUTO_INCREMENT PRIMARY KEY,
 quote varchar(800),
 author varchar(100),
 genre varchar(100)
 );
mysql> show tables;
 +---------------+
 | Tables_in_dev |
 +---------------+
 | areacodes |
 | dictionary |
 | quotes |
 +---------------+
 3 rows in set (0.00 sec)
mysql> describe quotes;
 +--------+--------------+------+-----+---------+----------------+
 | Field | Type | Null | Key | Default | Extra |
 +--------+--------------+------+-----+---------+----------------+
 | id | int(11) | NO | PRI | NULL | auto_increment |
 | quote | varchar(800) | YES | | NULL | |
 | author | varchar(100) | YES | | NULL | |
 | genre | varchar(100) | YES | | NULL | |
 +--------+--------------+------+-----+---------+----------------+
 4 rows in set (0.06 sec)

ok, the table looks good, so I can load the CSV data file – note that I’ve got the “quotes35000.csv” file I downloaded from
http://thewebminer.com/download sitting in the current directory:

mysql> load data local infile 'quotes35000.csv' into table quotes
 -> fields terminated by ';'
 -> lines terminated by 'n'
 -> (quote, author, genre);
 Query OK, 35002 rows affected (1.54 sec)
 Records: 35002 Deleted: 0 Skipped: 0 Warnings: 0

that looks like it went well (“35002 rows affected”), time to check it:

mysql> select count(*) from quotes;
 +----------+
 | count(*) |
 +----------+
 | 35002 |
 +----------+
 1 row in set (0.04 sec)
mysql> select * from quotes where author like '%Einstein' and genre like 'attitude%';
 +------+-----------------------------------------------------+-----------------+-----------+
 | id | quote | author | genre |
 +------+-----------------------------------------------------+-----------------+-----------+
 |4647 | Weakness of attitude becomes weakness of character. | Albert Einstein | attitude
 +------+-----------------------------------------------------+-----------------+-----------+
 1 row in set (0.02 sec)

All looking good, the row count and the returned query match what I’d expect having looked at the contents of the CSV file.

I also want to do a “random quote of the day thing”, so looked in to ways to do this in MySQL – my initial thought was to use something basic like “ORDER BY RAND() LIMIT 0,1;” to bring back one random row, but I guessed there may be better ways.

Google led me to this site which has some good examples and some performance/comparison details too:
http://akinas.com/pages/en/blog/mysql_random_row/

so I tried this…

mysql> SELECT * FROM quotes WHERE id >= (SELECT FLOOR( MAX(id) * RAND()) FROM quotes ) ORDER BY id LIMIT 1;
 +-----+--------------------------------------------------------------------------+-----------------+-------+
 | id | quote | author | genre |
 +-----+--------------------------------------------------------------------------+-----------------+-------+
 |84 | Men are like wine - some turn to vinegar, but the best improve with age. | Pope John XXIII | age
 +-----+--------------------------------------------------------------------------+-----------------+-------+
 1 row in set (1.54 sec)

then this…

mysql> SELECT * FROM quotes ORDER BY RAND() LIMIT 0,1;
 +-------+-------------------------------------------------------------------------------------+----------------+-------+
 | id | quote | author | genre |
 +-------+-------------------------------------------------------------------------------------+----------------+-------+
 |29470 | The good die young, because they see it's no use living if you have got to be good. | John Barrymore | good
 +-------+-------------------------------------------------------------------------------------+----------------+-------+
 1 row in set (0.73 sec)

and found to my surprise that in this case, looking at the timings, the simple approach looks to be faster – probably because of the relatively small table and its simple structure?

Anyway, that’s the database side of things sorted, the next part is to put together some PHP code to allow searching for quotes based on author, partial quote or genre, and to write a simple “random quote” generator kind of thing.

Cheers,

Don

Minecraft and Minecraft Pocket Edition Servers on Ubuntu Linux

I was asked to set up some Home LAN Minecraft and Pocketmine Servers for my children, so they can play at home and online with their friends in a safe/private environment – I was also interested in the geekier side of setting these servers up and seeing what all the Minecraft fuss is about 🙂

This post covers:

  • setting up a “normal” Minecraft Server on Linux
  • setting up a Minecraft Pocket Edition Server on Linux
  • getting started with the Linux “screen” command to manage multiple Minecraft Server processes

Setting up a normal Minecraft server on Linux (and I’d imagine any other OS) is very easy – you just need Java and the minecraft server jar file which you can get here:

https://minecraft.net/download

And as that page says, just sort out Java then kick off the process like this:

 java -Xmx1024M -Xms1024M -jar minecraft_server.jar nogui

Making sure you change the minecraft_server.jar  to match the name of the file you downloaded (e.g. minecraft_server.1.7.4.jar or whatever).

I originally put that command in a script and started it with nohup, but realised that you then lose the ability to interact with the process, so I have changed my approach and use the screen command which is much better – see the notes below on how that can be done, it’s easy and very useful.

Also, I think it’s safer to stop your Minecraft server/world cleanly by doing “stop” in the console, rather than Ctrl-c or killing the PID – after doing this I stopped getting these error messages in the console output:

 [ERROR] A level 8 error happened: "Uninitialized string offset: 8192" in...


Setting up a Minecraft Pocket Edition server… this was initially quite a contrast to the above, but it got better…

I started off by following the Pocketmine Server setup and installation instructions I found which said to simply download the install script (PocketMine-MP_Installer_XXXXX.sh) and run it:

https://github.com/PocketMine/PocketMine-MP/wiki/Setting-up-a-Server#wiki-linux

but this really didn’t work for me and led to a catalogue of vague errors and a whole load of googling which took me back to the olden times of fighting with make, configure, libraries, conflicts, missing tools and config files and installing all sorts of things based on vague hints from obscure error messages found in cryptic log files… you get the general idea I guess.

It has a simple and happy ending (below), but my experience started off something like this…

don@ubuntuserver:~/pe_minecraft$ ./start.sh
 09:43:39 [ERROR] Unable to find the pthreads extension.
 09:43:39 [ERROR] Unable to find the cURL extension.
 09:43:39 [ERROR] Unable to find the SQLite3 extension.
 09:43:39 [ERROR] Please use the installer provided on the homepage.

And that was after running the installer provided on the homepage and checking the dependencies were all there… so I debugged the steps in that script and was then on to the log files… where one thing led to another for quite a while… some of the more memorable ones are…

 “Compiler error reporting is too harsh for ./configure (perhaps remove -Werror).”
“configure: error: C compiler cannot create executables”

tried “apt-get install build-essential” to fix that, got a bit further

/usr/include/stdc-predef.h:30:26: fatal error: bits/predefs.h: No such file or directory

tried “apt-get install libc6-dev-i386” to fix that, got a bit further

There were several other issues and no end in sight, and I realised it really shouldn’t be this frustrating, so I looked for another approach.

The Minecraft MP Server code is all hosted on github here:

https://github.com/shoghicp/PocketMine-MP?1358555786480

So I simply downloaded everything from there (you could do “git clone” or “svn export”, but I went for wget’ing the latest zip file):

 wget https://github.com/PocketMine/PocketMine-MP/archive/master.zip

extracted that then ran compile :

./src/build/compile.sh

waited a while then ran start:

./start.sh

and this time there were no problems, my Minecraft Pocket Edition MP server was up and running on the home LAN and local devices were able to connect no problem.


The Linux “screen” command is very useful tool for Minecraft Server Admins – please see this post for details on getting started with it:

Minecraft Server Admin tips – using the Linux screen command

it allows you to manage multiple Minecraft Server Processes and consoles easily, without having to keep multiple sessions open.

Cheers,

Don

SCons on Ubuntu for C++ and Java builds

Hi,

Here are my notes from playing around with SCons – I’m using it to build both C++ and Java projects, and thought I’d share my notes using a simple example of the setup and approach used for anyone else new to SCons.

This files for this project can be cloned from GitHub:
https://github.com/DonaldSimpson/java_and_c_with_scons

It’s very easy to install scons on Ubuntu via apt-get, just:

sudo apt-get install scons

You can then check your scons install & version info:

scons --version
SCons by Steven Knight et al.:
 script: v2.2.0.issue-2856:2676:d23b7a2f45e8[MODIFIED], 2012/08/05 15:38:28, by garyo on oberbrunner-dev
 engine: v2.2.0.issue-2856:2676:d23b7a2f45e8[MODIFIED], 2012/08/05 15:38:28, by garyo on oberbrunner-dev
 engine path: ['/usr/lib/scons/SCons']
Copyright (c) 2001, 2002, 2003, 2004, 2005, 2006, 2007, 2008, 2009, 2010, 2011, 2012 The SCons Foundation

Creating a new project is trivial – it’s all relative to this directory:

mkdir newscons
cd newscons

and for the simplest example I could think of , let’s use Hello World in C++:

vim hello.c

#include <stdio.h>
int
main()
{
 printf("Hello, from C world!n");
}

that’s it – :wq from vim, then create a new SConstruct file and add in this one line:

Program('hello.c')

– that’s that done, :wq again.

so now we have just two files; the source for a tiny c program, and the one-line SConstruct file defining it

don@ubuntuserver:~/newscons$ ls -al
total 16
drwxrwxr-x 2 don don 4096 Oct 1 11:33 .
drwxr-xr-x 42 don don 4096 Oct 1 11:26 ..
-rw-rw-r-- 1 don don 51 Oct 1 11:31 hello.c
-rw-rw-r-- 1 don don 40 Oct 1 11:32 SConstruct

you can now kick off the scons build process by simply typing “scons”…

don@ubuntuserver:~/newscons$ scons
scons: Reading SConscript files ...
scons: done reading SConscript files.
scons: Building targets ...
gcc -o hello.o -c hello.c
gcc -o hello hello.o
scons: done building targets.

and then test the compiled C program…

don@ubuntuserver:~/newscons$ ./hello
Hello, from C world!

So, scons has just created the binary “hello”, a “hello.o” Object file and “.sconsign.dblite”, which is what scons uses to store file signatures so that if you now do “scons” again (without making any changes), you will see something like the following:

don@ubuntuserver:~/newscons$ scons
scons: Reading SConscript files ...
scons: done reading SConscript files.
scons: Building targets ...
scons: `.' is up to date.
scons: done building targets.

as there have been no changes, but if you

don@ubuntuserver:~/newscons$ rm .sconsign.dblite

then try again…

don@ubuntuserver:~/newscons$ scons
scons: Reading SConscript files ...
scons: done reading SConscript files.
scons: Building targets ...
gcc -o hello.o -c hello.c
gcc -o hello hello.o
scons: done building targets.

that will make scons recompile regardless.

Now for the Java SCons example, let’s create a src/ dir and add in a simple Java example…

mkdir src

vim src/HelloWorld.java

class HelloWorld
{
 public static void main(String args[])
 {
 System.out.println("Hello, Java World!");
 }
}

Then edit the SConstruct to tell scons about the Java example – using “build” as the output destination for the built Java class file, and “src” as the source dir – I’m also leaving in the C++ example here too…

don@ubuntuserver:~/newscons$ cat SConstruct
Program('hello.c')
Java('build','src')
don@ubuntuserver:~/newscons$

run that, and you get:

don@ubuntuserver:~/newscons$ scons
scons: Reading SConscript files ...
scons: done reading SConscript files.
scons: Building targets ...
javac -d build -sourcepath src src/HelloWorls.java
scons: done building targets.

so we now have the following files in our scons project:

don@ubuntuserver:~/newscons$ find .
.
./hello
./build
./build/HelloWorld.class
./hello.c
./hello.o
./.sconsign.dblite
./SConstruct
./src
./src/HelloWorls.java

and the new Java class can be tested like so:

don@ubuntuserver:~/newscons$ java -classpath build HelloWorld
Hello, Java World!

– that’s it for this simple example – there’s tons more that SCons can do, and here’s a good place to look: http://www.scons.org/

Cheers,

Don

Monitoring Jenkins Slave Nodes with Groovy

This script is now available on GitHub:

https://github.com/DonaldSimpson/groovy

Here is a simple little Groovy script to monitor the health of slaves in Jenkins and let you know when they fail.

I use a lot of Jenkins slaves on many different Jenkins master instances, and I often have something like this running in a Jenkins job that lets me know if there are issues anywhere – which it will do if any of the Jenkins Slave Nodes are offline or dead etc.

To set this up, you first need to install the Groovy Plugin (https://wiki.jenkins-ci.org/display/JENKINS/Groovy+plugin).

Do this in Jenkins by going to “Manage Jenkins -> Manage Plugins -> Available”, then search for “Groovy Plugin”.

Once that’s done, create a new “Freestyle” Jenkins job and add a Build Step to “Execute System Groovy Script”.

Here’s the code:

int exitcode = 0
for (slave in hudson.model.Hudson.instance.slaves) {
 if (slave.getComputer().isOffline().toString() == "true"){
 println('Slave ' + slave.name + " is offline!"); 
 exitcode++;
 }
}

if (exitcode > 0){
 println("We have a Slave down, failing the build!");
 return 1;
}

You can see what’s going on here, but to be clear the main processing logic is:

for each Slave;
-  if it's offline, increment the exit code

if the exit code is greater than zero;
 - return 1, which will fail the job and trigger an email alert.

Obviously this is deliberately simple, and you could extend it to go off and do any number of things – including trying to bring the slave back online again with something like this: https://wiki.jenkins-ci.org/display/JENKINS/Monitor+and+Restart+Offline+Slaves.

I then configure the job run periodically through the Jenkins cron (check “build periodically” in the build triggers section of your jobs config, then put in a cron schedule – “* * * * *” or “@midnight” for example), and to email me if it fails so I know there’s something up.

A word of warning: don’t try changing the “return 1” to something like System.exit(1)… I did that initially, and it killed the running Jenkins instance… doh! 🙂

So when the Groovy script detects an Offline Jenkins Slave Node, the console output should look something like this:


Building on master in workspace /apps/jenkins/jobs/MonitorSlaves/workspace
Slave <YOURSLAVENAME> is offline!
We have a Slave down, failing the build!
Script returned: 1
Build step 'Execute system Groovy script' marked build as failure
Finished: FAILURE
<send an email or whatever here...>

Cheers,

Don

Jenkins Agent Nodes – using the Swarm Plugin

NOTE: This post and approach is quite old now; a better alternative for dynamically provisioning and scaling Jenkins Agents and running CI/CD Pipelines is demonstrated here.


I’ve been trying out a new (to me at least) way to add a Jenkins Agent Node – using UDP auto discovery via the Jenkins Swarm Plugin

This is a very easy and nice way to do it, with minimal configuration/hassle required so you can quickly and easily add new Jenkins Agent Nodes to your Master Jenkins instance as and when they are required.

Here are my notes from setting this up – it’s pretty simple to do and worked well for me out of the box…

Set up a new instance of Jenkins:

  • Make & cd to a working directory

mkdir jenkinsswarm; cd jenkinsswarm

  • Fetch jenkins.war

curl -O http://mirrors.karan.org/jenkins/war/1.506/jenkins.war

  • Start Jenkins

{/path/to/java/bin/}java -jar jenkins.war

After that, you should get console output along these lines…

Running from: /root/jenkinsswarm/jenkins.war
webroot: $user.home/.jenkins
18-Mar-2013 15:19:26 winstone.Logger logInternal
INFO: Beginning extraction from war file
Jenkins home directory: /root/.jenkins found at: $user.home/.jenkins
18-Mar-2013 15:19:33 winstone.Logger logInternal
INFO: HTTP Listener started: port=8080
18-Mar-2013 15:19:33 winstone.Logger logInternal
INFO: Winstone Servlet Engine v0.9.10 running: controlPort=disabled
18-Mar-2013 15:19:34 jenkins.InitReactorRunner$1 onAttained
INFO: Started initialization
18-Mar-2013 15:19:35 jenkins.InitReactorRunner$1 onAttained
INFO: Listed all plugins
18-Mar-2013 15:19:35 jenkins.InitReactorRunner$1 onAttained
INFO: Prepared all plugins
18-Mar-2013 15:19:35 jenkins.InitReactorRunner$1 onAttained
INFO: Started all plugins
18-Mar-2013 15:19:41 jenkins.InitReactorRunner$1 onAttained
INFO: Augmented all extensions
18-Mar-2013 15:19:41 jenkins.InitReactorRunner$1 onAttained
INFO: Loaded all jobs
18-Mar-2013 15:19:44 org.jenkinsci.main.modules.sshd.SSHD start
INFO: Started SSHD at port 25133
18-Mar-2013 15:19:44 jenkins.InitReactorRunner$1 onAttained
INFO: Completed initialization
18-Mar-2013 15:19:44 hudson.TcpAgentListener <init>
INFO: JNLP agent listener started on TCP port 41790
18-Mar-2013 15:19:44 hudson.WebAppMain$2 run
INFO: Jenkins is fully up and running

– that looks happy enough, and as you can see from the line “HTTP Listener started: port=8080” it’s running on the default port, so connect to http://yourhost:8080 and you should see something like this…

the next step is to install the Swarm Plugin (https://wiki.jenkins-ci.org/display/JENKINS/Swarm+Plugin) on this Jenkins Master instance so that Swarm Clients can connect to it.

Do this by going to “Manage Jenkins > Manage Plugins > Available” then selecting to install the “Swarm Plugin“.

Once that’s done you should see that the plugin has been installed…


Now that your new Jenkins server is set up and ready, hop over to your other Jenkins Agent/Client host and do the following…

mkdir for the swarm client

mkdir swarmclient; cd swarmclient/

Get the Swarm Client jar file from the ‘net

curl -O http://maven.jenkins-ci.org/content/repositories/releases/org/jenkins-ci/plugins/swarm-client/1.8/swarm-client-1.8-jar-with-dependencies.jar

Start up the Client

java -jar swarm-client-1.8-jar-with-dependencies.jar
Found 1 eligible Jenkins.
Connecting to http://mydomain.com:8080/
Attempting to connect to http://mydomain.com:8080/ a2721b16-04e4-0d962
18-Mar-2013 15:33:22 org.apache.commons.httpclient.HttpMethodDirector authenticateHost
WARNING: Required credentials not available for BASIC <any realm>@mydomain.com:8080
18-Mar-2013 15:33:22 org.apache.commons.httpclient.HttpMethodDirector authenticateHost
WARNING: Preemptive authentication requested but no default credentials available
18-Mar-2013 15:33:23 hudson.remoting.jnlp.Main$CuiListener <init>
INFO: Hudson agent is running in headless mode.
18-Mar-2013 15:33:23 hudson.remoting.jnlp.Main$CuiListener status
INFO: Locating server among [http://mydomain.com:8080/]
18-Mar-2013 15:33:23 hudson.remoting.jnlp.Main$CuiListener status
INFO: Connecting to myhost.mydomain.com:43932
18-Mar-2013 15:33:23 hudson.remoting.jnlp.Main$CuiListener status
INFO: Handshaking
18-Mar-2013 15:33:23 hudson.remoting.jnlp.Main$CuiListener status
INFO: Connected

Now take a look at your browser and you should see a new Node automatically added to the Master Jenkins instance…

A very handy and flexible approach to adding/managing Nodes and workload – many thanks to the developers behind this!

Cheers,

Don

Oracle admin tasks

Oracle admin tasks – here are some basic queries and script examples I have gathered and adapted from various sources – the Internet, colleagues etc.

GitHub repo: https://github.com/DonaldSimpson/oracle_scripts

My main interest in this is in doing both day to day maintenance tasks to support environments, and in scripting monitoring and preventative Jenkins jobs that report on various aspects of Oracle Database servers – these automated database monitors have proved very worthwhile, and often identify upcoming issues before they cause problems (e.g. expiring users, table spaces filling up, disabled constraints and triggers, etc etc).


Find and kill sessions:

Connect:
sqlplus / as sysdba

Set the line size so things look better:
set linesize 999

Then run a query to show active users:
SELECT s.osuser, s.status, s.process, s.machine, s.inst_id, s.sid, s.serial#, p.spid, s.username, s.program FROM gv$session s JOIN gv$process p ON p.addr = s.paddr AND p.inst_id = s.inst_id WHERE s.type != ‘BACKGROUND’;

If you want to kill one, use the SID and SERIAL from the above:

ALTER SYSTEM KILL SESSION ‘{SID},{SERIAL}’;

———————–

Tablespaces; finding, resizing and autoextending:

sqlplus / as sysdba
set linesize 999

List Oracle Database tablespace files:

SELECT FILE_NAME as FNAME, TABLESPACE_NAME as TSPACE,BYTES, AUTOEXTENSIBLE as AUTOEX, MAXBYTES as MAXB,INCREMENT_BY as INC FROM DBA_DATA_FILES;

From the above, get the file name for the Table Space that needs altered, and do something like this:

ALTER DATABASE DATAFILE ‘{/path to above TS file, eg /ora/path/undotbs_0001.dbf}’ AUTOEXTEND ON NEXT 64m MAXSIZE 2G;

———————–

Start and Stop things:

Listeners…

lsnrctl start listener_Name
lsnrctl stop listener_Name

databases…
sqlplus / as sysdba
startup
shutdown immediate

———————–

Find invalid objects:

Optionally filtered by owner(s) and without synonyms…

select owner || ‘.’ || object_name || ‘[‘ || object_type || ‘]’
from dba_objects
where status = ‘INVALID’
and object_type != ‘SYNONYM’
and owner in (‘SYSTEM’,’SYS’,’TOOLS’,’DEVUSER’);

———————–

Check Constraints and Triggers:

SELECT * FROM all_constraints WHERE status <> ‘ENABLED’;

or filter by users:

SELECT * FROM all_constraints WHERE owner = ‘ARBOR’ and status <> ‘ENABLED’;

Triggers are similar:

select * from all_triggers where status <> ‘ENABLED’;

———————–

Check for locked/locking users:

those already locked:

select * from dba_users where username in (‘SYSTEM’,’SYS’,’TOOLS’,’DEVUSER’) and lock_date is not null;

or those about to be locked (I add this to my Jenkins Database monitoring jobs so you get some warning…):

select * from dba_users where expiry_date < (trunc(SYSDATE) +7) and lock_date = null;

———————–

Check the Oracle Wallet:

Check to see if encrytion is present:

select * from dba_encrypted_columns;

if that brings something back, then you can check the state of the Oracle Wallet:

SELECT status from v$encryption_wallet where status not like ‘OPEN’;

———————–

Running SQL scripts from Shell scripts:

This can be done in various ways, but I tend to either use this approach to simply run a file and exit:

echo “About to run ${SCRIPT_NAME} on ${SERVER}…”
echo exit | sqlplus ${DB_USER}/${DB_PASSWORD}@${SERVER} @/path/to/sql/scripts/${SCRIPT_NAME}.sql
echo “Script ${SCRIPT_NAME} complete.” # now check the return code etc…

or sometimes a HEREDOC is more suitable, something like this example for checking database links work:

echo “Checking ${DBLINK} link for user ${DB_USER}…”
DBLINK_CHECK=$(sqlplus -s -l ${DB_USER}/${DB_PASS}@${ADM_DBASE}<<EOF
set echo off heading off feedback off
SELECT ‘Link works’ from dual@${DBLINK};
exit;
EOF)
if [ $? -ne 0 ]
then
echo “ERROR: Checking link ${DBLINK} as ${DB_USER} FAILED”
fi

———————–

If you find any of these useful or would like to suggest additions or changes please let me know.

Cheers,

Don

Getting the current user in Jenkins

Updated! Yet Again!

There are several ideas and comments below on ways to get the logged in user in Jenkins – the person/user that triggered the current build.

This has changed/broken/altered quite a few times since I wrote the initial post (about 8 years ago) as changes have been made to Jenkins – not least being the introduction of Pipelines and Groovy! For quite some time the best solution was, probably, to use a plugin for this (see “build user vars” below).

If you’re writing a Jenkins Pipeline and you’re happy adding in the Build User Vars plugin, then you can simply do this to access the BUILD_USER variable in your Jenkins groovy Pipeline job:

wrap([$class: 'BuildUser']) {
  echo "BUILD_USER that started this Pipeline: ${BUILD_USER}"
}

A few alternative and older ideas follow…

I recently wanted (again) to get the logged-in user that triggered the build in Jenkins and came across my own post when searching… doh. I didn’t really feel like adding a plugin just for this one – supposedly simple – task so had another look at ways to achieve this, and this latest approach seems to work well…

It’s not pretty or robust, and I’m doing it in two goes (to demonstrate getting the correct line then refining things with sed to just the name) which you could simplify, but this is hopefully enough to illustrate the general plan. You’d need to validate it for builds that are started by timer and things like that too.

Here is the plain text version:

# Just show the output:
set -
# change dir to where this builds files are kept:
cd /home/don/jenkins/home/jobs/GetJenkinsJobUserName/builds/${BUILD_NUMBER}
# To start, just get the whole string from the 'log' file:
export STARTED_BY="`grep -i Started log`"
# Output it to the console:
echo "STARTED BY USER = ${STARTED_BY}"
# refine this to just the user name:
export JUST_NAME="`echo "${STARTED_BY}" | sed "s@Started by user@@"`"
echo "Jenkins User Name is ${JUST_NAME}"

This produces the following output when run:

That seems to do the job!

All the original thoughts and comments are below….

Here is a bit of code for getting the details of the logged-in user in Jenkins or Hudson – useful for auditing which user started a given build. I often add this to an audit database, that over time builds up a log of who has done what, where and when, as well as indicating the current state – I then query that through a JSP page that generates a dynamic table that is included via an iFrame in the Description part of the corresponding job… but anyway, back on topic…

Update: the Build User Vars plugin can now provide this functionality. Just install that then check the “Set jenkins user build variables” checkbox under the “Build Environment” section in the configuration page for the job you want to use it, then you should be able to access the following variables in your job:

  • BUILD_USER — full name of user started build,
  • BUILD_USER_FIRST_NAME — first name of user started build,
  • BUILD_USER_LAST_NAME — last name of user started build,
  • BUILD_USER_ID — id of user started build.

As far as I know, there’s no built-in way to do this (apart from the plugin now mentioned above). e.g. through a Jenkins environment variable like $CURRENT_USER or $USER_ID, but using wget, the Jenkins XML API and a little bit of XPath, you can easily query for many things at runtime like so:

THIS_USER=”$(wget -nv –no-proxy “$BUILD_URL/api/xml”‘?xpath=//userId/text()’ -O -)”

That line fetches the logged-on user id by requesting (via wget) the XML for the current BUILD_URL, filtering for the userId text and assigning that value to the variable $THIS_USER, so that it can be used elsewhere in the job.

You can change this around to get the username if you prefer:

THIS_USER=”$(wget -nv –no-proxy “$BUILD_URL/api/xml”‘?xpath=//userName/text()’ -O -)”

Or, try adding “/api/xml” to the end of a Jenkins URL, and you can see the numerous other elements you could request via the Jenkins XML API and XPath.

I have often used this approach to query and report on the status of multiple downstream jobs, for example. Sometimes it’s easier to wget the XML then parse it locally at runtime (with sed/awk/whatever you like) for the data you are interested in – the number of passed, failed or unstable builds can be counted by searching for the number of corresponding “blue”, “red” or “yellow” elements, for example.

UPDATE: It looks like the current version of Jenkins has disabled or broken this feature/ability, but there are always alternative solutions…

For example, if you have curl and xml_grep to hand, you could do it like this…

THIS_USER=`curl –silent $BUILD_URL | xml_grep –text_only userName`

most systems will have curl or alternatively wget, and if you don’t have xml_grep some plain old grep or awk will do the job.

Cheers,

Don

Solaris 10 on ESXi5, with SunRay Server and Clients

About 10 years ago, I bought a SunRay 1g Client box with the plan of setting it up as a thin client to the (physical and very noisy) Sun Solaris Server I was running at the time. The old Sun server sadly didn’t last much longer, and I replaced it with a FreeBSD one before I managed to get the SunRay up and running… so it sat in a cupboard until recently.

The new plan is to use the SunRay 1g as a thin client to a Solaris VM running on my ESXi5 server. This seems like a good idea as it gives me a way to access and manage the ESX server without having to fire up another machine – plus, I think SunRay clients are awesome bits of kit – if I didn’t have an iMac I would use these, as they are silent, boot instantly, use hardly any power and make no noise… it seems like the ideal compliment to an ESX server.

Here’s a pic of my SunRay client…

So, here are some notes, links and pics on installing an Oracle Solaris 10 Virtual Machine on ESXi5, setting up the SunRay Server Software, and getting the SunRay client (finally) working…

From the Oracle site, Sun Ray Clients are:

“… simple, low-cost devices that are ideal for displaying server-hosted virtual desktops. With no moving parts and no local operating system to manage, Sun Ray Clients provide a cost-effective, highly functional thin client alternative to desktop and laptop computers and reduce many of the problems associated with traditional desktop deployments.”

http://www.oracle.com/us/technologies/virtualization/061984.html

They need a Server running the SunRay Server Software to connect to – I think you can use Linux these days but I wanted to set up a Solaris host anyway, so I went with the traditional approach – albeit running on VM Ware.

None of this was very difficult, and the only slight issue I had was getting DHCP set up correctly; as I understand it, Sun Ray clients need to be sent additional information when they get an IP address, and that means it’s easier to set up the SunRay Server as your DHCP server – once I’d done that (and configured my Router to act as a DHCP Relay, handing DHCP requests over to the Solaris host), it all worked well.

Install Solaris 10 on VMWare ESXi5:

I downloaded the DVD image from Oracle, and then uploaded it to the data store on the ESX Server, created a new VM and set it to mount the image as a DVD drive at boot time. The spec of my Solaris 10 VM is 8GB RAM, 2x vCPU and 500G disk for now – I will change this later when I see how it performs.

Install VM Ware tools:
mkdir / vmwaretools/

cp /cdrom/vmwaretools/vmware-solaris-tools.tar.gz .

# tar zxvf vmware-solaris-tools.tar.gz – that didn’t work – no GNU tar :-(

gunzip vmware-solaris-tools.tar.gz

tar xvf vmware-solaris-tools.tar

cd vmware-tools-distrib/

./vmware-install.pl

All done, much better 🙂

Setup  DHCP & NIS on Solaris 10

This command starts up the (GUI) DHCP Manager wizardy thing, which will prompt you for all required info to set up DHCP:
/usr/sadm/admin/bin/dhcpmgr &

As as I understand it, your SunRay clients will look for a DHCP server to (also) give them the details of the SunRay Server to connect to. I coudln’t see a way to use my existing DHCP server (my broadband router) and still be able to tell the clients how to connect to the Solaris Server – that would have been preferable for me.

cp /etc/nsswitch.dns /etc/nsswitch.conf

add the google DNS Server and the internal IP of my router to /etc/resolv.conf….

echo "nameserver 8.8.8.8" >> /etc/resolv.conf
echo "nameserver 192.168.0.1" >> /etc/resolv.conf

Install SunRay Server Software (SRSS)

This was all pretty simple, my notes are brief but there’s a decent guide here:

http://docs.oracle.com/cd/E22662_01/E22659/html/Installing-Howto-Install.html

I downloaded the installer and extracted it to a tar file on another host beforehand, which was handy as I hadn’t sorted out GNU tar yet…

mkdir /sunrayinstall

cd /sunrayinstall

scp don@myubuntuserver:/tmp/V32065-01.zip .

unzip V32065-01.zip

cd srs_5.3.0.0-SunOS.i386/

./utinstall

export SRSS_INST=/opt/SUNWut

# Enable LAN Access:

$SRSS_INST/sbin/utadm -L on

$SRSS_INST/sbin/utrestart

Things to look at later:

connector for vmware: http://docs.oracle.com/cd/E21907_01/PDF/EN/SRVMWC1dot2InstallGuide.pdf

Here are some of the other commands and checks I looked at while getting it running…

/opt/SUNWut/sbin/utdesktop

/opt/SUNWut/sbin/utgstatus

/opt/SUNWut/sbin/utquery -d 192.168.0.58

/opt/SUNWut/sbin/utsetup

/opt/SUNWut/sbin/utconfig

tail -1000f /var/opt/SUNWut/log/messages
Install Apache Tomcat for SunRay Server Software

I’m not sure if this is necessary?

cd /opt/apache-tomcat

cd bin

export JRE_HOME=/usr

./catalina.sh start
Setup NTP on Solaris 10
ls -al /etc/inet/ntp.*

touch /var/ntp/ntp.drift

cp /etc/inet/ntp.client /etc/inet/ntp.conf

svcadm enable svc:/network/ntp

date

Here’s a picture of the new Admin Tool – I only have 2 SunRay clients to manage (and even fewer users!), but I may still have to search eBay for some Smart Cards…

Update: I now have an unopened pack of smart cards (50 I think?) – a gift from a Solaris admin chum!

http://docs.oracle.com/cd/E19214-01/820-0412/new_admin_tool.html

Once that was all done and my Router was configured to relay DHCP requests to the DHCP Server running on the Solaris 10 VM, I was able to switch on my SunRay 1g client and be presented with a logon screen – yay!

And finally, here’s a pic of the SunRay client sitting on top of the HP ProLiant ML110 G6 ESXi5 home lab server, which is running the Solaris 10 Virtual Machine it’s connecting to…

Pin It on Pinterest