Previously
In the last Kubernetes post…
I wrote about getting Helm and Tiler working on the Kubernetes Cluster I set up here…
There was an obvious flaw in the example MySQL Chart I deployed via Helm and Tiller, in that the required Persistent Volume Claims could not be satisfied so the pod was stuck in a “Pending” state for ever.
Adding Persistent Storage
In this post I will sort that out, by adding Persistent Storage to the Cluster and redeploying and testing the same Chart deployed via “helm deploy stable/mysql“. This time, it should be able to claim all of the resources it needs with no tweaking or hints supplied…
First a few notes on some of the commands and tools I used for troubleshooting what was wrong with the mysql deploy.
watch -d 'sudo kubectl get pods --all-namespaces -o wide'

watch -d kubectl describe pod wise-mule-mysql

kubectl attach wise-mule-mysql-d69788f48-zq5gz -i
The above commands showed a pod that generally wasn’t happy or connectable, but little detail.
Running “kubectl get events -w” is much more informative:
LAST SEEN   TYPE      REASON              KIND                    MESSAGE
17m         Warning   FailedScheduling    Pod                     pod has unbound immediate PersistentVolumeClaims
17m         Normal    SuccessfulCreate    ReplicaSet              Created pod: quaffing-turkey-mysql-65969c88fd-znwl9
2m38s        Normal    FailedBinding       PersistentVolumeClaim   no persistent  volumes available for this claim and no storage class is set
17m         Normal    ScalingReplicaSet   Deployment              Scaled up replica set quaffing-turkey-mysql-65969c88fd to 1
and doing “kubectl describe pod <pod name>” is also very useful:
<snip a whole load of events and details>
  Type     Reason            Age                    From               Message
  ----     ------            ----                   ----               -------
  Warning  FailedScheduling  5m26s (x2 over 5m26s)  default-scheduler  pod has unbound immediate PersistentVolumeClaims
Making it pretty clear what’s going on and exactly what is noticeably absent from the Cluster.
My initial plan had been to use GlusterFS and Heketi, but having dabbled with this before and knowing it wasn’t really something I wanted to do for this use case, it was a bit of Yak Shaving I’d really like to avoid if possible.
So, I had a look around and found “Rook“. This sounded much simpler and more suited to my needs. It’s also open source, Apache licensed, and works on multi-node clusters. I’d previously considered using hostPath storage but it’s a bit too basic even for here, and would restrict me to a single node cluster due to the (lack of) replication, missing a lot of the point of a Cluster, so I thought I’d give Rook a shot.
Here’s the guide on deploying Rook that I used:
https://github.com/hobby-kube/guide#deploying-rook
Which says to
Apply the storage manifests in the following order:
storage/operator.yml (wait for the
rook-agentpods to be deployedkubectl -n rook get podsbefore continuing)
I tried to follow this but had some issues, which I will try and clarify when I run through this again – I’d made a bit of a mess trying a bit of Gluster and some hostPath and messing about with the default storage class etc, so it was quite possibly “just me”, and not Rook to blame here 🙂 This is some of my shell history:
kubectl apply -f https://raw.githubusercontent.com/rook/rook/release-0.5/cluster/examples/kubernetes/rook-operator.yaml
kubectl apply -f https://raw.githubusercontent.com/rook/rook/release-0.5/cluster/examples/kubernetes/rook-cluster.yaml
kubectl apply -f https://raw.githubusercontent.com/rook/rook/release-0.5/cluster/examples/kubernetes/rook-storageclass.yaml
kubectl -n rook get pods
kubectl apply -f https://github.com/hobby-kube/manifests/blob/master/storage/00-namespace.yml
kubectl apply -f https://github.com/hobby-kube/manifests/blob/master/storage/00-namespace.yml
kubectl apply -f https://github.com/hobby-kube/manifests/blob/master/storage/00-namespace.yml
kubectl apply -f https://raw.githubusercontent.com/rook/rook/release-0.5/cluster/examples/kubernetes/rook-operator.yaml
kubectl apply -f https://raw.githubusercontent.com/rook/rook/release-0.5/cluster/examples/kubernetes/rook-cluster.yaml
watch -d 'sudo kubectl get pods --all-namespaces -o wide'
kubectl apply -f https://raw.githubusercontent.com/rook/rook/release-0.5/cluster/examples/kubernetes/rook-storageclass.yaml
I definitely ran through this more than once, and I think it also took a while for things to start up and work – the subsequent runs went much better than the initial ones anyway. I also applied a few patches to the rook user and storage class (below) – these and many other alternatives were recommended by others facing similar sounding issues, but I think for me the fundamental is solved further below, re the rbd binary missing from $PATH, and installing ceph:
kubectl get secret rook-rook-user -oyaml | sed "/resourceVer/d;/uid/d;/self/d;/creat/d;/namespace/d" | kubectl -n kube-system apply -f -
kubectl get secret rook-rook-user -oyaml | sed "/resourceVer/d;/uid/d;/self/d;/creat/d;/namespace/d" | kubectl -n default -f -
kubectl get secret rook-rook-user -oyaml | sed "/resourceVer/d;/uid/d;/self/d;/creat/d;/namespace/d" | kubectl -n default apply -f -
kubectl patch storageclass rook-block -p '{"metadata":{"annotations": {"storageclass.kubernetes.io/is-default-class": "true"}}}
That all done, I still had issues with my pods, specifically this error:
MountVolume.WaitForAttach failed for volume “pvc-4895a379-104b-11e9-9d98-000c29702bc8” : fail to check rbd image status with: (executable file not found in $PATH), rbd output: ()
which took me a little while to figure out. I think reading this page on RBD gave me the hint that there was something (well yeah, the rbd binary specifically) missing on the hosts, but there’s a lot of talk of folk solving this by creating custom images with the rbd binary added to the $PATH in them, replacing core k8s containers with them, which didn’t sound too appealing to me. I had assumed that the images would include the binaries, but hadn’t checked this is any way.
This issue may well be part or possibly all of the reason why I ran the above commands repeatedly and applied all of those patches.
The simple yet not too obvious solution to this – in my case anyway – was to ensure that the ceph common package was available both on the master:
apt-get update && apt-get install ceph-common -y
and critically that it was also available on each of the worker nodes too.
Once that was done, I think I deleted and reapplied everything rook-related again, then things started working as they should, finally.
A quick check:
ansible@umaster:~$ kubectl get sc
 NAME                   PROVISIONER     AGE
 rook-block (default)   rook.io/block   22h
And things are looking much better now.
Checking the Dashboard I can see a Rook namespace with a number of Rook pods all looking green, and Persistent Volume Claims in the default namespace too:

Test with an example – “helm install stable/mysql”, take 2…
To verify this I re ran the same Helm Chart for mysql, with no changes or overrides, to ensure that rook provisioning was working, that it was properly detected and used as the default storage class in the Cluster with no args/hints needed.
The output from running “helm install stable/mysql” includes this info:
MySQL can be accessed via port 3306 on the following DNS name from within your cluster:
donmysql.default.svc.cluster.localTo get your root password run:
MYSQL_ROOT_PASSWORD=$(kubectl get secret –namespace default donmysql -o jsonpath=”{.data.mysql-root-password}” | base64 –decode; echo)
To connect to your database:
1. Run an Ubuntu pod that you can use as a client:
kubectl run -i –tty ubuntu –image=ubuntu:16.04 –restart=Never — bash -il
2. Install the mysql client:
$ apt-get update && apt-get install mysql-client -y
3. Connect using the mysql cli, then provide your password:
$ mysql -h donmysql -p
So I tried the above, opting to create an ubuntu client pod, installing mysql utils to that then connecting to the above MySQL instance with the root password like so:
ansible@umaster:~$  MYSQL_ROOT_PASSWORD=$(kubectl get secret --namespace default donmysql  -o jsonpath="{.data.mysql-root-password}" | base64 --decode; echo)
ansible@umaster:~$ echo $MYSQL_ROOT_PASSWORD
<THE ROOT PASSWORD WAS HERE>
ansible@umaster:~$ kubectl run -i --tty ubuntu --image=ubuntu:16.04 --restart=Never -- bash -il
If you don't see a command prompt, try pressing enter.
root@ubuntu:/#
root@ubuntu:/# apt-get update && apt-get install mysql-client -y
Get:1 http://archive.ubuntu.com/ubuntu xenial InRelease [247 kB]
Get:2 http://security.ubuntu.com/ubuntu xenial-security InRelease [107 kB]
<snip a load of boring apt stuff>
Setting up mysql-common (5.7.24-0ubuntu0.16.04.1) ...
update-alternatives: using /etc/mysql/my.cnf.fallback to provide /etc/mysql/my.cnf (my.cnf) in auto mode
Setting up mysql-client-5.7 (5.7.24-0ubuntu0.16.04.1) ...
Setting up mysql-client (5.7.24-0ubuntu0.16.04.1) ...
Processing triggers for libc-bin (2.23-0ubuntu10) ...
root@ubuntu:/# mysql -h donmysql -p
Enter password:
Welcome to the MySQL monitor.  Commands end with ; or \g.
Your MySQL connection id is 67
Server version: 5.7.14 MySQL Community Server (GPL)
<snip some more boring stuff>
mysql> show databases;
+--------------------+
| Database           |
+--------------------+
| information_schema |
| mysql              |
| performance_schema |
| sys                |
+--------------------+
4 rows in set (0.00 sec)
mysql> exit
Bye
root@ubuntu:/
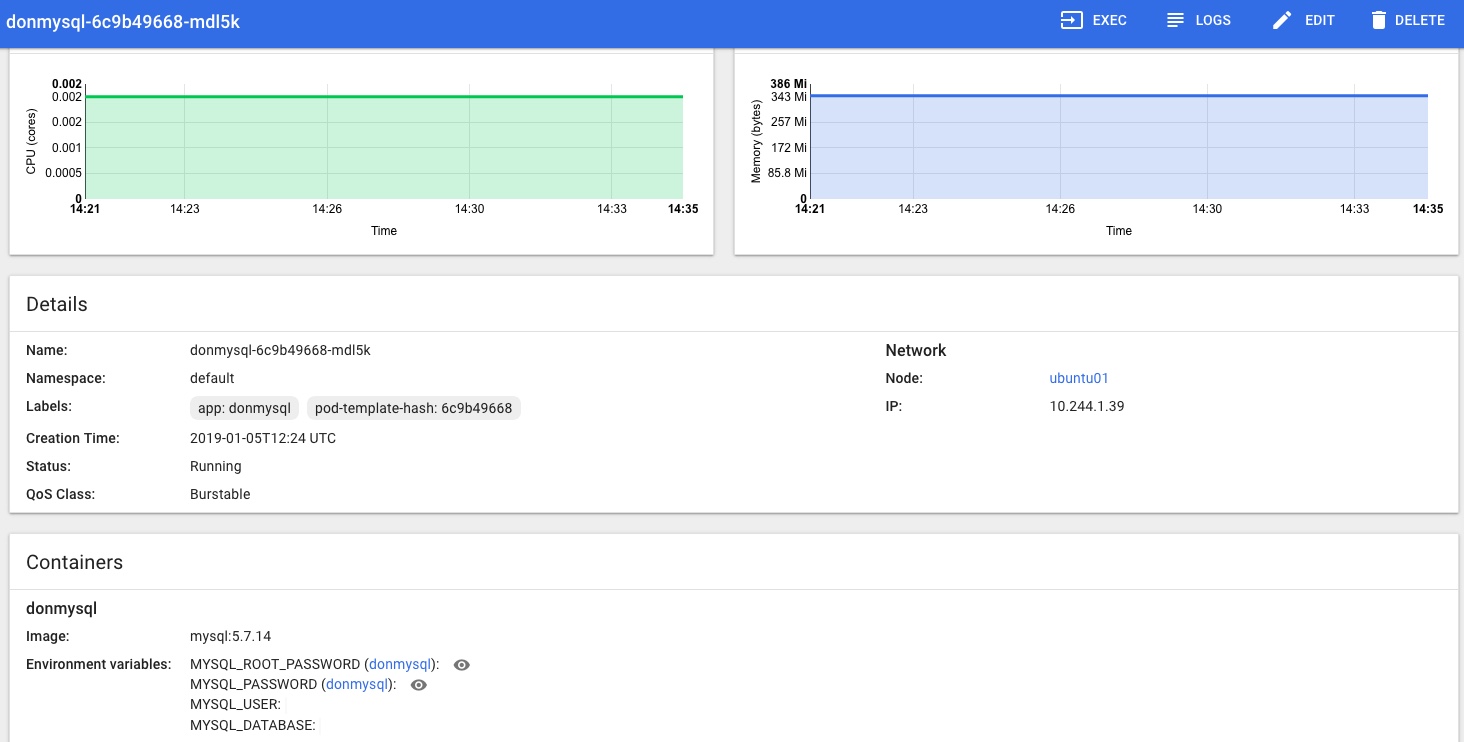
In the Kubernetes Dashboard (loads more on that little adventure coming soon!) I can also see that the MySQL Pod is Running and looks happy, no more Pending or Init issues for me now:
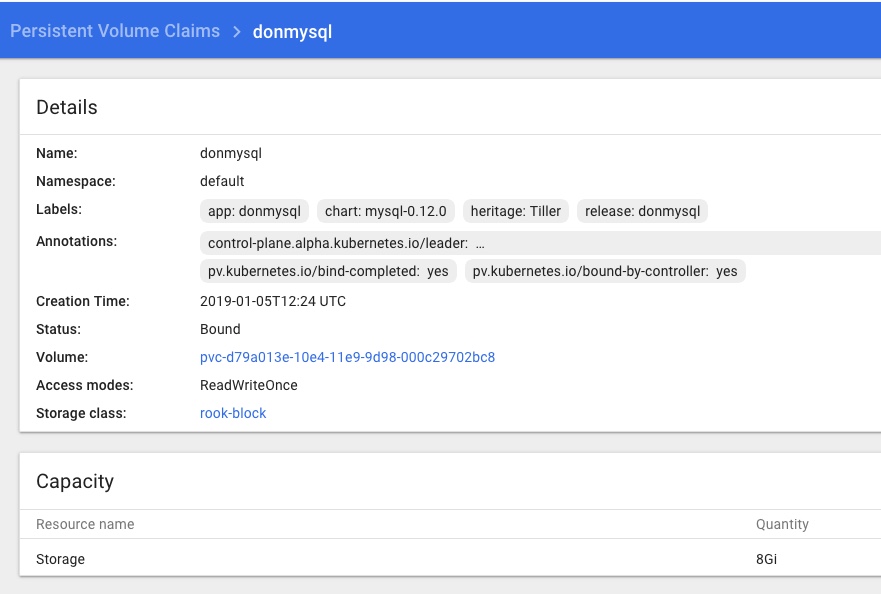
and that the Rook Persistent Volume Claims are present and looking healthy too:
Conclusion & next steps
That’s storage sorted, kind of – I’m not totally happy everything I did was needed, correct and repeatable yet, or that I know enough about this.
Rook.io looks very good and I’m happy it’s the best solution for my current needs, but I can see that I should have spent more time reading the documentation and thinking about prerequisites, yadda yadda. To be honest when it comes to storage I’m a bit of a Luddite – i just want it to be there and work as I’d expect it to, and I was keen to move on to the next steps….
I plan to scrub the k8s cluster shortly and run through this again from scratch to make sure I’ve got it clear enough to add to my provisioning pipeline process.
Next, a probably not-too-brief post on how I got Heapster stats working with an InfluxDB backend monitoring stats for both the Master and Nodes, installing a usable Kubernetes Dashboard, and getting that working with suitable access/permissions, aaaaand getting the k8s Dashbaord showing the CPU and Memory stats from Heapster as seen in the Dashboard pic of the pod statuses above…. phew!
Discover more from Don's Blog
Subscribe to get the latest posts sent to your email.


